Are you tired of seeing your food scraps go to waste and want a more eco-friendly solution? Why not try building your own composting system right in your backyard? It’s easier than you think, and we’re here to guide you through the process.
Not only will this DIY project help reduce household waste, but it’ll also give your garden some much-needed nutrients for healthier plants. Don’t worry if you think it might be too complicated or dangerous – we’ve got safety covered!
With our step-by-step instructions, anyone can create their very own composting system with minimal risk. So let’s dive into turning those leftovers into black gold for your garden while keeping everything safe and sound.
The Benefits Of Composting
Have you ever wondered if composting is really as beneficial as people say it is? Well, let’s dive into the facts and figure out what makes this process so valuable for your garden.
Composting involves collecting organic waste materials like food scraps and leaves, allowing them to decompose over time in a controlled environment, which results in nutrient-rich soil that can be used to nourish plants.
One major benefit of composting is that it helps reduce landfill waste by recycling organic matter back into the earth. Many households produce large amounts of kitchen waste, such as fruit and vegetable peelings, coffee grounds, and eggshells, all of which are perfect candidates for composting instead of sending them to landfills. This not only reduces our environmental impact but also saves money on trash disposal fees!
Additionally, using homemade compost in place of store-bought fertilizers eliminates the need for harmful chemicals in your garden. Aside from being an eco-friendly option, compost provides essential nutrients that promote healthy plant growth.
The rich mixture obtained from breaking down these organic materials releases vital elements like nitrogen, phosphorus, potassium, and micronutrients – all necessary for strong root development and vibrant blooms. Using compost also improves soil structure by increasing its ability to retain water while preventing erosion.
So next time you’re considering ways to enhance your garden’s health and beauty while keeping the planet safe, remember: a DIY composting system offers numerous benefits worth exploring!
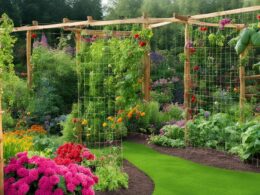
Choosing The Right Location
Now that you’ve decided to build a DIY composting system for your garden, it’s important to choose the right location. This is crucial because placing your compost bin in an appropriate spot will not only make it more efficient but also ensure safety and convenience. So before you start gathering materials or building your compost pile, take some time to scout out the perfect place in your yard.
One of the main factors to consider when selecting a location is sunlight exposure. Your compost pile needs heat from the sun to break down organic matter quickly; however, too much direct sunlight can cause moisture loss and slow down decomposition. Therefore, look for a spot with partial shade where your compost bin will receive just enough sunlight during the day without getting constantly baked by full sun rays.
It’s also essential to find a flat area with good drainage so excess water doesn’t pool around your bin, which could lead to unpleasant odors and attract pests.
Additionally, think about accessibility when choosing a location for your compost bin. You’ll need easy access to add kitchen scraps and other organic waste regularly while ensuring it won’t be disturbed by pets or children playing nearby. Moreover, try picking a spot near where you plan on using the finished compost – such as close to your vegetable garden or flower bed – making transport convenient once it’s ready for use.
By considering these factors and taking extra care in selecting the ideal location for your DIY composting system, you’ll create a safe environment that efficiently turns waste into valuable nutrients for your plants!
Selecting The Appropriate Composting Method
Have you ever wondered which composting method is the best fit for your garden? With so many options out there, it can be overwhelming to choose the right one. But don’t worry! We’re here to help you select the appropriate composting system that will not only benefit your garden but also keep everyone safe and sound.
One popular choice among gardeners is a simple pile or heap composter. This method involves layering organic materials such as leaves, grass clippings, and kitchen scraps in an open space on the ground. The key to success with this type of composting is turning the pile regularly to ensure proper air circulation and even decomposition.
While this may seem like a low-cost and easy option, it might attract pests if not managed properly. To avoid unwanted critters, make sure to bury food scraps deep within the pile and cover them with other materials like leaves or straw.
Another great alternative is using tumbling compost bins. These containers are designed with a rotating mechanism that allows for efficient mixing of materials without much effort from you. Not only do these units speed up the decomposition process by providing better aeration, but they also deter rodents and insects due to their enclosed design – giving you peace of mind about safety concerns.
So go ahead and explore different composting methods; just remember that selecting the right one depends on factors like available space, time commitment, and personal preference while keeping everyone’s well-being in mind!
Gathering Essential Materials
Now that you’ve chosen the ideal composting method for your needs, it’s time to gather all the necessary materials and start building! This exciting stage will bring you one step closer to enriching your garden with nutrient-dense compost. Don’t worry; this process is not only straightforward but also safe and enjoyable.
Here are four essential items you’ll need for your DIY composting system:
- Composting Bin or Pile: Depending on your chosen method, either purchase a ready-made bin (such as a tumbler) or create a simple enclosure using wooden pallets, chicken wire, or plastic fencing.
- Carbon-rich ‘brown’ materials: These include dry leaves, straw, wood chips, sawdust, shredded paper or cardboard. They provide structure and help balance nitrogen levels in the compost pile.
- Nitrogen-rich ‘green’ materials: Kitchen scraps like fruit peels and vegetable trimmings along with grass clippings and coffee grounds are great sources of nitrogen for breaking down organic matter.
- Aeration Tool: A pitchfork or similar tool will be useful for turning and mixing the compost regularly to promote proper breakdown and avoid unpleasant odors.
Next up is assembling everything into an effective composting system. Start by placing the compost bin or pile in a well-draining area with convenient access from both your kitchen (for adding fresh waste) and garden (for collecting finished compost).
Layer brown and green materials alternately inside the container – ideally maintaining two-thirds browns to one-third greens ratio to achieve optimal decomposition rates while keeping foul smells at bay. Remember to turn your pile periodically using your trusty pitchfork!
Though patience is key when waiting for nature to do its work transforming raw materials into rich humus-like substance, there’s nothing more satisfying than reaping the benefits that come from creating homemade nutrient-packed soil amendment perfect for nourishing plants safely. Your vibrant, healthy garden will be the ultimate testament to your dedication and love for sustainable living.
So go ahead, get started on this rewarding journey of DIY composting!
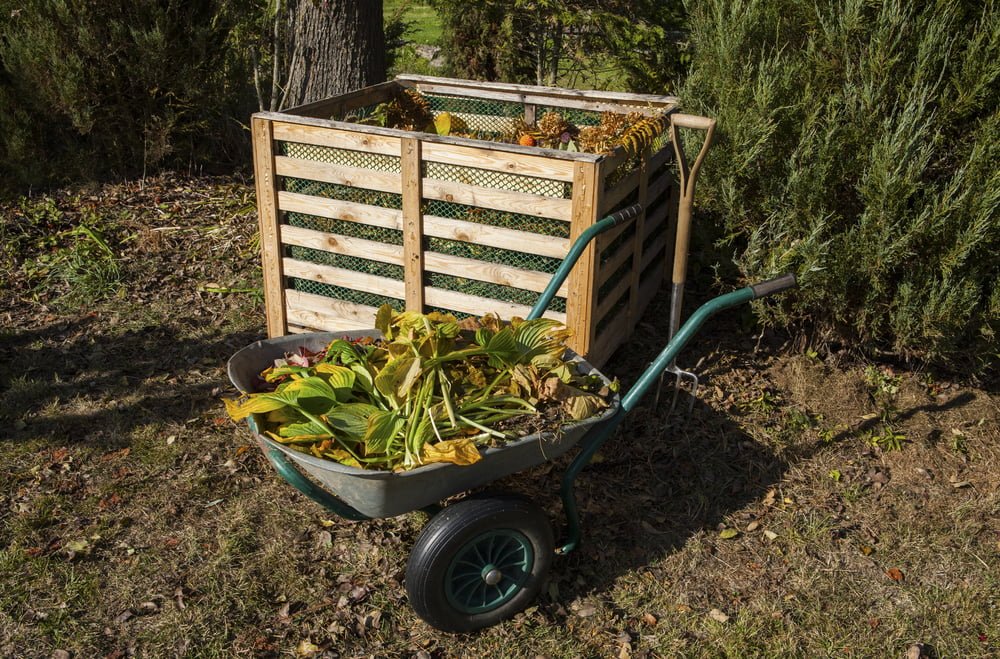
Constructing The Compost Bin
Creating a cozy compost bin can be an enjoyable and easy endeavor for garden lovers. Begin by selecting the perfect spot in your yard, preferably a flat area with good drainage and partial shade to shield it from extreme temperatures.
Next, decide on the size of your compost bin – usually a three-foot cube is sufficient for most households.
For fabulous functionality and safety, consider using repurposed materials such as wooden pallets or cinder blocks to create the walls of your compost bin. These sturdy structures will not only provide support but also ensure that critters are kept at bay while allowing proper air circulation essential for decomposition. Assemble the chosen materials into a square or rectangular shape, leaving gaps between them for airflow. If using wooden pallets, secure them together with strong wire or durable plastic ties.
Once you’ve built your brilliant backyard buddy, it’s time to fill it up! Start off by laying down a layer of coarse brown material like twigs or small branches at the bottom to promote ventilation. Then alternate layers of green (kitchen scraps, grass clippings) and brown (dry leaves, cardboard) materials until your bin is full.
Remember to turn the pile periodically with a pitchfork or shovel, ensuring even decomposition and preventing any unpleasant odors from arising.
Watch as nature works its magic turning waste into nutrient-rich goodness for your garden!
Understanding The Composting Process
Now that you’ve built your compost bin, it’s time to dive into the fascinating world of decomposition! The science behind composting may seem complex at first, but once you understand the basics, you’ll be well on your way to creating nutrient-rich compost for your garden.
Let’s break down this process and learn how a simple mix of ingredients can turn into ‘black gold’ for your plants. In its most basic form, composting is nature’s recycling system. It involves breaking down organic matter (like kitchen scraps and yard waste) into simpler compounds through the action of microorganisms like bacteria and fungi.
These tiny critters need oxygen, moisture, and food sources in order to thrive and do their job effectively. To create an ideal environment for them, start by layering green materials (rich in nitrogen – such as grass clippings or fruit peels) with brown materials (rich in carbon – like dried leaves or cardboard). Aim for a 2:1 ratio of browns to greens to maintain balance within your pile.
Maintaining proper conditions within your compost pile will ensure a speedy decomposition process while keeping any unpleasant odors at bay. Make sure there is ample airflow throughout the pile by turning it regularly with a pitchfork or other tool; this allows oxygen to reach all parts of the heap and keeps those hungry microbes happy!
Additionally, monitor the moisture level of your compost – it should feel like a damp sponge without being soaking wet. If needed, add water during dry spells or throw in extra brown materials if things get too soggy. Remember that safety comes first when handling decomposing material- always wear gloves and wash hands thoroughly after working with your compost pile.
With these tips in mind, soon enough you’ll have rich, dark compost ready to nourish your thriving garden!
Balancing Green And Brown Materials
One of the most important aspects of creating a successful composting system is balancing green and brown materials. Green materials are rich in nitrogen and include items like fruit and vegetable scraps, coffee grounds, and fresh grass clippings. On the other hand, brown materials are high in carbon and consist of things like dried leaves, straw, and small twigs.
The right balance of these materials will ensure that your compost pile breaks down quickly while also providing essential nutrients to your garden. A good rule of thumb when it comes to mixing green and brown materials is to aim for a ratio of about 3:1 – three parts brown material for every one part green material. This helps keep the decomposition process running smoothly by ensuring there’s enough carbon to provide energy for the microorganisms breaking down the organic matter. It also prevents unpleasant odors from forming as too many green materials can cause a buildup of ammonia gas.
Achieving this perfect balance may take some trial and error at first but don’t worry if you find yourself off track initially; adjusting your compost ratios over time is perfectly normal! Keep an eye on how quickly your pile is decomposing as well as any smells it might be producing – this will give you helpful clues as to whether you need more green or brown ingredients in the mix. By paying attention to these signs and maintaining a proper balance between greens and browns, you’ll soon have nutrient-rich compost ready to nourish your garden safely all season long!
Maintaining Proper Moisture And Aeration
Now that you’ve mastered the art of balancing green and brown materials in your compost, it’s time to focus on two other essential elements: moisture and aeration. Maintaining proper moisture levels and ensuring adequate airflow are both crucial components for a thriving, odor-free composting system. Don’t worry; achieving these might sound complicated, but with some simple techniques, you’ll have an efficient set-up in no time.
To maintain ideal moisture levels in your compost pile:
- Keep track of rainfall: During heavy rain seasons, cover your compost pile with a tarp or plastic sheet to prevent excess water from saturating your mixture.
- Water when needed: In dry spells or hot weather, give your compost pile occasional light watering to keep the microorganisms happy.
- Assess by touch: A well-moistened compost should feel like a damp sponge. Squeeze it between your fingers – if water runs out easily, it’s too wet; if it feels dry and crumbly, add more water.
- Turn regularly: Turning the pile not only helps with aeration but also distributes moisture evenly throughout the heap.
Airflow is just as important as moisture for breaking down organic matter effectively and keeping unwanted odors at bay. To ensure there’s enough oxygen circulating through your DIY composting system:
- Create air pockets within the material by adding coarse items such as wood chips or straw intermittently while building up layers of finer materials.
- Make sure to turn the contents of your bin periodically (every 1-2 weeks). This will help introduce fresh air into the center of the pile where decomposition occurs most rapidly.
- Use a specialized aerator tool or simply poke holes into the mass using a garden fork – this promotes ventilation without having to completely shift its location.
With consistent attention to maintaining appropriate moisture levels and providing sufficient airflow, you’re on track for creating rich, earthy compost that will foster a flourishing garden. By following these simple strategies, you can be confident that your DIY composting system is not only safe and efficient but also contributes to a healthier environment for both plants and people.
Monitoring Temperature And Odor
Imagine yourself as a secret agent, checking in on your compost pile like it’s some top-secret mission. You’re equipped with two essential tools: a thermometer and your sense of smell. That’s right, you’re no ordinary gardener; you have the power to monitor the temperature and odor of your DIY composting system!
As our undercover operative, keeping tabs on the temperature is crucial in ensuring an efficient breakdown of materials. The ideal range for most microorganisms doing their magic lies between 90°F-140°F (32°C-60°C). It’s important not to let it go below or above this threshold!
To keep things running smoothly, make sure to turn the pile regularly – that’ll help maintain optimal temperatures while also providing valuable oxygen for those hard-working microbes.
Now, onto your second weapon: your nose! Odor is another critical factor when maintaining a healthy compost environment. A well-functioning compost should emit an earthy smell, similar to damp forest soil (your ‘license to till,’ if you will).
However, if something smells rotten – quite literally – there could be issues at play such as improper ventilation or excessive moisture levels. Don’t worry, though! This can usually be remedied by turning the pile more frequently and making adjustments to its composition by adding dry leaves or straw to help balance out any excess moisture.
Remember, Agent Compost Whisperer (yes, we just gave you that title), paying attention to both temperature and odor is key in creating nutrient-rich gold for your garden beds!
Turning And Mixing The Compost
Now that you’ve been keeping an eye on the temperature and odor of your compost, it’s time for the next crucial step: turning and mixing! This process helps ensure that your compost breaks down evenly and efficiently. Plus, it can also prevent unpleasant smells from developing.
Turning and mixing the compost is a simple task that requires just a little bit of effort. All you need to do is use a pitchfork or shovel to mix up the contents of your compost pile. Try to move materials from the outer edges towards the center, while bringing the inner layers outwards. This will help redistribute moisture levels throughout and introduce fresh oxygen into the system – both key factors in successful decomposition. Make sure to wear gloves when handling any potentially sharp tools or materials.
For best results, be consistent with turning your compost regularly – perhaps once every week or two depending on weather conditions and size of your pile.
By staying committed to this routine, you’ll not only create healthier soil but also reduce any risks associated with pests or rotting odors. It won’t be long before you have rich, nutrient-dense material ready to enrich your garden and keep it thriving!
Recognizing When Compost Is Ready
They say patience is a virtue, and this certainly holds true when it comes to composting. Recognizing when your compost is ready for use in your garden can be both exciting and rewarding. It’s essential to ensure that the compost has reached its final stage of decomposition before incorporating it into your soil; otherwise, you might introduce harmful pathogens or pests.
To determine if your DIY compost system has produced finished compost, look for these key indicators:
- The material should be dark brown and crumbly, resembling fertile soil.
- There should be no recognizable food scraps or other materials in the mix.
- A pleasant earthy smell should emanate from the compost pile.
- The temperature of the pile will have cooled down significantly compared to earlier stages of decomposition.
It’s natural to feel eager about using your homemade compost in your garden – after all, it’ll provide valuable nutrients and improve the overall health of your plants. However, ensuring that your compost is fully matured before spreading it on your garden beds not only guarantees optimal results but also keeps you and your plants safe from any potential harm caused by unfinished decomposing matter.
Remember, good things come to those who wait!
So now you know how to recognize when compost is ready! Once you’ve confirmed that the texture, appearance, odor, and temperature are all meeting expectations, go ahead and reward yourself (and your garden) with an application of nutrient-rich organic matter.
Your plants will thank you for providing them with such a nourishing environment while keeping their surroundings safe and healthy as well. And remember – happy gardening starts with excellent preparation!
Utilizing Finished Compost In Your Garden
Once you have created your own compost using the DIY composting system, it’s time to put this nutrient-rich material to work in your garden. Incorporating finished compost into your soil can provide numerous benefits for the plants and overall health of your garden. Not only does it offer essential nutrients that help plants grow strong and healthy, but it also improves soil structure by increasing its ability to hold water and air.
To make the most of your homemade compost, here are some suggestions on how and when to use it:
| Application | Timing | Benefits |
|---|---|---|
| Mulching | Spring | Helps retain moisture, suppresses weeds, prevents erosion |
| Topdressing | Fall | Adds nutrients slowly throughout winter months |
| Soil amendment | Before planting new seeds or seedlings | Improves soil structure, increases nutrient availability |
| Potting mix | Anytime (when repotting/transplanting) | Provides balanced nutrition for container-grown plants |
As a gardener looking out for their garden’s safety and well-being, knowing how to properly utilize compost is crucial. Be sure not to apply too much at once; start with a light layer about an inch thick and gradually add more as needed over time. Remember that moderation is key: too much compost can lead to excessive growth which may attract pests or diseases. With these guidelines in mind, incorporating finished compost into your gardening routine will contribute greatly towards building a thriving ecosystem that is both safe and sustainable for years to come.
Frequently Asked Questions
Can I Compost In An Apartment Or Small Urban Space? What Are Some Alternative Composting Options For Those With Limited Space?
Absolutely, you can compost in an apartment or small urban space! Even if you have limited space, there are alternative composting options that’ll work perfectly for your situation.
One popular method is using a worm bin or vermicomposting system, which is compact and odor-free – making it ideal for indoor use.
Another option is bokashi fermentation, where kitchen scraps are fermented in an air-tight container with the help of effective microorganisms.
By exploring these eco-friendly alternatives, not only will you be reducing waste but also creating nutrient-rich soil to give your plants a boost while ensuring the safety and cleanliness of your living space!
Are There Any Materials Or Items That Should Not Be Added To A Compost Bin, Even If They Are Organic?
Absolutely! While composting is a fantastic way to recycle organic waste, there are certain materials you should avoid adding to your compost bin.
Items like meat, bones, and dairy products can attract pests and create unpleasant odors, so it’s best to leave them out of your compost pile.
Also, stay away from pet waste – it may contain harmful parasites or bacteria that could contaminate your garden.
Additionally, don’t toss in any treated wood or sawdust since they might have chemicals that aren’t safe for plants.
Remember, when building a healthy compost system for your garden, stick with fruit and vegetable scraps, coffee grounds, eggshells, grass clippings, leaves, and small branches – these will all break down nicely into nutrient-rich soil without causing any problems!
How Can I Keep Unwanted Pests And Animals Away From My Compost Bin?
To keep unwanted pests and animals away from your compost bin, it’s important to take a few preventative measures.
First, make sure you’re not adding any meat or dairy products to your compost pile, as these can attract critters like rodents and raccoons.
Next, try covering the top layer of your compost with a thick layer of leaves or straw – this helps mask the smell of decomposing food scraps while also creating an unappealing environment for insects.
Finally, consider placing a barrier around your bin such as chicken wire or hardware cloth that stops small animals from getting in but still allows air circulation for proper decomposition.
By following these simple tips, you’ll ensure both you and your garden stay safe!
How Long Does It Typically Take For Compost To Be Ready For Use In The Garden, And Are There Any Factors That Can Speed Up Or Slow Down The Process?
Imagine your compost pile is like a magical cauldron, bubbling away and transforming your kitchen scraps and yard waste into rich, dark soil.
The enchanting process typically takes anywhere from 2 to 6 months for the compost to be ready for use in your garden.
However, there are factors that can speed up or slow down this transformation – like casting a spell!
To accelerate the process, make sure you’re turning and mixing the contents regularly, maintaining proper moisture levels (not too wet nor too dry), keeping a good balance of ‘greens’ (nitrogen-rich materials) and ‘browns’ (carbon-rich materials), and chopping larger items into smaller pieces before adding them.
By following these simple steps, you’ll ensure that your compost brews at an optimal pace while also providing a safe haven for beneficial creatures who help break it all down – making it less tempting for unwanted pests to invade.
So go on brave gardener, harness the power of nature’s alchemy by nurturing your very own compost concoction!
Can Composting Produce Any Harmful Gases Or Substances, And Are There Any Safety Precautions I Should Take When Handling Compost?
While composting is generally a safe and eco-friendly process, it can produce some harmful gases or substances if not managed properly. For example, decomposing organic materials can release methane, ammonia, and hydrogen sulfide – all of which can be dangerous in high concentrations.
To stay safe while handling compost, make sure you turn your compost pile regularly to allow proper air circulation and prevent the buildup of these gases. Additionally, avoid using diseased plants or pesticide-treated materials in your compost since they may contaminate the finished product.
Always wash your hands after handling compost and use gloves as an extra precaution to protect yourself from any potential pathogens that might be present. Remember, taking these simple safety measures will help ensure your DIY compost system remains a productive and secure addition to your garden!
Conclusion
In the end, creating your own composting system is a rewarding and eco-friendly way to nourish your garden. Just remember to be mindful of what goes into your compost bin, keep those pesky critters at bay, and have patience as nature works its magic.
So go ahead, give it a try!
Before you know it, you’ll be turning kitchen scraps and yard waste into rich ‘black gold’ for your plants to thrive on.
Happy composting, my fellow green-thumbed friends!