This article was contributed by Beth at Bury Hill Topsoil and has been updated with current composting guidance.
Good garden compost comes from a workable mixture of materials, moisture, air and time. You do not need an expensive bin, purchased worms or a product promising to halve the waiting time. These seven steps will help you build a manageable system and recognize when its contents are ready to use.
1. Choose a practical place and container
A heap, a simple enclosure or a manufactured bin can all work. Choose somewhere you can reach with kitchen scraps, garden waste and a watering can, with room to turn or empty the material. Check local rules and choose a system that limits animal access if food scraps are included.
Do not buy by capacity alone. A small hatch that makes finished compost difficult to remove may be frustrating even if the bin fits neatly into a corner. Think through how you will load, mix and harvest it.
2. Gather suitable greens and browns
Greens include fruit and vegetable scraps, coffee grounds and fresh plant trimmings. Browns include dry leaves, plain shredded cardboard and small woody material. Tear cardboard into manageable pieces and remove tape and plastic. Empty tea leaves out of bags unless the bag is specifically suitable for home composting.
For a basic backyard system, leave out meat, dairy, oily foods, pet waste and treated wood. Avoid adding persistent weeds or diseased material when you cannot manage the temperatures needed to deal with them. The EPA’s home-composting guide has a useful material checklist.
3. Mix rather than compact the ingredients
Start with more loose browns than greens by volume; the EPA suggests about two to three parts browns to one part greens. This is a starting point, not a precise recipe for every material. Mix grass clippings with dry material so they do not form a dense, wet mat, and cover food scraps with browns.
Keep a nearby supply of dry leaves or shredded cardboard. It is easier to balance a new bucket of scraps when the matching dry material is already available.
4. Adjust moisture and air
The material should be damp, with air spaces, rather than dusty or waterlogged. If it is dry, add water while mixing so the inside is moistened too. Adding more fresh material alone does not necessarily solve a dry pile.
If it becomes wet and smells unpleasant, mix in dry, bulky browns and improve aeration. Turn or remix as your system allows. A compost fork may help with a heap, but use equipment that you can handle comfortably. University of Maryland Extension explains how moisture, oxygen and microbial activity work together.
5. Let the organisms already present do the work
Microorganisms are central to ordinary composting. Worms and other small organisms may join in cooler material, but you do not need to buy worms for a hot compost pile. A deliberately managed worm bin is a different system with different care requirements.
Commercial activators are not a necessary shortcut. Iowa State Extension explains that suitable organic materials already carry decomposer organisms. If progress is slow, check moisture, materials and aeration before purchasing an additive.
6. Allow decomposition and curing to finish
A small heap topped up little by little will not behave like a large, well-managed batch. Weather, particle size and turning all affect the time needed. Avoid promising a fixed finish date or assuming that a dark color proves readiness.
Finished material should be crumbly and earthy-smelling, with most original ingredients no longer recognizable. Let a finished batch mature without continually mixing in new scraps. Keep unfinished woody pieces for the next batch. If material is still heating strongly after mixing or smells sour, give it more time and correct the conditions.
7. Use it as an amendment
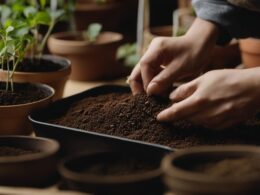
Use mature compost to improve suitable garden soil or as part of a planting plan. Do not automatically fill a seed tray or container with pure homemade compost: its texture and nutrient levels can vary. Choose an appropriate potting mix for containers.
Compost contributes nutrients, but it does not replace every fertilizer decision. If you grow vegetables, combine its use with soil-test guidance; our article on choosing tomato fertilizer explains why adding more of every nutrient is not the goal.