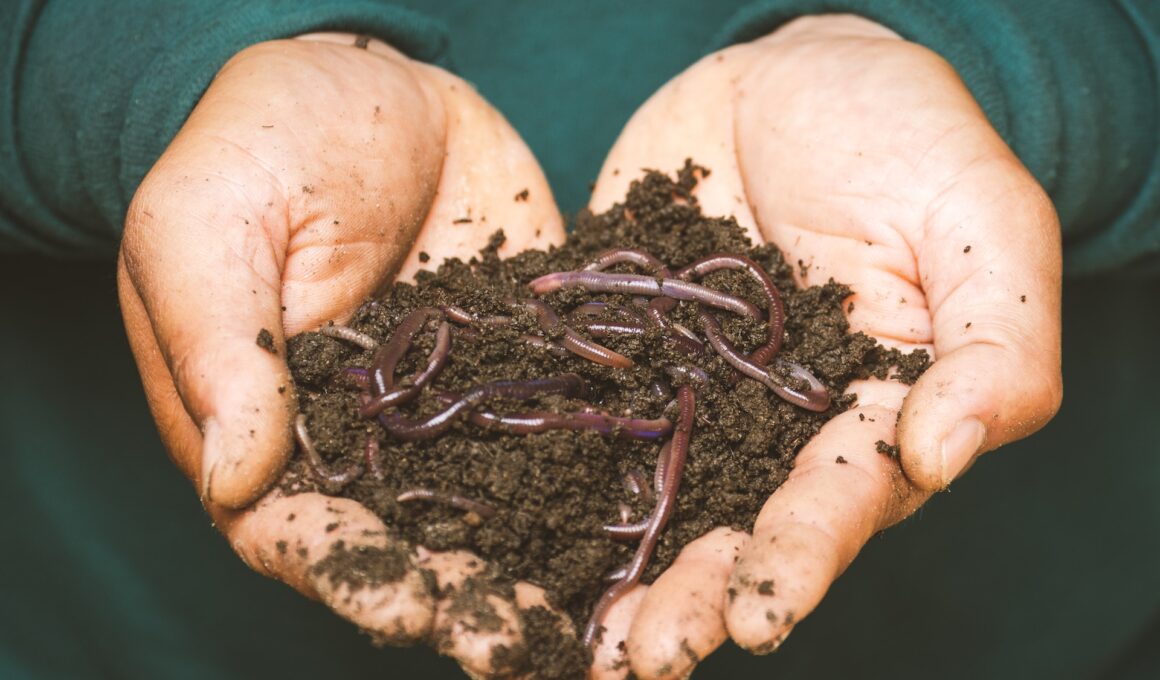
Vermicomposting is a fantastic way to recycle your kitchen scraps and create some of the best, nutrient-rich compost for your garden. But don’t worry, it’s not as gross or scary as you may think! In fact, vermicomposting can be an easy and safe process that helps both your plants and the environment.
So let’s dive in and learn how to compost with worms. It’s easier than you’d expect, even if you’re new to gardening or have never tried composting before.
We’ll show you step-by-step how to set up a worm bin, what types of worms are perfect for this job, and how to maintain the system so that everyone involved stays healthy and happy – including the worms!
Trust us; once you start vermicomposting, you’ll wonder why you didn’t try it sooner.
Benefits Of Vermicomposting
Did you know that vermicomposting can help reduce household waste by up to 30%? That’s right! Vermicomposting, or composting with worms, is an eco-friendly and efficient way to turn your kitchen scraps into nutrient-rich soil for your plants.
Not only does it minimize the amount of trash ending up in landfills, but it also provides a safe haven for beneficial microorganisms. These tiny helpers break down organic matter, releasing essential nutrients for plant growth.
One major benefit of vermicomposting is the production of worm castings – nature’s own fertilizer. Worm castings are rich in necessary nutrients like nitrogen, phosphorus, and potassium that plants need to thrive. Using this natural fertilizer reduces our dependence on harmful chemicals which could contaminate our water sources and harm wildlife.
Moreover, worm castings improve soil structure by increasing its water-holding capacity and promoting healthy root development. This makes it easier for plants to access the necessary moisture and nutrients they require to grow strong and resilient.
Another reason why vermicomposting is advantageous lies in how easy and low-maintenance it is. All you need is a suitable container, bedding material such as shredded newspaper or cardboard, some red wiggler worms (Eisenia fetida), and your everyday kitchen waste like fruit peels or coffee grounds.
The worms will do all the hard work for you by breaking down these materials into valuable compost. Plus, maintaining a worm bin ensures safety since there are no harsh chemicals involved; instead, you’re creating a sustainable ecosystem within your home where everyone – including worms – thrives harmoniously together!
Choosing The Right Worms For Your Bin
Now that you’ve decided to start vermicomposting, it’s important to choose the right worms for your bin. Not all worms are suited for this process, and picking the best ones will make a huge difference in how well your composting system works.
Don’t worry! This guide is here to help you find the perfect worm buddies who’ll happily munch on your scraps and turn them into nourishing fertilizer.
Red wigglers, also known as Eisenia fetida, are the most common choice for vermicomposting because they thrive in decomposing organic matter. These worms reproduce quickly and can eat about half their body weight in food every day.
Another option is European nightcrawlers, or Eisenia hortensis, which grow larger than red wigglers but might not be as efficient at breaking down materials.
It’s essential to avoid using earthworms from your garden since they aren’t adapted to living in bins and won’t do well with kitchen waste.
So when setting up your worm bin, remember that red wigglers are typically the top pick due to their impressive appetite and ability to adapt to life inside a container. However, if you’d like bigger worms or have specific needs for fishing bait or pet feedings, European nightcrawlers could be more suitable.
Whichever worm species you select, rest assured knowing these little creatures will work hard to transform unwanted scraps into valuable compost while keeping our environment safe and healthy one bite at a time!
Setting Up Your Worm Bin
Once you’ve decided to start vermicomposting, it’s time to set up your worm bin. This is where the magic happens! Don’t worry; creating a safe and comfortable home for your worms is easy and fun.
To begin with, you’ll need a container made of plastic or wood. A shallow container works best because worms like staying close to the surface while they eat and break down organic material. Make sure there are small holes in the bottom for drainage so that your worms don’t get too wet.
Next, let’s prepare some bedding for our wriggly friends. Bedding helps keep worms moist, which is essential for their survival – think of it as their cozy blanket! You can use materials like shredded newspaper or cardboard, coconut coir, or peat moss.
Moisten the bedding by soaking it in water for a few minutes before placing it into your worm bin. Remember that worms breathe through their skin, so be careful not to make the bedding too wet – aim for the consistency of a damp sponge!
With your worm bin prepared and full of comfy bedding, it’s time to add your new composting buddies: red wiggler worms (scientifically known as Eisenia fetida). These little guys are perfect decomposers due to their voracious appetite for organic waste.
Be sure to provide them with enough food scraps such as fruit and vegetable peelings, coffee grounds, tea bags, crushed eggshells, and even paper towels without any chemicals on them – just remember not to overwhelm them with too much at once. Keep an eye on how fast they’re consuming what you give them and adjust accordingly.
Now sit back and watch your tiny ecosystem thrive while turning everyday waste into valuable fertilizer!
Selecting The Ideal Location For Your Worm Bin
Did you know that worms can eat up to half their body weight in food each day? That’s a lot of composting power! To make the most of this, it’s important to select the ideal location for your worm bin. By choosing the right spot, you’ll ensure that your worms are happy and healthy, while also keeping any potential smells or pests at bay.
When looking for the perfect place for your worm bin, consider these factors:
- Temperature: Worms thrive in temperatures between 55°F (13°C) and 77°F (25°C). Be sure to keep them out of direct sunlight or extreme heat.
- Moisture: Vermicomposting requires moisture for worms to move around easily. Place your bin on an even surface where water won’t pool around it.
- Ventilation: Airflow is essential for a successful worm bin. Make sure there is enough space around the sides and top of your container so air can circulate freely.
- Accessibility: Choose a location that is easy for you to access regularly as you’ll need to maintain and harvest from the bin.
Now that we’ve covered some crucial aspects of selecting the ideal location for your worm bin, remember safety should be at the forefront of our minds when dealing with composting materials. Worm bins must be kept away from pets and young children who might accidentally disturb or ingest its contents.
Additionally, avoiding areas prone to flooding will prevent possible contamination of groundwater sources. So go ahead and find that perfect spot for your new vermicomposting adventure – one which ensures both safety and success!
Proper Feeding Techniques For Your Worms
Now that you’ve found the perfect spot for your worm bin, it’s time to learn about keeping those wiggly workers well-fed and happy. Feeding your worms properly is essential for a thriving vermicomposting system.
In this section, we’ll discuss some techniques to ensure they receive all the nutrients they need without overfeeding or causing any harm.
To begin with, always start by feeding your worms small amounts of food scraps. A general rule of thumb is to provide an amount equal to half their weight each day. For example, if you have one pound of worms in your bin, feed them approximately half a pound of food daily.
Keep in mind that while worms can consume various organic materials like fruit and vegetable peels, coffee grounds, tea bags, eggshells, and even shredded paper or cardboard, there are some items to avoid. Steer clear from oily foods, meat products, dairy products, spicy or salty snacks as these can attract pests and create unpleasant odors in your worm bin.
As you become more familiar with caring for your worms and monitoring their eating habits; feel free to experiment with different types of food waste gradually – but remember not too much at once! Overloading the bin may cause problems such as foul smells or excess moisture which could compromise the safety of your composting environment.
By following these proper feeding techniques and being mindful of what goes into the worm bin; you’re well on your way towards maintaining a successful vermicomposting system where both you and your wriggly friends can thrive!
Maintaining The Right Moisture Level
Maintaining the right moisture level in your vermicomposting bin is essential for keeping your worms happy, healthy, and productive. If the environment becomes too dry or too wet, it can be harmful to the worms and affect their ability to break down organic materials efficiently. So how do you ensure that the conditions are just right? Let’s explore some tips on maintaining a safe and comfortable home for your wiggly friends.
- Use bedding materials that retain moisture well
- Regularly monitor and adjust the moisture content
- Keep an eye out for any water buildup at the bottom of the bin
To begin with, make sure you choose bedding materials that help maintain proper moisture levels. Some popular choices include shredded newspaper, cardboard, coconut coir, or peat moss. These materials not only provide a suitable living space for your worm buddies but also absorb excess moisture when needed without becoming too soggy themselves.
It’s important to regularly check on the humidity inside the bin by feeling around in the bedding material. You’re aiming for a consistency similar to that of a wrung-out sponge; damp but not dripping wet.
To increase moisture levels if necessary, mist water evenly over the surface using a spray bottle or add moist food scraps like fruit and vegetable peelings into your compost mix. On the other hand, if things seem overly wet or there’s visible standing water at the bottom of your bin, try adding more dry bedding material such as shredded paper to soak up excess moisture.
By following these simple steps and paying attention to potential hazards like excessive dryness or sogginess within your vermicomposting system, you’ll create optimal conditions where both worms and microbes thrive together converting waste into nutrient-rich compost!
Your plants will thank you later for providing them with this wonderful natural fertilizer while reducing waste from landfills simultaneously – making our planet so much safer and cleaner one worm cast at a time!
Ensuring Adequate Temperature And Air Circulation
One of the key factors to keep in mind when vermicomposting is maintaining a comfortable environment for your worms. This means ensuring that their home has a suitable temperature and good air circulation.
Worms thrive in temperatures between 55°F and 75°F, so it’s important to monitor and maintain this range inside their bin.
To achieve optimal airflow within the worm bin, make sure you have plenty of ventilation holes on all sides as well as the lid. These will not only allow fresh air to flow through but also help excess moisture escape, keeping the bedding from becoming too wet or soggy.
A well-ventilated bin creates a safe and healthy environment for your worms to live and reproduce.
As you continue with your vermicomposting journey, remember that monitoring temperature and air circulation should be part of your regular routine. By doing so, you’ll ensure that your worms are happy, healthy, and producing high-quality compost for your garden.
So go ahead – take care of those wiggly friends by providing them with ideal living conditions while they work hard at turning kitchen scraps into nutrient-rich gold!
Troubleshooting Common Vermicomposting Issues
Did you know that about 75% of households in the United States throw away food scraps every day? That’s a lot of trash that could be turned into nutrient-rich compost with the help of worms! Vermicomposting is an easy and rewarding way to recycle your kitchen waste, but like any process, it can come with its own set of challenges.
In this section, we’ll discuss some common vermicomposting issues you may face and how to tackle them head-on so you can confidently maintain a healthy worm bin.
One issue you might encounter when maintaining a worm bin is foul odors coming from the decomposing organic matter. This usually indicates that there is too much moisture or not enough air circulation within your bin. To resolve this problem, try adding more dry bedding such as shredded newspaper or cardboard to absorb excess moisture while also increasing airflow by turning the contents gently with a trowel or fork. If necessary, create additional ventilation holes on the side or top of your container for improved oxygen flow. Keep in mind that a well-maintained worm bin should have little to no smell at all!
Another challenge faced by many vermicomposters is dealing with pests such as fruit flies or ants invading their worm bins. These critters are attracted to rotting food scraps which are plentiful in our cozy worm homes! One effective method to keep these unwanted visitors at bay is by burying fresh food scraps beneath existing bedding material instead of leaving them exposed on the surface where they can easily attract pests.
Additionally, if possible, place your bin off the ground using bricks or wooden blocks – this will prevent ants from gaining easy access inside while also promoting better drainage for excess moisture build-up below. Remember that maintaining optimal conditions in your worm bin will ensure a safe environment not only for your wriggly friends but also for yourself as you enjoy reaping the benefits of sustainable waste management through vermicomposting!
Harvesting Your Finished Compost
Collecting the worms can be done by carefully sifting through the compost material.
To separate the worms from the compost, use a sieve or a large plastic container, such as a Rubbermaid bin.
Then, add some fresh, damp bedding to the bin, then pour the compost material over the bedding.
Finally, you can use your hands or a spoon to scoop out the worms.
Collecting The Worms
So you’ve been diligently tending to your worm bin, and now it’s time to harvest the rich compost that those wriggly little workers have produced. Congratulations on reaching this exciting stage in your vermicomposting journey!
As you prepare for the harvesting process, one of the first tasks is to collect the worms so they can be returned to their cozy home after you’ve removed the finished compost.
Gathering up all those wiggling creatures might seem a bit intimidating at first, but don’t worry – there are some tried-and-true methods that’ll make it easy as pie.
One popular technique is known as ‘side-to-side’ or ‘migration.’ To do this, simply push all of the contents (worms, bedding, and unfinished compost) over to one side of the bin. Then add fresh bedding material along with tempting food scraps on the empty side. Over the next week or two, most of your worms will migrate towards this new food source, making it easier for you to scoop out just the finished compost from the other side without scooping up too many squirming friends!
Another approach involves shining light onto your bin since worms like to hide away from bright lights. You can place a lamp nearby or use natural sunlight if possible. Worms will instinctively burrow deeper into the pile when exposed to light; hence you can gradually scrape off thin layers of compost until you reach a layer where more worms start appearing.
At that point, pause and allow them some time before continuing again – always keeping their safety in mind. Remember not to expose them under direct sunlight for long periods because our critter pals prefer dark environments.
Whichever method suits best for collecting your worms during harvest time should provide reassurance that these helpful creatures are being treated with care while also reaping rewards from their hard work in breaking down waste materials into nutrient-rich organic matter suitable for plants’ growth!
Seperating The Compost Material
Now that you’ve successfully gathered your wiggly worm friends, it’s time to focus on separating the compost material itself. Don’t worry; this step is just as easy and safe as collecting the worms! By taking a few simple precautions, you can ensure that your finished compost is separated from any remaining waste or bedding without causing harm to those helpful little critters.
To start, gently sift through the harvested compost with your hands or a small garden tool, removing larger chunks of unfinished materials like food scraps, eggshells, or bedding. It’s okay if some smaller bits remain – they’ll continue breaking down over time in your plants’ soil.
As you work, be mindful not to squish any stray worms that might still be hiding amidst the dark, crumbly goodness. If you find any adventurous wigglers who haven’t made their way back home yet, simply scoop them up and return them to the safety of their bin.
By carefully sorting through the compost and returning any escapees back to their cozy habitat, you’ll end up with a beautiful pile of rich organic matter ready for use in your garden or potted plants. And remember – every time you harvest and separate compost material with care, you’re helping maintain a healthy environment for both your plants and your wriggling helpers!
Using Your Compost In The Garden
After you’ve successfully created your vermicompost, it’s time to use that nutrient-rich material in your garden. Using compost not only provides valuable nutrients for your plants but also helps improve the overall health of your soil. By incorporating worm castings into your gardening routine, you’ll be giving your plants a boost and creating an environment where they can thrive.
Here are four ways to use vermicompost in your garden:
- Top dressing: Simply spread a thin layer of compost around the base of your plants or over the surface of the soil. This will gradually release nutrients as it breaks down and also help retain moisture.
- Side dressing: If you have established plants with deep root systems, add vermicompost along their outer edges so that roots can access those nutrients easily.
- Soil amendment: Before planting new seeds or seedlings, work some worm castings into the top few inches of soil to enrich it and create better growing conditions.
- Compost tea: Create a liquid fertilizer by steeping compost in water for several hours (or even days). Strain out solids before using this ‘tea’ on your plants either by spraying them directly or watering at their base.
By making use of these methods, you’re benefiting both yourself and the environment. Vermicomposting is a sustainable way to manage organic waste while providing essential nutrients for plant growth without resorting to chemical fertilizers.
Not only does this preserve natural resources such as water and energy, but it also reduces pollution from harmful runoff entering our rivers and oceans. So go ahead and embrace vermicomposting – give your garden what it needs while keeping our planet safe!
Expanding Your Vermicomposting System
So, you’ve mastered the art of vermicomposting and are now living in harmony with your wriggly worm friends. But as time goes on, you might find yourself thinking: ‘Why stop here? Why not take my passion for composting to new heights?’ Well, fear not! There’s absolutely no need to suppress your insatiable appetite for turning food scraps into nutrient-rich soil.
Let’s delve into how to expand your vermicomposting system without causing a full-scale worm rebellion.
As any skilled Worm General knows, the secret to expanding an empire lies in understanding its population. In this case, it means keeping tabs on just how many wiggling workers are currently residing within your compost bin. The more worms there are, the faster they can process the organic material you provide them – which is great news for both your garden and Mother Earth!
To increase the size of your army (in other words, add extra worms), simply split their existing habitat into two separate containers before introducing fresh bedding and food scraps. This will encourage reproduction amongst our squirmy soldiers while preventing overcrowding.
One final piece of advice when planning world domination through vermicomposting: don’t forget about logistics! As you multiply bins or create larger ones, be prepared to manage their upkeep accordingly. Keep track of moisture levels, air circulation needs, temperature fluctuations, and perhaps most importantly – maintain a balanced diet for those hungry little heroes breaking down waste products day after day.
By staying attentive to these details, you’ll guarantee an efficient expansion that benefits both your personal ecosystem and the planet overall. So go forth and conquer with confidence; let nothing stand between you and a garden overflowing with rich compost made possible by legions of loyal earthworms!
Frequently Asked Questions About Vermicomposting
Now that you’ve got the hang of vermicomposting and even expanded your system, it’s natural to have some questions along the way. This journey can lead to new discoveries and challenges, so let’s dive into a few commonly asked questions about vermicomposting to help keep your worms happy and healthy.
How do I know if my worm bin is too wet or too dry?
A well-maintained worm bin should be damp like a wrung-out sponge but not soaking wet. If you notice excess water pooling at the bottom of the bin, try adding more bedding materials such as shredded newspaper or cardboard to absorb moisture. On the other hand, if your bin feels dry, simply mist it with water until you achieve the desired consistency.
What should I avoid feeding my worms?
While worms are excellent composters for most organic waste, there are certain items they cannot process effectively. Avoid feeding them meat, dairy products, oily foods, bones, pet feces, and anything heavily salted or spiced.
Why are my worms trying to escape from their bin?
Worms usually attempt to leave their habitat when conditions become unfavorable. Check for issues such as poor ventilation, extreme temperatures (worms prefer 55-77°F), overly wet or acidic environment, or lack of food.
Is it normal for fruit flies or other critters to appear in my worm bin?
It’s common for fruit flies and other small organisms to find their way into your vermicomposting system since they’re attracted by decomposing matter; however excessive pests may indicate an imbalance in your system. To reduce their presence: bury fresh food scraps under bedding material instead of leaving them exposed on top; add crushed eggshells occasionally which helps balance pH levels; maintain proper moisture level; use tight-fitting lids with air holes for proper ventilation.
Can I Use Worms From My Garden For Vermicomposting, Or Do I Need To Purchase Specific Types Of Worms?
Imagine you’re trying to bake a cake using only the ingredients found in your pantry, without knowing if they are indeed suitable for baking. You might end up with an unappetizing result that doesn’t serve its purpose.
Similarly, when it comes to vermicomposting, not all worms from your garden will be effective in breaking down organic waste and creating nutrient-rich compost.
The ideal candidates for this job are red wigglers (Eisenia fetida) or European nightcrawlers (Eisenia hortensis), as they thrive on decomposing matter and reproduce quickly.
These specific types of worms can often be purchased online or at local gardening stores, ensuring a successful start to your vermicomposting journey while keeping your worm friends safe and content in their new environment.
How Do I Know If My Worm Bin Has A Healthy Worm Population And What Should I Do If The Population Seems To Be Decreasing?
To ensure your worm bin has a healthy population, keep an eye out for signs such as active and lively worms, a fresh earthy smell, and the presence of worm castings (their waste product).
If you notice the population decreasing, try to identify possible issues like overfeeding, excess moisture or foul odors.
Adjusting their diet by providing smaller amounts of food more frequently can help maintain balance; also, make sure there’s ample bedding material like shredded newspaper or cardboard to improve air circulation and prevent any unwanted smells.
By keeping these factors in check, you’ll provide a safe environment that encourages growth and sustains your little composting helpers!
Are There Any Potential Pests Or Predators That Can Harm My Worm Bin, And How Can I Prevent Them From Causing Damage To The System?
In the wild world of worm bins, your wriggling friends can sometimes face dangers from pests and predators that want to crash their composting party.
To keep your worms safe and sound while they’re hard at work breaking down your scraps, it’s important to know who these uninvited guests are and how to prevent them from causing chaos in your system.
Some common troublemakers include ants, fruit flies, centipedes, and rodents – each with its own tricky tactics for infiltrating your bin!
By maintaining a balanced environment (not too wet or dry), burying food waste beneath the bedding material, using tight-fitting lids with adequate air holes, and regularly inspecting for signs of intruders, you’ll help ensure that your worm bin remains a secure haven for your wiggly workforce to thrive in peace.
How Much Time Does It Typically Take For Worms To Break Down Organic Matter And Produce Usable Compost, And Are There Any Factors That Can Speed Up Or Slow Down This Process?
It typically takes worms about 2-3 months to break down organic matter and produce usable compost, but factors like temperature, moisture, and the size of the food scraps can impact this process.
To speed things up, try chopping your kitchen waste into smaller pieces before adding it to the bin, maintaining a balanced mix of ‘green’ (kitchen scraps) and ‘brown’ (paper or cardboard) materials, and keeping the bin at room temperature with proper moisture levels.
By providing a safe and comfortable environment for your worms, you’ll help them work more efficiently in turning waste into nutrient-rich compost!
Can I Add Other Decomposers, Such As Insects Or Fungi, To My Worm Bin To Enhance The Composting Process, Or Will They Harm The Worms Or Disrupt The System?
Introducing other decomposers like insects or fungi to your worm bin might seem like a good idea, but it can actually harm the worms and disrupt the composting process.
While some microorganisms are naturally present in the system and help break down organic matter, adding additional creatures could create competition for food and resources, as well as potentially introduce harmful pathogens.
To keep your worm bin healthy and efficient, it’s best to stick with just worms and let them do their magic!
Conclusion
As we continue our vermicomposting journey, it’s essential to closely monitor our worm bin and ensure a thriving environment for our wiggly friends. Keep an eye out for potential threats that could harm the system, while also considering additional decomposers to speed up the process.
In time, you’ll find yourself with rich, nutrient-packed compost that your plants will love. So stay patient and attentive – after all, who knows what amazing discoveries await in the world of worms and decomposition?