As the cold winter days gradually make way for warmer weather, it’s time to start thinking about getting our gardens ready for spring.
With just a little bit of effort and some planning, you can ensure that your garden is not only beautiful but safe too. After all, who wouldn’t want their own slice of paradise right outside their doorstep?
In this article, we’ll cover some essential tips on how to prepare your garden for the growing season. From cleaning up debris and dead plants to checking for potential hazards, these steps will help you create an inviting and secure outdoor space where you can relax with peace of mind knowing that everything has been taken care of.
So grab your gardening gloves, roll up those sleeves, and let’s get started!
Assessing Winter Damage
As the winter season comes to an end, it’s time to assess any damage that may have occurred in your garden during those cold months. This is a crucial first step in preparing your garden for spring and ensuring a healthy growing season. Not only will this help you identify potential hazards, but it also allows you to address them properly before they become bigger problems.
Start by taking a walk around your garden and paying close attention to any signs of stress or damage on plants, trees, and structures such as fences or trellises. Look out for broken branches, dead leaves, and frost-damaged foliage. You should also check for any pests that may have taken up residence during the winter months.
Once you’ve identified these issues, take action! Prune damaged branches from trees and shrubs using clean tools to prevent the spread of diseases. Remove dead leaves and debris from planting beds to discourage pests from returning.
To ensure your garden remains safe throughout the upcoming growing season, consider adding some protective measures like mulch or fencing if needed. Mulch can help protect plant roots from extreme temperature fluctuations while providing beneficial nutrients as it breaks down over time. Fencing can keep unwanted critters away from your precious plants so they continue to grow strong and healthy.
By addressing winter damages early on and implementing preventive steps, you’ll be well on your way towards creating a thriving outdoor haven where safety abounds all season long!
Removing Dead Plants And Debris
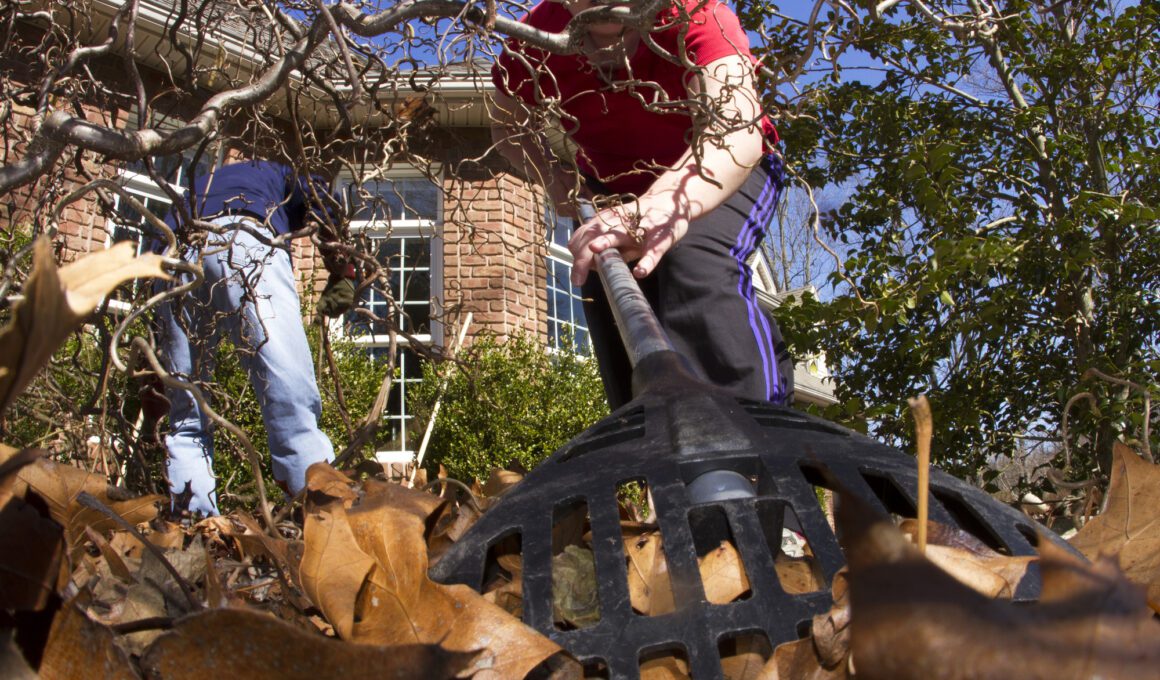
Raking leaves is a great way to start the garden clean-up process.
Pulling weeds and disposing of debris can be done quickly.
Pruning trees and trimming bushes can help create a neat and tidy look.
Digging up roots and collecting clippings should also be done for a successful garden clean-up.
Raking Leaves
Imagine the feeling of accomplishment you’ll get from raking all those pesky leaves out of your garden. It’s a simple task, but it can make a huge difference in preparing your garden for the growing season.
Not only does it help give your plants room to breathe and grow, but it also helps create a safer environment for you and your loved ones. Don’t worry if you’re not an expert at raking leaves – anyone can do it! All you need is a sturdy rake and some elbow grease.
Start by removing larger debris like branches or twigs that may have fallen during winter storms. Then, gently rake up any remaining dead leaves, being careful not to damage any new growth or delicate plants. As you work through the garden, be mindful of slippery spots where wet leaves may cause accidents; take extra care there to ensure everyone’s safety.
After raking up all those leaves, what should you do with them? You’ve got options! If they’re free of disease or pests, consider adding them to your compost pile as a great source of nutrients for future plantings. Alternatively, many communities offer yard waste recycling programs where collected leaves are turned into mulch or compost for local use.
Either way, by taking the time to clean up those leftover autumn leaves, you’re contributing to both the health of your garden and the well-being of yourself and your family.
Disposing Debris
Now that you’ve successfully raked up all those pesky leaves, it’s time to focus on disposing of the debris properly. It’s essential to remove this waste from your garden not only for the health of your plants but also to maintain a safe and clutter-free environment for everyone to enjoy.
There are several ways to dispose of dead plants and debris, so let’s explore some options that’ll work best for you and your garden.
One popular method is using a compost pile or bin where you can turn dead plant material into nutrient-rich compost over time. By adding these organic materials back into your soil, you’re helping create healthier growing conditions while keeping waste out of landfills – talk about a win-win! Just remember not to include any diseased or pest-infested plants in your compost; they might cause problems later on.
Another option is checking if your community offers yard waste recycling programs. These initiatives often collect leaves, branches, and other natural debris which are then turned into mulch or compost for local use. This way, you’re contributing positively to both your garden and the wider community by ensuring proper disposal methods keep our environment clean and safe.
Pruning And Trimming Trees And Shrubs
Once you’ve cleared away the dead plants and debris, it’s time to focus on giving your trees and shrubs some much-needed attention. Proper pruning and trimming not only maintain their health but also ensure a safe environment for you and your family as you enjoy your garden throughout the growing season. With well-maintained trees and shrubs, there will be fewer hazards from falling branches or overgrown bushes.
To effectively prune and trim your trees and shrubs, follow these four steps:
- Identify which branches need removal: Look for broken, diseased, or dying limbs that could pose a risk if left unattended.
- Make clean cuts: Use sharp tools such as pruning shears, loppers, or a handsaw to make precise cuts without damaging the surrounding bark.
- Prune at the right time: The best time to prune varies depending on the type of tree or shrub; generally speaking, late winter or early spring is ideal for most species.
- Maintain shape: Regularly trim back any overgrowth to maintain an appealing appearance while promoting healthy growth.
By following these guidelines in caring for your trees and shrubs, they’ll continue to thrive throughout the year providing shade, beauty, and safety within your garden haven.
As with all aspects of gardening maintenance tasks like this play a big part in creating that perfect outdoor space where we can relax knowing our families are protected from potential hazards caused by neglecting essential upkeep duties.
So grab those pruning shears with confidence – it’s time to show those trees who’s boss!
Tending To Perennials And Bulbs
As you’re getting your garden ready for the growing season, it’s important to pay special attention to perennials and bulbs. These plants are the backbone of many gardens as they return year after year, providing a reliable display of color and texture. To ensure their continued health and vigor, follow these simple steps.
First, start by trimming back any dead or damaged foliage from last season. This will not only make room for new growth but also help prevent disease from spreading throughout your garden. Be careful when cutting around delicate shoots that may be emerging – you don’t want to accidentally damage them!
Afterward, gently loosen the soil around your plants using a fork or hand cultivator. This allows air and water to penetrate more easily while encouraging strong root development.
To give your perennials and bulbs an extra boost this spring, consider adding some organic material like compost or well-rotted manure to the soil around them. Work it into the top few inches of soil without disturbing the roots too much. This added nourishment can work wonders in promoting healthy growth and beautiful blooms all season long.
With proper care and attention during your spring garden clean-up, your perennials and bulbs will reward you with stunning displays year after year – making your outdoor space a safe haven for both you and local wildlife to enjoy.
Repairing Hardscape Elements
Just when you thought your spring garden clean-up was all about trimming, pruning, and clearing away the winter debris, there’s another important task that demands attention. It might not be as glamorous or exciting as planting new flowers or tending to those delicate seedlings, but it plays a crucial role in the overall health of your outdoor space.
We’re talking about repairing hardscape elements – walkways, patios, fences, and more. Over time, Mother Nature can take its toll on these structures. Freeze-thaw cycles may cause cracks in pathways or loosen pavers; heavy snows could have damaged fence posts; even strong winds might have knocked over trellises or arbors. Ignoring these issues won’t make them disappear – in fact, they’ll only get worse if left unaddressed.
That’s why it’s essential to assess any damage and repair them promptly so that you can ensure safe navigation throughout your garden for yourself and guests alike. Start by taking a good look at each hardscape element in your garden. Check for loose stones in paths or patio areas – this is especially important around steps where someone could slip or trip! Inspect wooden structures like fences and gates for signs of rotting wood or broken hinges that need fixing before they become hazards.
Even small repairs such as tightening connections on pergolas can provide stability during windy days which adds an extra layer of safety to your garden oasis. By addressing these concerns now, you will create a safer environment while protecting your investment in these beautiful additions to enhance your landscape design long term.
Prepping Garden Beds For Planting
Now that you’ve cleaned up your garden, it’s time to get those garden beds ready for planting. This step is crucial for ensuring a thriving and healthy environment for your plants throughout the growing season. Properly prepped garden beds will not only provide essential nutrients but also help prevent weeds, pests, and diseases from harming your precious plants.
To prepare your garden beds for planting, follow these four simple steps:
- Remove any remaining debris or weeds: Make sure you’ve cleared out all dead leaves, twigs, and other unwanted materials from the area. Weeds can be persistent troublemakers in a garden bed, so it’s essential to remove them before they have a chance to grow back.
- Loosen the soil: Use a fork or spade to turn over the top layer of soil in your garden bed. This helps improve air circulation and makes it easier for plant roots to penetrate into the earth.
- Add organic matter: Mix compost or well-rotted manure into the loosened soil. Organic matter improves soil structure by adding vital nutrients and increasing water retention capabilities.
- Level the surface: Rake the surface of your prepared bed smooth and level – this creates an even base for sowing seeds or transplanting seedlings.
It might seem like there are many tasks involved in getting your garden beds ready for planting, but with some effort put into preparation now, you’ll reap fantastic rewards later on!
A well-prepared garden bed ensures that your plants have everything they need to flourish during their growth period while offering protection against potential threats such as weeds and pests. So don’t skimp on giving your future harvests their best chance at success – invest time now in preparing those perfect garden beds!
Fertilizing And Amending Soil
Fertilizing and amending your garden soil is an essential step in preparing for the growing season. A healthy, nutrient-rich soil will provide your plants with the best possible foundation for growth and protection against pests and diseases.
Before you start adding any fertilizers or amendments, it’s important to test your soil to determine its current nutrient levels and pH balance. This information will help guide you in choosing the right products to improve your garden’s health.
One of the most common ways to add nutrients back into the soil is by using organic matter such as compost, aged manure, or leaf mold. These materials not only supply plants with essential nutrients but also help improve soil structure, drainage, and moisture retention. To apply these amendments, simply spread a layer about 2-4 inches thick on top of your garden beds and work them gently into the existing soil using a rake or shovel. Be careful not to overdo it – too much organic matter can lead to problems like nitrogen depletion.
As you prepare your garden for planting, consider using slow-release granular fertilizers that provide balanced nutrition throughout the growing season. This type of fertilizer releases nutrients gradually over time rather than all at once, which helps prevent plant stress and promotes steady growth. When applying granular fertilizer, be sure to follow label instructions carefully regarding application rates and timing; this ensures that your plants receive just what they need without any unnecessary waste or risk of harming nearby water sources.
With proper care and attention to your garden’s nutritional needs during spring clean-up, you’ll set yourself up for a successful growing season full of beautiful blooms and bountiful harvests!
Weed Control And Prevention
Imagine your garden as a beautiful kingdom, with various plants and flowers acting as the loyal subjects. However, lurking in the shadows are villainous weeds that threaten to overthrow this peaceful realm. As a wise ruler of your garden, it is essential to implement effective weed control strategies and prevent these invaders from causing chaos.
- Mulching: Spread a layer of mulch around your plants to smother existing weeds and prevent new ones from taking root. Organic mulches such as straw or bark chips will also benefit your soil by decomposing over time.
- Hand-pulling: Regularly inspect your garden for any unwanted guests and promptly remove them by hand before they can establish deep roots or spread their seeds.
- Hoeing: For larger areas or tougher weeds, use a hoe to cut off their heads beneath the soil surface, preventing regrowth.
- Chemical controls: If all else fails, consider using an herbicide designed specifically for targeting problem weeds without harming desired plants.
Remember that maintaining a healthy and well-tended garden is one of the most critical aspects of weed prevention. By providing optimal growing conditions for your favorite plants—proper sunlight, water, nutrients—you create an environment where they can thrive while leaving little room for pesky intruders trying to steal valuable resources away from them.
So take up arms against those would-be usurpers through diligent care and attention! Your flourishing domain depends on it!
Setting Up Irrigation Systems
Choosing the right system is an important step in setting up an irrigation system. Look for a system that fits the size of your garden and meets your budget.
When planning and installing your system, make sure to:
- Measure your garden
- Determine the water pressure
- Choose the right pipes and fittings
Lastly, be sure to read the instructions and safety warnings before beginning your installation.
Choosing The Right System
Setting up the right irrigation system can help make that dream come true! It’s important to choose an irrigation system that will suit your specific needs and keep your plants healthy throughout the growing season.
There are several different types of irrigation systems out there, so how do you know which one is best for you? Drip irrigation systems deliver water slowly and directly to each plant’s roots, making it perfect for gardens with lots of individual plants or flowers.
Sprinkler systems cover larger areas by spraying water over the entire space; these work well for lawns and large flower beds. Soaker hoses are another option – they’re flexible tubes filled with tiny holes that release water as they lay along the ground. These are ideal for rows of vegetables or long planting beds.
You’ll also want to consider factors like cost, ease of installation, and water efficiency when deciding on an irrigation system. While some might be more expensive upfront, they could save you money in the long run due to lower water usage (and who doesn’t love saving money?).
Plus, knowing that your plants are being properly cared for without having to constantly monitor their watering needs provides peace of mind – allowing you to enjoy the beauty and tranquility of your garden even more this season.
Planning And Installing
Now that you’ve got a better idea of which irrigation system might be best for your garden, it’s time to dive into planning and installing it. Don’t worry – this process doesn’t have to be overwhelming! With some careful thought and preparation, you’ll soon have an efficient watering system in place that keeps your plants happy and healthy while giving you more time to relax and enjoy your outdoor oasis.
First things first: map out the layout of your garden and determine where each type of plant or flower is located. This will help ensure that every area gets the right amount of water without wasting any precious resources.
Next, gather all the necessary materials for your chosen irrigation method – whether it’s drip lines, sprinklers, or soaker hoses – as well as any tools needed for installation.
Once everything is ready, take a deep breath and tackle the project step by step. And remember: if something seems too complicated or confusing, don’t hesitate to ask for help! There are plenty of online tutorials available, or consider reaching out to a knowledgeable friend or local gardening expert who can guide you through the process.
By taking these precautions, not only will your plants thank you with lush growth and beautiful blooms but also create safer surroundings knowing they’re properly cared for.
Choosing And Planting New Additions
Now that your irrigation system is in place, it’s time to turn your attention to the excitement of adding fresh life to your garden. In this section, we will explore how to choose and plant new additions that not only thrive but also contribute positively to the overall ecosystem of your space. Remember, a well-planned garden can provide you with a sense of safety and comfort as well as beauty.
To start, consider which plants will be best suited for your garden environment by taking into account factors such as light exposure, soil type, and climate. Once you have determined these conditions, you can then select plants accordingly from the categories below:
| Category | Characteristics |
|---|---|
| Sun-loving | Require direct sunlight for at least six hours per day |
| Shade-tolerant | Prefer indirect or dappled light; avoid scorching midday sun |
| Drought-resistant | Can withstand dry periods without frequent watering |
Remember to incorporate a mix of annuals (plants lasting one growing season), biennials (those living two years) and perennials (long-lived plants returning year after year). Including native plants supports local pollinators while increasing biodiversity.
When planting new additions in your garden, dig holes slightly larger than each plant’s root ball. Loosen the roots gently before placing them into their respective holes. Fill in around the roots with nutrient-rich soil mixed with compost or other organic matter. Water deeply immediately after planting so that moisture reaches all parts of the roots; this helps establish strong connections between the plantings and their new surroundings. As you watch your carefully chosen selections grow together in harmony over time, know that you’ve created a safe haven both for yourself and our planet’s precious ecosystem.
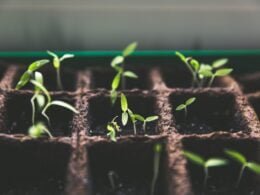
Starting Seeds Indoors
Now that your garden is all cleaned up and ready for the growing season, it’s time to start thinking about planting. One great way to get a head start on your gardening is by starting seeds indoors.
This not only gives you more control over the growing conditions but also allows you to grow plants that might not have enough time to mature if planted directly outside.
To begin with seed starting, gather these essential supplies:
- A variety of seeds suited for your climate and desired plant types
- Seedling trays or small pots filled with high-quality potting soil
- Grow lights or access to a sunny windowsill
Make sure you read the back of each seed packet carefully for specific instructions on how deep to sow and when to start them indoors before transplanting outdoors. Some seeds may require special treatments like pre-soaking or chilling in order for germination rates to improve.
Once you’ve sown the seeds, make sure they’re kept moist (but not soaking wet) and warm – many seeds need temperatures between 65-75°F to germinate successfully. Don’t forget to label your trays or pots so you know which plant is which later down the line!
As your seedlings grow, monitor their progress closely and provide ample light – ideally from full-spectrum grow lights placed just a few inches above the foliage.
When it’s finally time to move them outside, take care not to shock them by gradually easing them into outdoor conditions first through a process called ‘hardening off.‘
By following this methodical approach, you can ensure the safety of both yourself and your delicate young plants while preparing them for a successful transition into the great outdoors!
Implementing Pest Management Strategies
One important aspect of preparing your garden for the growing season is implementing pest management strategies. Pests can be a major problem in any garden, as they can damage or even destroy plants, leaving you with little to harvest at the end of the season. However, there are several steps you can take to protect your garden and ensure a healthy crop.
The first step in managing pests is preventative action. By keeping your garden clean and free from debris, you create an environment that’s less attractive to insects and other critters. It’s also essential to properly space out your plants when planting them, as this allows for good air circulation which helps prevent diseases that attract pests.
Additionally, try rotating crops each year so that certain bugs don’t have time to establish themselves in one area of your garden.
Another effective way to manage pests is by employing natural predators like ladybugs and praying mantises. These helpful creatures will eat many common garden pests without harming your plants. You can purchase these beneficial insects online or at local gardening centers and release them into your garden where they’ll get right to work munching on those unwanted intruders!
Remember, it’s crucial not just for the health of our gardens but also for our safety – no one wants harmful chemical pesticides around their home or family members!
Frequently Asked Questions
How Can I Determine Which Plants Are Suitable For My Garden’s Climate And Soil Conditions?
Just like Goldilocks searching for the perfect porridge, finding plants that thrive in your garden’s unique climate and soil conditions can be a bit of trial and error.
However, you don’t have to rely on guesswork alone.
Begin by researching your area’s hardiness zone, which gives you an idea of what plants can survive your region’s temperature extremes.
Next, get up close and personal with your soil; conduct a simple test to determine its texture (sandy, clayey or loamy) and acidity level (pH).
With this valuable information in hand, you’ll be able to choose plants that are well-suited for your specific environment – ensuring they flourish safely under Mother Nature’s watchful eye!
What Are Some Eco-Friendly Alternatives To Chemical Fertilizers And Pesticides?
If you’re looking for eco-friendly alternatives to chemical fertilizers and pesticides, there are plenty of natural options out there that can help keep your garden healthy and safe.
One popular choice is using compost, which not only enriches the soil with essential nutrients but also helps reduce waste by recycling kitchen scraps and yard clippings.
You can also try organic fertilizers like fish emulsion or bone meal to give your plants a nutrient boost without harming the environment.
As for pest control, consider introducing beneficial insects like ladybugs or lacewings into your garden, as they’ll naturally prey on common pests.
Additionally, planting companion plants such as marigolds or basil can help deter unwanted critters while adding extra beauty and flavor to your outdoor space!
How Can I Attract Beneficial Insects And Pollinators To My Garden?
They say ‘the enemy of my enemy is my friend,’ and this holds true when attracting beneficial insects and pollinators to your garden.
By planting a variety of flowers, herbs, and native plants that bloom at different times throughout the growing season, you’ll provide food sources for these helpful critters while adding beauty to your landscape.
Consider incorporating plants like dill, fennel, and yarrow which attract ladybugs and lacewings – predators of pesky aphids!
To lure in pollinators such as bees and butterflies, choose colorful flowers with abundant nectar supply like coneflowers, lavender, or bee balm.
Not only will their presence be enjoyable to observe, but they’ll also help ensure a healthy harvest by assisting with natural pest control – making both you and Mother Nature feel safe in knowing that no harmful chemicals were needed to keep your garden thriving.
What Are Some Effective Companion Planting Strategies For Pest Control And Enhanced Growth?
One exciting and effective way to keep your garden healthy and pest-free is through companion planting strategies. By pairing certain plants together, you can naturally repel pests, attract beneficial insects, and even boost each other’s growth!
For example, marigolds release a strong scent that deters pesky bugs like aphids while inviting helpful pollinators, making them an ideal sidekick for various vegetables.
Planting basil alongside tomatoes not only enhances their flavor but also helps ward off tomato hornworms.
And if you’re growing cabbage or broccoli, consider adding nasturtiums or onions nearby to fend off common pests like caterpillars and beetles.
With the right plant buddies in place, your garden will thrive and become a safe haven for both you and your precious plants!
How Can I Incorporate Sustainable Gardening Practices, Such As Composting And Rainwater Harvesting, Into My Spring Garden Clean-Up And Preparation?
Composting is like turning scraps from feasts into valuable treasure for your plants – simply gather organic waste such as leaves, kitchen scraps, and grass clippings to create nutrient-rich soil that will help them grow stronger.
Meanwhile, setting up rain barrels or other water collection systems allows you to harvest the sky’s bounty so that your loyal subjects (the plants) have enough hydration without draining precious resources from elsewhere.
By adopting these eco-friendly practices, you’ll be ensuring the safety and prosperity of your flourishing garden kingdom for seasons to come.
Conclusion
In conclusion, taking the time to research and implement eco-friendly practices in our gardens can make a big difference.
Not only will these methods help keep our plants healthy and thriving, but they also contribute positively to the environment around us.
As we prepare for the growing season, let’s remember to consider factors such as climate, soil conditions, beneficial insects, companion planting, and sustainable gardening techniques.
With some effort and care, we can cultivate a beautiful and environmentally friendly garden this spring.