As the leaves start changing colors and there’s a crisp chill in the air, you know it’s time to get your garden ready for winter. It might seem like a lot of work now, but trust us, taking these steps will make your life so much easier when spring rolls around again!
Plus, knowing that everything is cared for and tucked away safely can give you peace of mind during those cold months ahead.
In this article, we’ll go through all the must-do tasks on our fall gardening checklist. From cleaning up debris to protecting precious plants from frosty nights, we’ve got you covered.
So grab your gloves and let’s dive into preparing your garden for its long winter nap – because we all want to make sure our gardens are safe and sound until they come back to life next year!
Clearing Away Leaves And Debris
One of the most important tasks in preparing your garden for winter is clearing away leaves and debris. As fall progresses, trees shed their leaves, which can pile up on your lawn and garden beds. While it might be tempting to let nature take its course, leaving these piles untouched can lead to problems down the road.
By taking a few simple steps now, you’ll help ensure that your garden stays healthy throughout the cold months ahead.
Raking up fallen leaves not only keeps your yard looking tidy but also helps prevent diseases from spreading among plants. Wet, decaying leaves create an ideal breeding ground for fungi and bacteria that could harm your beloved greenery. In addition, thick layers of leaves may smother grass or tender perennials struggling to survive under the weight. Clearing them away allows sunlight to reach the soil surface and promotes proper air circulation around your plants – all crucial factors for a thriving garden!
So grab a rake or leaf blower and make it a point to clear away those pesky autumn remnants as they accumulate. Be sure to dispose of diseased plant material properly by burning it or placing it in sealed bags before sending off with other waste materials; this way, you won’t inadvertently infect next year’s growth!
Your efforts will go a long way toward keeping your outdoor sanctuary safe from pests and disease while setting the stage for a beautiful spring awakening.
Pruning Perennials And Shrubs
Cutting back perennials and shrubs is an important step in preparing your garden for the winter months.
Deadheading is the process of removing spent flowers, which encourages more blooms and helps to maintain the health of your plants.
When pruning perennials and shrubs, it’s important to use the right pruning techniques to ensure you don’t damage the plant.
Always use sharp, clean pruning tools and avoid cutting too close to the base of the plant.
When cutting back perennials, wait until after the first frost, which will help prevent disease from spreading.
Deadheading should be done throughout the growing season, and pruning should be done after the last frost in the spring.
Cutting Back
When it’s time to prepare your garden for the winter months, one essential task is cutting back and pruning perennials and shrubs. This not only keeps your plants healthy but also ensures they’ll come back strong next spring. We’re going to explore some tips on how best to cut back those plants while keeping our gardens safe and tidy.
Firstly, let’s focus on pruning perennials. It’s important to remove dead or diseased foliage from these plants before winter sets in. You can do this by using a pair of sharp, clean gardening shears or even just your hands if the stems are thin enough. Be careful when you’re cutting; try not to damage any healthy parts of the plant. Make sure you dispose of any removed material properly – don’t leave it lying around as it may harbor pests or diseases that could harm other plants.
Now, let’s move on to shrubs. Pruning them during fall helps maintain their shape and prevent branches from becoming too crowded or weak over time. When cutting back shrubs, always make sure you have a clear plan in mind: decide which branches need removing and where new growth should be encouraged. Cut off any dead wood first, then trim away weaker branches so that stronger ones have room to grow. Remember to angle your cuts slightly downward so water doesn’t pool on the cut surface – this reduces the risk of rot setting in over winter months.
And there you have it! A well-pruned garden ready for whatever Mother Nature has in store over the colder season.
Deadheading
Now that we’ve covered the basics of pruning perennials and shrubs, let’s talk about another important aspect: deadheading.
Deadheading is a simple technique where you remove spent flowers from your plants to encourage new growth and keep them looking fresh throughout the season. It’s like giving your garden a mini makeover! Plus, it helps prevent diseases from spreading by removing areas where they can thrive.
Deadheading is easy – all you need is a pair of sharp, clean gardening shears or even just your hands if the stems are thin enough. Simply snip off any faded blooms at their base, making sure not to damage healthy parts of the plant in the process.
You’ll be amazed at how quickly this small task can make a big difference in keeping your garden safe and tidy! So go ahead and give deadheading a try next time you’re out tending to your beloved plants.
Your garden will thank you for it with healthier plants and more vibrant colors throughout the growing season!
Pruning Techniques
Now that we’ve covered the basics of pruning perennials, shrubs, and deadheading, let’s dive into some specific pruning techniques to make sure your garden stays safe and healthy. Different plants may require various methods, so it’s essential to familiarize yourself with these techniques for a thriving garden.
Remember, using proper strategies not only keeps your plants looking great but also ensures their safety by preventing diseases and pests from taking over.
One popular pruning technique is thinning out branches, which involves removing select stems or branches entirely to improve air circulation and light penetration within the plant. This method helps reduce the risk of disease spreading due to overcrowding while still maintaining the natural shape of the plant.
Another technique is heading back, where you cut off part of a branch or stem just above a bud or side shoot – this encourages bushier growth by stimulating multiple new shoots from that point.
So don’t be afraid to experiment with these different pruning techniques in your garden! Your plants will benefit greatly from regular maintenance, providing them with better conditions for growth and keeping potential threats at bay. And as you gain experience in applying these methods effectively, you’ll find that your gardening skills have improved along with the overall health and beauty of your outdoor space.
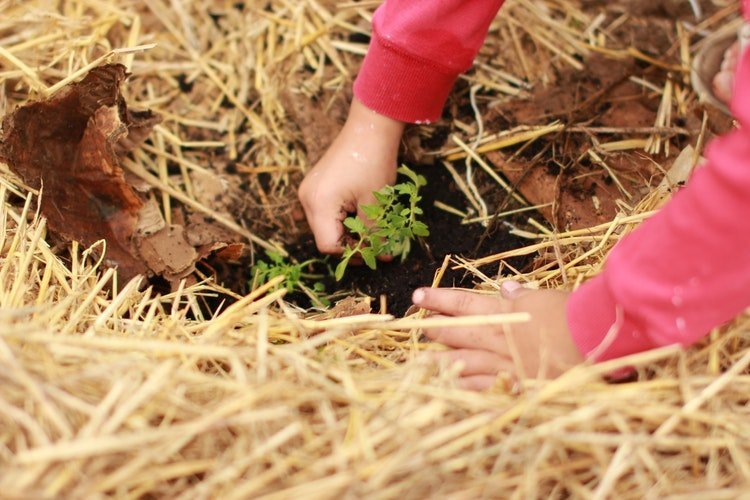
Dividing And Transplanting Perennials
Imagine your garden as a bustling neighborhood filled with colorful residents – the perennials. Just like people, these plants need some space to grow and thrive. After a few years of living in the same spot, it might be time for them to move out and find new homes within your garden’s community.
This process is called dividing and transplanting perennials, which not only helps maintain their health but also allows you to fill any empty spots or share with friends and neighbors.
Before diving into this task, do some research on which of your perennials are ready for division. A general rule of thumb is that most perennials can be divided every three to five years. Some signs indicating that they are good candidates include overcrowding, decreased flowering, or dead areas at the center of the plant clump.
Once you have identified which plants need relocation, choose an overcast day with cooler temperatures so your perennials won’t experience too much stress during the moving process.
To begin dividing and transplanting your chosen plants, carefully dig around their root system while trying not to damage any vital roots. Gently lift the entire clump from the ground and separate it into smaller sections using a sharp knife or spade; each section should contain healthy roots and shoots.
Next, prepare new planting holes in other parts of your garden (or pots if sharing) by digging deep enough to accommodate the perennial’s root system comfortably without bending or breaking them. Place each newly-divided piece into its designated hole, ensuring there is adequate spacing between neighboring plants to allow for future growth; then backfill soil firmly around the roots while keeping them cool by watering thoroughly throughout each step until well-established in their new home.
Taking this extra effort now will result in healthier plants next growing season that continue providing beauty and enjoyment year after year! So go ahead – give those lovely perennials room to spread their wings (and roots), ensuring a flourishing garden that remains vibrant and welcoming for seasons to come.
Planting Bulbs For Spring Blooms
When selecting bulbs, it’s important to pick ones that are firm and plump.
Plant them at a depth two to three times the size of the bulb and space them six to eight inches apart.
For bigger bulbs, plant them deeper and farther apart.
Remember to read the instructions on the package for specific spacing and planting depth.
Selecting Bulbs
Imagine walking through your garden in the spring, with beautiful flowers blooming all around you. That’s what planting bulbs can do for your garden! Bulbs are a fantastic way to add color and life to your garden after the cold winter months have passed.
When selecting bulbs for your spring blooms, there are a few key factors to keep in mind that will ensure healthy growth and vibrant colors.
First of all, it’s important to choose high-quality bulbs from reputable sources. You’ll want to make sure they’re firm, plump, and free of any signs of rot or damage. Look for ones that come with clear instructions on planting depth, spacing requirements, and sunlight preferences – this information is crucial for their success in your garden! Additionally, consider choosing bulbs that are native to your region or climate so they’re more likely to thrive in your specific conditions.
Another thing to think about when selecting bulbs is the variety of flower types and bloom times. By carefully planning out which species you plant and where you place them, you can create gorgeous displays that last throughout the entire spring season.
For example, early-blooming varieties like crocuses and daffodils can be combined with mid-season tulips and late-blooming irises for continuous waves of color. Mixing different heights and textures within these groupings also adds visual interest while ensuring each flower has its own space to shine.
With thoughtful selection and proper care during planting time, you’ll be rewarded with stunning blossoms that transform your garden into a cheerful oasis come springtime!
Planting Depth And Spacing
Now that you’ve carefully chosen the perfect bulbs for your spring garden, it’s time to focus on planting depth and spacing. These two factors play a major role in ensuring your flowers grow up strong and healthy, creating a safe haven of vibrant colors for you to enjoy.
Don’t worry – getting this part right is easier than you might think!
When determining how deep to plant each bulb, a general rule of thumb is to aim for about three times the height of the bulb itself. This helps protect them from harsh weather conditions while still allowing their roots plenty of room to spread out and anchor themselves securely into the soil.
As for spacing, be sure to follow the recommendations provided with your specific bulbs. Giving each flower enough space ensures they won’t compete too much for nutrients or sunlight – instead, they’ll work together as a team to create an inviting atmosphere full of life.
By paying attention to both planting depth and proper spacing, you’re setting your bulbs up for success from day one! With these basics covered, you can look forward to watching them flourish throughout the spring season and transform your garden into a colorful sanctuary where safety reigns supreme.
Adding Mulch For Insulation
Now that you’ve planted your bulbs for a colorful spring display, it’s time to focus on keeping the rest of your garden safe and warm during the winter months.
One effective way to do this is by adding mulch around your plants. Mulch not only provides insulation against harsh temperatures but also helps retain moisture in the soil and suppress weeds.
When selecting mulch materials, consider using organic options like shredded leaves, straw, or wood chips. These natural choices break down over time, enriching your soil with nutrients and improving its overall structure.
To apply the mulch, spread a layer about 2-3 inches thick around each plant, being careful not to cover the base of the stem as this can cause rotting issues. You can also add an extra layer if you live in colder climates or want added protection for more sensitive plants.
As you prepare your garden for winter, don’t forget about this important step! Adding mulch will help ensure that your plants survive through frigid temperatures and emerge strong and healthy once spring arrives again.
So grab some gloves, gather up those fallen leaves, and get ready to give your garden a cozy blanket of insulation for the frosty days ahead!
Preparing Garden Beds For Planting
Winter’s chill is fast approaching. The time to prepare your garden beds for planting has arrived, ensuring a healthy and productive growing season next year. By taking these crucial steps now, you’ll be setting the stage for a bountiful harvest in the spring.
First things first, clear away any debris from your garden beds like dead leaves or weeds that could harbor pests or diseases. Once the area is clean, it’s important to amend the soil with organic matter such as compost or aged manure. This will not only improve the fertility of your soil but also help retain moisture during dry periods which can be especially helpful for young plants just getting established.
Another valuable step you can take is testing your soil pH; this information allows you to make necessary adjustments so that nutrients are more readily available to your plants when they need them most.
As winter approaches and temperatures drop below freezing, consider adding a layer of mulch on top of your garden beds. Mulching serves several purposes: it helps insulate plant roots from extreme cold, prevents erosion by protecting against harsh winds and heavy rain, and assists in suppressing weed growth come springtime – giving your new seedlings their best chance at survival.
There are many types of mulch available (such as straw, wood chips, or shredded leaves), each offering its own unique benefits depending on what type of plants you plan to grow in the coming year. Choose wisely based on the specific needs of your garden!
Protecting Trees And Shrubs With Burlap
As you prepare your garden for the colder months, it’s essential to think about how to protect your trees and shrubs.
One helpful method is using burlap to shield them from harsh winter conditions. Burlap is a great option because it allows air circulation while still providing protection against wind, frost, and heavy snowfall.
To get started with wrapping your trees and shrubs in burlap, first choose which plants need extra care during the winter months. You’ll want to focus on young or newly planted trees, as well as delicate shrubs that are more susceptible to damage from cold temperatures.
Once you’ve identified the plants that need help, purchase enough burlap material to cover each one completely. When wrapping the plants, make sure not to pull too tightly; this could cause damage or breakage. Instead, wrap loosely around the tree trunk or shrub branches so they have room to breathe but remain protected.
Taking these steps will ensure that your precious trees and shrubs stay safe throughout the winter season. By investing time and effort into protecting your garden now, you can look forward to seeing healthy growth when spring arrives next year.
So go ahead and give those vulnerable plants some love – they deserve it!
Winterizing Garden Tools And Equipment
As the gardening season comes to an end, it’s essential not only to prepare your garden for winter but also to take care of your tools and equipment. Properly maintaining and storing these items can ensure their longevity and save you money in the long run.
Let’s dive into some tips on how to winterize your garden tools and equipment so that they are ready for use when spring finally arrives.
-
Clean them up: Remove any dirt or debris from your tools by wiping them down with a damp cloth or rinsing them with water. Remember to dry them off thoroughly afterward.
-
Sharpen blades: Sharpen pruning shears, loppers, and other cutting tools using a sharpening stone or file. This will make your work easier during the next gardening season.
-
Oil metal parts: Lightly coat metal surfaces (like hinges and springs) with oil or WD-40 to prevent rust.
-
Inspect handles: Check wooden tool handles for cracks or splinters. Sand down rough areas and apply linseed oil to protect against moisture damage.
-
Store properly: Keep tools in a cool, dry place like a garage or shed. Hang larger instruments on hooks or store them off the ground to avoid contact with damp floors.
By taking care of our tools now, we’re ensuring that they’ll be in tip-top shape once the warmer months roll around again. Plus, following these simple steps can give us peace of mind knowing that our investment is safe and protected throughout the colder seasons.
So let’s grab those gloves one last time this year, get our gear cleaned up, maintained, and tucked away – because we know there is nothing better than stepping out into our gardens come springtime with everything in perfect working order!
Cleaning And Storing Plant Containers
Cleaning and storing plant containers is like giving your garden tools a well-deserved rest after working hard for you all season long. As the colder months approach, it’s essential to make sure that your pots and containers are properly cleaned, stored, and ready for use when spring returns. Not only will this keep them in good condition, but it’ll also help prevent diseases from spreading among your plants.
First things first, empty out any remaining soil or debris from each container; this can be done using a trowel or even just by tapping the pot upside-down.
Next, give each one a thorough scrubbing with warm water and mild soap to remove any dirt or residue left behind. It may be tempting to skip this step if your containers don’t appear dirty at first glance; however, doing so can lead to unforeseen issues down the road, such as mold growth or pest infestations. Remember that safety starts with cleanliness!
Once everything has been washed clean and given ample time to dry completely (which might take longer than expected on damp fall days), find an appropriate storage spot where they won’t be exposed to harsh weather conditions or extreme temperatures over winter.
This could mean stashing them away in a shed or garage, stacking them neatly underneath an outdoor table covered with a tarp, or placing smaller ones inside larger ones to save space.
By taking these simple steps now, you’re not only ensuring the longevity of your gardening gear but also promoting overall safety within your garden sanctuary come next year’s planting season!
Installing Protective Covers Or Structures
As fall turns to winter, it’s essential to protect your garden from the harsh elements. One way to do this is by installing protective covers or structures over your plants and garden beds. These safeguards can help keep your plants warm and shield them from frost, snow, ice, and other cold-weather hazards.
There are various types of covers you can use in your garden. For smaller plants, consider using cloches – bell-shaped glass or plastic containers that cover individual plants. Cloches trap heat inside while still allowing sunlight through for photosynthesis.
If you have larger areas to protect, try using row covers made of breathable fabric materials like fleece or polypropylene. Row covers can be draped directly over plants or stretched across hoops or stakes to form a low tunnel.
Cold frames and greenhouses also provide excellent protection against winter weather; they create an enclosed space where temperatures remain warmer than outside conditions.
When setting up these protective measures, make sure they’re securely anchored so they won’t blow away during storms. It’s also crucial to monitor the temperature under the covering daily if possible – remember that on sunny days even in winter months, it may become too hot for some plants underneath!
To avoid overheating, lift the covers when needed for proper ventilation or choose materials with built-in vents. By taking these steps to install protective covers or structures in your garden, you’ll ensure that your beloved plants stay safe throughout the challenging winter season ahead.
Fertilizing And Amending Soil
Imagine you’re a dedicated gardener who has spent countless hours tending to your plants, only to find them struggling in the cold winter months. Wouldn’t it be disheartening?
To avoid such situations and keep your garden thriving even during the chilly season, it’s crucial to fertilize and amend the soil in fall. Fertilizing and amending soil help replenish essential nutrients that may have been depleted over time or washed away by rainfall. It also ensures better drainage, so water doesn’t pool around plant roots and cause damage when temperatures dip below freezing.
Start by testing your soil to identify any nutrient deficiencies or imbalances. Once you know what needs fixing, add organic matter like compost or aged manure to improve overall soil health. Then, apply slow-release granular fertilizer based on the specific needs of your plants. Taking care of these tasks before winter arrives will give your garden a head start for spring growth.
Your plants will thank you as they show off their lush foliage and vibrant blooms next year! Remember: healthy soil equals happy plants. So don’t wait until it’s too late – prepare your garden now for colder days ahead by giving attention to its foundation: the fertile ground beneath our feet!
Creating A Plan For Next Year’s Garden
As you prepare your garden for the winter months, it’s also a great time to start planning for next year’s garden.
Creating a plan can help ensure that your garden will be even more successful and beautiful in the coming growing season. Plus, having a solid plan in place can provide peace of mind and make gardening tasks feel less overwhelming.
When creating your plan, consider what worked well this past year and what could use improvement. Think about which plants thrived and which struggled, as well as any issues with pests or diseases.
This is an excellent opportunity to learn from your experiences and make adjustments to create a healthier, safer environment for your plants next year. Don’t forget to factor in crop rotation if you’re growing vegetables, as changing where they are planted each year can help prevent soil-borne diseases and maintain nutrient levels in the soil.
As you finalize your plan for next year’s garden, remember to keep safety at the forefront of your decisions. Choose sturdy structures for trellises and supports that won’t topple over during strong winds or under heavy plant growth.
Also, consider adding paths between planting areas so you can safely navigate through your garden without stepping on precious plants or risking injury due to uneven ground. With careful thought and preparation now, you’ll be ready to hit the ground running when spring arrives – ensuring a thriving, safe space for all who enjoy it!
Frequently Asked Questions
What Are Some Ways To Maintain A Healthy Lawn During The Winter Months?
Keeping your lawn healthy during the winter months might seem like a challenge, but with a few simple steps, you can ensure it stays in great shape.
Start by giving your grass one last good mow before the cold weather sets in, and remember to rake up any fallen leaves so they don’t smother your lawn.
Aerate the soil to help oxygen and nutrients reach the roots more easily, while also adding some winter fertilizer to give your lawn an extra boost of nourishment.
Don’t forget to avoid walking on frozen grass as this can cause damage.
By taking these precautions, you’ll be able to enjoy a lush green yard when spring comes around!
How Can I Protect My Garden’s Soil Quality From Harsh Winter Conditions?
To keep your garden’s soil in tip-top shape during the chilly winter months, there are a few simple steps you can follow.
First, consider adding a layer of mulch or compost to provide an insulating barrier that helps retain moisture and protects against frost damage. This not only keeps your plants cozy but also enriches the soil with nutrients for next year’s growing season!
Additionally, planting cover crops like clover or rye grass can shield the ground from erosion while boosting its fertility at the same time.
Don’t forget to give your garden beds some breathing room by avoiding walking on them when they’re wet or frozen – this prevents compaction which could hinder future plant growth.
By following these tips, you’ll be ensuring a safe and healthy environment for your beloved plants throughout those long, cold winter nights.
Are There Any Specific Winter Care Tips For Vegetable Gardens Or Fruit Trees?
Imagine your vegetable garden and fruit trees tucked in safely, snug under a blanket of snow or frost.
To ensure their protection during winter months, there are specific care tips to follow.
For vegetable gardens, clear away any remaining plant debris and add a layer of organic mulch like straw or shredded leaves to protect the soil from harsh conditions.
Fruit trees require pruning once they’ve gone dormant; this helps prevent diseases and encourages healthy growth come springtime.
You can also wrap tree trunks with burlap or use white latex paint on young trees’ bark to guard against sunscald damage.
By taking these precautions, you’re providing that much-needed shield for your plants to endure those icy days ahead.
What Are Some Indoor Gardening Activities That Can Be Done During The Winter Months To Prepare For Spring?
During the chilly winter months, you can still flex your green thumb by engaging in some fun indoor gardening activities to gear up for spring.
Try starting seeds indoors for veggies and flowers that’ll be ready to transplant when warmer weather arrives.
You could also experiment with growing herbs or small vegetable plants on a sunny windowsill, providing fresh flavors for your cooking all season long.
Moreover, tending to houseplants can offer a great opportunity not only to sharpen your plant care skills but also to create a cozy atmosphere at home while ensuring cleaner air.
So go ahead and enjoy nurturing life inside while it’s cold outside – it’s a safe and rewarding way to stay connected with nature during those frosty days!
How Can I Properly Store And Care For My Garden Furniture And Decorations During The Winter?
To keep your garden furniture and decorations in top shape during the winter months, it’s essential to store them properly and provide a little extra care.
First, clean all items thoroughly by wiping down surfaces, brushing off dirt, and washing cushions or fabrics as needed.
Next, protect wood or metal pieces with weather-resistant covers, sealants, or rust-inhibiting sprays.
If possible, move smaller decorative items indoors for safekeeping and stack larger furniture pieces neatly in a dry area like a garage or shed.
By taking these steps, you’ll not only ensure the longevity of your beloved garden belongings but also create a safer environment free from potential hazards that could result from damaged or deteriorated items when spring arrives.
Conclusion
In conclusion, taking care of your garden during winter months is essential for a healthy and fruitful spring. With proper lawn maintenance, soil protection, vegetable and fruit tree care, indoor gardening activities, and storage of furniture and decorations, you’ll be well-prepared for the upcoming growing season.
Did you know that about 85% of Americans have a yard or garden? That’s a lot of people who can benefit from these winter gardening tips!
So let’s put in some effort this winter to make our gardens thrive come springtime.