Growing garlic is not only a fun and rewarding gardening activity, but it’s also a great way to add some extra flavor to your favorite dishes. Plus, did you know that garlic has been used for centuries as a natural remedy for various health issues? It’s no wonder so many people want to grow their own!
If you’ve ever thought about giving it a try, you’re in luck – we’ve put together some handy tips and techniques to help you achieve the most successful harvest possible.
Don’t worry if you’re new to gardening or have never grown garlic before; we’ve got your back! This guide will walk you through everything from picking out the best bulbs to plant, understanding when it’s time to harvest them, and even how to store your fresh cloves until they’re ready for use.
So grab those gloves and let’s get started on this exciting journey towards having our very own supply of fragrant and healthy garlic right at home!
Choosing The Right Garlic Variety
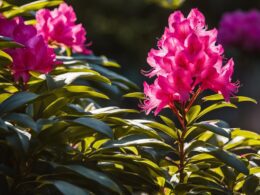
Like a tale as old as time, garlic has been an essential ingredient in various cuisines around the world. It’s not just about adding that extra kick to your favorite dishes; it’s also known for its numerous health benefits and natural ability to repel pests from your garden.
One of the first steps towards growing this magical plant is choosing the right variety for you. There are two main types of garlic: softneck and hardneck.
Softneck varieties, such as Silverskin and Artichoke, have a milder flavor and tend to grow well in warmer climates. They’re also great for braiding due to their flexible stems, making them perfect if you want to create beautiful edible decorations or simply store them easily after harvest.
On the other hand, hardneck varieties like Rocambole and Purple Stripe offer a stronger taste but require colder winters for proper growth—ideal if you live in cooler regions with harsher temperatures.
When selecting which type of garlic will suit your needs best, consider factors like climate, intended use (culinary or decorative), and personal preferences when it comes to flavor intensity. By being mindful of these aspects while making your decision, you’ll be one step closer to enjoying a bountiful harvest of delicious homegrown garlic that offers protection against unwanted critters—and maybe even vampires!
Selecting High-Quality Bulbs For Planting
One of the most important steps in growing a successful garlic crop is choosing high-quality bulbs for planting. It might be tempting to just grab some bulbs from your local grocery store, but this could lead to disappointment later on. Garlic sold at stores may not always be suitable for planting as they can carry diseases or have been treated with chemicals that prevent them from sprouting properly. Instead, it’s best to purchase certified disease-free and untreated seed garlic from a reputable nursery or online supplier.
When selecting your seed garlic, keep an eye out for healthy-looking bulbs with plenty of large cloves. This will ensure that you’re starting off with strong plants which are more likely to produce big, flavorful bulbs come harvest time. Avoid any soft or moldy bulbs, as well as those with small or shriveled cloves – these won’t grow well and could even spread disease throughout your garden!
It’s also worth considering the different varieties available; there are many types of garlic out there ranging from mild-tasting to extra zesty. Experimenting with various kinds allows you to find the perfect flavor profile for your cooking needs while also adding diversity to your garden.
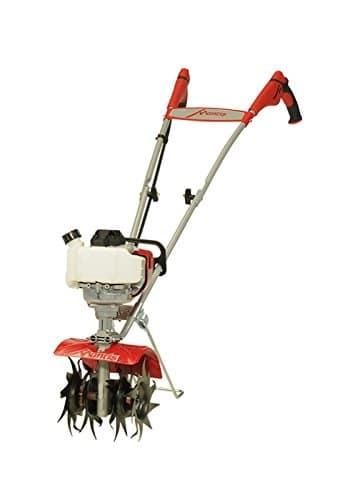
Now that you’ve chosen your top-notch seed garlic, it’s time to plant! Break apart each bulb into individual cloves shortly before planting – doing so too far in advance can cause them to dry out and lose their vigor. When placing the cloves into the soil, make sure to position them pointy end up about 2-3 inches deep and approximately 6 inches apart.
With proper care and attention, these carefully selected high-quality cloves will soon transform into thriving plants ready for harvest when the time comes! So go ahead and give yourself peace of mind by starting off on the right foot – choose great quality seed garlic and enjoy a bountiful yield of delicious homegrown goodness!
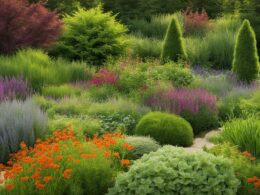
Preparing The Soil For Optimal Growth
Testing soil’s pH is important for garlic growth, so it’s good to do this before planting.
Adjusting the pH level is necessary if it’s too high or low.
Fertilizers can help nutrients get to the soil and should be chosen carefully.
Organic fertilizers are best for garlic and should be applied according to package directions.
Testing Soil’s Ph
Before planting garlic, it’s important to test your soil’s pH level. This is because they prefer slightly acidic soil with a pH between 6 and 7. If the soil isn’t within this range, don’t worry! There are simple ways to adjust its acidity so that you’ll have a successful harvest.
To begin testing, you can purchase an easy-to-use home pH testing kit from any garden supply store or online retailer. These kits usually come with instructions on how to collect and prepare samples of your soil for accurate results. It might seem intimidating at first, but remember that it’s better to be safe than sorry when it comes to growing healthy crops!
If your test shows that the soil is too acidic (a pH below 6), adding lime can help raise the pH levels. On the other hand, if your soil is too alkaline (above pH 7), sulfur products or organic matter like peat moss will lower its acidity. Just make sure to follow product guidelines and recommendations before applying anything in order not to overcorrect the issue.
With these adjustments made, you’re one step closer toward having fertile ground where your garlic can thrive!
Adjusting Soil Ph
Now that you’ve tested your soil’s pH and know if it needs adjusting, let’s talk about how to make those changes so your garlic can grow strong and healthy. Remember, safety first – always follow product guidelines when applying any amendments to your garden.
Adjusting the soil pH might seem like a big task for young gardeners, but don’t worry! With just a few simple steps, you’ll have perfect soil conditions in no time.
If your soil is too acidic (below pH 6), adding lime will help raise its levels closer to what garlic loves. On the other hand, if your test shows that the ground is too alkaline (above pH 7), using sulfur products or organic matter like peat moss will bring down its acidity. Just be sure not to overdo it – finding the right balance is essential for keeping both you and your plants safe!
By making these necessary adjustments, you’re well on your way to creating an ideal environment where your garlic can thrive while ensuring everything stays nice and secure for all involved.
Happy gardening!
Planting Garlic Bulbs: Timing And Spacing
Now that your soil is well-prepared, it’s time to move on to the next step in growing garlic: planting the bulbs. Knowing when to plant and how much space to give each bulb will greatly impact your harvest success.
First things first, let’s talk about timing. The best time to plant garlic depends on where you live but generally falls into two categories: fall or early spring planting. Fall planting allows for a longer period of growth before winter sets in, providing more robust plants with larger cloves. In most regions, October through November is an ideal window for planting; however, if you experience harsh winters, consider waiting until early spring (March-April) so your tender sprouts won’t be damaged by frost. Keep in mind that varieties such as hardneck and softneck may fare better depending on climate conditions – don’t hesitate to consult local garden centers or experienced growers for advice tailored to your area!
As you venture out into your freshly prepared plot, armed with plump garlic bulbs eager to grow roots and shoots, remember this rule of thumb when spacing them out: allow 4-6 inches between individual cloves and 12-18 inches between rows. Be sure not to push the cloves too deep into the soil; they should be planted just below the surface with their pointy ends facing up. Adequate spacing ensures each clove gets enough nutrients from the soil while also preventing diseases from spreading easily among closely packed plants.
With proper planning and attention given to planting times and spacing requirements, you’re taking important steps toward achieving a bountiful garlic harvest.
As you watch those green shoots emerge confidently from the ground over time, knowing they’ve been set up for success thanks largely in part due to your careful preparation work can provide immense satisfaction indeed!
So go ahead – get those hands dirty and enjoy nurturing one of nature’s finest flavors right in your own backyard!
Watering And Fertilizing Your Garlic Plants
Taking care of your garlic plants involves proper watering and fertilizing routines. It’s essential to find the right balance when it comes to giving them enough water, especially since overwatering can lead to root rot or other diseases. Generally, you should aim for about 1 inch of water per week during the growing season.
You could use a rain gauge to measure rainfall, and if there isn’t enough natural precipitation, supplement by using a hose or irrigation system. Be sure to avoid getting the leaves wet as this can promote fungal growth.
Fertilizing your garlic is also important for encouraging strong, healthy plants that produce large bulbs. When planting in the fall, mix some slow-release organic fertilizer into the soil before adding your cloves. This will give them an initial boost of nutrients to help with root development and early growth.
As spring arrives and your garlic starts putting out new green shoots, it’s time for another round of feeding! Apply a balanced liquid fertilizer every few weeks until about mid-May (or around one month before harvest). Remember not to exceed recommended amounts; too much fertilizer might cause lush foliage but small bulb formation.
By following these simple guidelines on watering and fertilizing, you’ll be well on your way to cultivating vibrant garlic plants that yield bountiful harvests. Pay attention to their needs throughout the growing process and make adjustments accordingly – just like any nurturing relationship!
With patience, dedication, and tender loving care, you’ll enjoy delicious homegrown garlic while taking pride in knowing that you’ve nurtured them from seedlings all the way up to fully-grown bulbs ready for consumption. So go ahead – get those hands dirty and watch your beloved garlic flourish under your diligent supervision!
Managing Pests And Diseases
As your garlic plants continue to flourish with proper watering and fertilization, it’s essential to keep a watchful eye on potential threats. Just like most things in life, even the healthiest of gardens can encounter some unwanted guests. The good news is that there are ways to manage pests and diseases without compromising the safety of your garden or your future harvest.
Coincidentally, many natural remedies exist for combating common garlic pests such as aphids, whiteflies, and thrips. Neem oil, for example, is an organic solution that can be used sparingly on affected areas; this pesticide effectively deters insects while leaving beneficial creatures unharmed. Another option is introducing ladybugs into your garden – these seemingly innocent beetles have quite an appetite for aphids!
Additionally, maintaining proper airflow around your plants by spacing them correctly helps prevent fungal growth which can lead to various plant diseases. When it comes to keeping your garlic plants healthy and disease-free, vigilance is key. Regularly inspecting leaves for signs of damage or discoloration will help you identify issues early on so they can be dealt with promptly.
Remember that prevention plays a vital role too: ensuring adequate sunlight exposure, using clean gardening tools, and rotating crops yearly all contribute to creating an environment where both pests and diseases struggle to survive. With diligence and dedication throughout the growing process, you’ll soon find yourself harvesting beautiful cloves of homegrown garlic – safe from harm’s way!
Mulching To Protect And Nourish Your Garlic
Mulching is an essential step in ensuring a bountiful garlic harvest. Not only does it help protect your precious crop from harsh weather conditions, but it also provides valuable nutrients to the soil as it decomposes. With proper mulching techniques, you can create a safe and nourishing environment for your garlic plants to thrive.
Some key benefits of mulching that will make you feel secure about your garlic’s well-being include:
-
Insulation: A thick layer of mulch protects tender roots and bulbs from temperature extremes, keeping them cozy during cold snaps and cool on hot days.
-
Moisture retention: Mulch acts like a sponge, holding onto water so your garlic plants stay hydrated longer between watering sessions.
-
Weed suppression: Say goodbye to pesky weeds competing with your garlic for nutrients! A generous layer of mulch helps smother unwanted plant growth while allowing your desired crops to flourish.
Incorporating mulch into your gardening routine may seem daunting at first, but rest assured that it’s easier than you think. Start by choosing organic materials such as straw, grass clippings or shredded leaves – these break down over time and enrich the soil with vital nutrients. Spread a 3-4 inch layer around each planted clove, taking care not to pile it too close to the base of the stem; this avoids creating a damp haven for pests or diseases.
As the growing season progresses, replenish the mulch as needed to maintain its depth and effectiveness. The feeling of security provided by diligently tending to your mulched garden will be worth every bit of effort when you’re rewarded with plump, flavorful cloves come harvest time.
Recognizing When It’s Time To Harvest
Now that you have learned how mulching can protect and nourish your garlic, it’s time to look forward to the exciting moment of harvesting. Knowing when to harvest is crucial for ensuring great-tasting garlic with a long storage life.
In this section, we will cover some key indicators that signal it’s time to pull those delicious bulbs out of the ground. A general rule for knowing when to harvest garlic is counting the number of leaves on each plant. Garlic plants typically have between six and eight green leaves at maturity.
When about half of these leaves turn brown, your garlic should be ready for harvest. This browning usually occurs around mid-summer, but local climate conditions may affect the timing slightly. It might also help to mark your calendar based on the variety of garlic you planted since different varieties mature at various times throughout summer.
Aside from observing leaf color, another method for determining if your garlic is ready for harvest involves gently digging up one or two sample bulbs from the edge of your garden bed. If they are fully formed and segmented into cloves – congratulations! Your hard work has paid off, and it’s time to collect your crop!
However, if individual cloves aren’t easily distinguishable yet or if the bulb feels soft overall, give them more time in the ground before attempting another test-harvest again later. Sure enough, patience pays off in reaping a bountiful harvest that makes all your efforts worthwhile.
Proper Harvesting Techniques
Harvesting timing is important for garlic. For best results, you should harvest when the tops of the plants begin to yellow and the bottom leaves start to brown.
Separating bulbs is the next step. Gently loosen the soil around the bulbs and then pull them from the ground. It’s important to handle the bulbs carefully so you don’t break them.
After separating the bulbs, you’ll need to cure them. Curing helps garlic last longer and develop flavor. You should spread the bulbs out in a dry, well-ventilated area for a few weeks.
With proper timing and care, you can have a successful harvest of garlic.
Harvesting Timing
Imagine you’re standing in your lush, green garden on a warm summer day. You’ve been carefully tending to your garlic plants for months, and it’s finally time to harvest those flavorful bulbs.
Picking the right moment to harvest is crucial; if you wait too long or not long enough, you might miss out on the full potential of your precious crop.
When it comes to timing, patience truly is a virtue. Garlic typically takes about eight to nine months from planting to reach maturity. As the days get longer and warmer, keep an eye out for yellowing leaves – this could be an indication that it’s time to dig up those treasures hidden beneath the soil.
Some experts suggest waiting until at least half of the plant’s lower leaves have turned brown while others advise lifting a test bulb as soon as most of its top foliage has wilted away. Either way, make sure not to leave them in the ground too long after they’re ready because overripe garlic can split open and spoil more easily.
To ensure a safe and successful harvest, gently loosen the soil around each plant with a fork or small shovel before pulling them up by their stalks. Avoid using excessive force when doing so because damaged bulbs may not store well later on.
After harvesting, lay your garlic out somewhere shady and well-ventilated for two weeks or so to let them dry properly. This curing process will help preserve their flavor and extend their shelf life – ensuring that all your hard work pays off in deliciously garlicky dishes throughout the year!
Separating Bulbs
Now that you’ve harvested and cured your garlic, it’s time to separate the bulbs for storage or planting. Don’t worry; this step is a piece of cake! The key here is to be gentle while handling the individual cloves because they’re sensitive little things that can easily get bruised or damaged.
To start separating your bulbs, simply hold onto the base of each one and carefully twist off the outer layers of skin until you reveal those beautiful, plump cloves inside. It’s like unwrapping a natural treasure chest filled with garlicky goodness!
You might want to wear gloves during this process just in case any strong-smelling oils leak out – after all, safety first!
Remember not to rush through this task – take your time and enjoy the satisfaction of revealing perfectly intact garlic cloves, ready for cooking up some scrumptious meals or planting next season’s crop. This way, you’ll keep both yourself and your precious harvest safe every step of the way.
Curing Garlic
So, you’ve successfully harvested your garlic and now it’s time to move on to the next important step – curing! Curing is a process that not only ensures your garlic stays fresh for longer but also helps enhance its flavor. Trust me, taking the extra effort in this stage is definitely worth it when you’re enjoying some homemade garlic dishes later on.
Curing garlic isn’t too difficult either; all you need is a cool, dry place with good air circulation where your precious harvest can safely rest for about 2-3 weeks. You can tie the stalks together and hang them up or simply spread them out on a clean surface like a table or shelf. Just make sure they don’t touch each other so there’s enough room for air to flow around each bulb – remember, safety first!
After patiently waiting for those few weeks, you’ll notice the outer layers of skin becoming papery as the moisture evaporates from the bulbs. This means your garlic is well-cured and ready to be stored or used in cooking some mouthwatering meals.
And hey, why not share some with friends and family? They’ll appreciate the love and care put into growing these delicious gems!
Curing Your Garlic For Longevity
Did you know that properly cured garlic can last up to six months in storage? Curing your garlic is an essential step for ensuring a long-lasting and successful harvest. By taking the time to cure your garlic, you’ll be able to enjoy its flavorful goodness well into winter while also reducing any risk of mold or decay.
To begin the curing process, find a well-ventilated area away from direct sunlight – such as a shed, garage, or even a covered porch. Hang your harvested garlic by their stalks or lay them out on trays with plenty of space between each bulb. It’s important not to rush this stage; let the bulbs dry for at least three weeks before checking on them regularly. You’ll know they’re ready when the outer layers have dried and appear papery while the inner cloves are still firm but no longer moist.
Once your garlic has been adequately cured, it’s time to store them for future use. Carefully trim off any remaining roots and leaves (leaving about an inch of stem), then place the bulbs in mesh bags or loosely woven baskets where air can circulate freely around each one.
Keep these containers in a cool, dark place like a pantry or cupboard – avoiding damp environments that could lead to spoilage. With proper care and attention during both harvesting and curing stages, you’ll be rewarded with delicious homegrown garlic that lasts throughout the seasons!
Storing Your Harvested Garlic
Now that you’ve successfully cured your garlic for longevity, it’s time to focus on storing your harvested bulbs. Proper storage is essential to ensure the safety and quality of your garlic throughout its shelf life. In this section, we’ll discuss some key tips and techniques for safely storing your garlic harvest.
Here are five important steps to follow when storing your harvested garlic:
-
Choose a cool, dark location: Garlic should be stored in a place with low humidity levels and out of direct sunlight. A temperature range of 60-65°F (15-18°C) is ideal.
-
Ensure proper air circulation: Store your garlic in mesh bags or loosely woven baskets to allow for adequate airflow around the bulbs. Avoid plastic bags or containers that can trap moisture leading to mold growth.
-
Regularly inspect the bulbs: Periodically check on your stored garlic, looking for any signs of rotting or disease. Remove affected bulbs immediately to prevent spreading issues among other healthy ones.
-
Sort by size and variety: Larger cloves tend to have a longer shelf life than smaller ones; thus, use up small cloves first. Additionally, softneck varieties usually last longer than hardneck types so consume them accordingly.
-
Consider preserving methods if needed: If you’re unable to store all of your fresh garlic properly, consider alternative preservation methods like freezing or pickling.
By following these guidelines, not only will you enjoy the fruits (or rather vegetables) of your labor but also feel confident knowing that they are safe for consumption.
Remember that maintaining an orderly storage area helps protect both the integrity and taste of your homegrown garlic as well as keeps potential hazards at bay.
As we wrap up our discussion on growing and harvesting garlic, remember always prioritize safety while enjoying the satisfaction of cultivating one’s food supply. By adhering carefully to each step – from planting through curing and finally into storage – you can relish in the knowledge that your garlic harvest will remain safe, delicious, and ready to use in your favorite recipes for months to come.
Creative Uses For Your Homegrown Garlic
So, you’ve successfully grown your own garlic and now have a bountiful harvest. Congratulations! Now comes the fun part – putting that homegrown goodness to good use in your kitchen and beyond. Garlic is not only a delicious addition to many recipes but also has numerous health benefits and other creative uses you might not have considered before.
For starters, let’s talk about cooking with your freshly harvested garlic. Of course, it can be used in countless dishes like pasta sauces, stir-fries, soups, salad dressings, and more. But why not try something new?
How about making homemade garlic bread or even roasting entire bulbs for a rich, caramelized flavor that can be spread on crusty bread or added to mashed potatoes? Don’t forget about pickling some of those cloves too – they make a tasty snack or fantastic gift for friends and family who appreciate unique flavors!
Aside from its culinary prowess, did you know that garlic has been valued for centuries as an all-natural remedy for various ailments? Its antibacterial properties make it useful for treating minor cuts or scrapes; just crush up a few cloves into a paste and apply it directly onto the affected area.
Homegrown garlic can also help keep pests at bay in your garden by repelling insects like aphids when planted alongside vulnerable plants such as roses. And if vampires are causing any sleepless nights (just kidding!), rest assured knowing that your homegrown supply will provide ample protection against these mythical creatures.
Frequently Asked Questions
Can I Grow Garlic In A Container Garden, And If So, What Size Container Should I Use?
Absolutely! You can grow garlic in a container garden, making it a safe and convenient option for those who may not have access to traditional gardening spaces.
To ensure your garlic plants thrive, choose a container that is at least 12 inches deep and 10 inches wide. This will give the roots plenty of room to grow without becoming overcrowded or stressed.
Make sure the container has drainage holes as well, so excess water can escape and prevent root rot.
With proper care and attention, you’ll be on your way to a bountiful harvest of fresh garlic from your very own container garden!
How Can I Ensure A Continuous Supply Of Garlic Throughout The Year By Staggering Planting And Harvesting?
Did you know that the average person consumes about 2 pounds of garlic each year?
To ensure a continuous supply of garlic throughout the year, try staggering your planting and harvesting.
Plant different varieties with varying maturity times or plant cloves every few weeks to create a steady flow of ready-to-harvest bulbs.
By doing this, you’ll not only have fresh, homegrown garlic at hand but also enjoy peace of mind knowing exactly where your food comes from and how it was grown.
What Companion Plants Work Well With Garlic To Improve Its Growth And Flavor?
When planting garlic, it’s a great idea to include some companion plants that can help improve its growth and flavor.
Some popular choices are tomatoes, spinach, chamomile, marigolds, and yarrow – these buddies not only support your garlic but also bring their own benefits to the garden party!
For instance, tomatoes can repel pests while attracting beneficial insects; spinach provides nutrients as a green manure when chopped and dropped; chamomile enhances the taste of nearby veggies; marigolds ward off nematodes (nasty soil-dwelling creatures); and yarrow attracts pollinators like bees for a healthier ecosystem.
So go ahead, invite those plant pals over and watch them work together to keep your beloved garlic safe and thriving!
Are There Any Specific Environmental Factors, Such As Climate Or Altitude, That Can Affect The Success Of My Garlic Crop?
Certainly, climate and altitude can create critical conditions for your garlic crop’s growth.
Garlic generally thrives in cooler climates with well-draining soil, so higher altitudes might be more advantageous as long as the temperature doesn’t dip too low for extended periods of time.
Warm, wet weather during bulb development could cause issues like mold or rot, putting your precious plants at risk.
To ensure a safe and successful harvest, it’s essential to select suitable varieties that are adapted to your specific environment – hardneck types tend to tolerate colder temperatures better than softneck ones.
Keep an eye on moisture levels and adjust watering practices accordingly, safeguarding against potential problems while promoting prolific production.
Can I Use The Garlic Scapes (Flower Stalks) In My Cooking, And When Is The Best Time To Harvest Them?
Absolutely! Garlic scapes, the curly flower stalks that emerge from your garlic plants, can be a delicious addition to your meals.
The best time to harvest them is when they’re young and tender, usually in late spring or early summer. Just snip off the scapes near their base with scissors or pruners, being careful not to damage the rest of the plant.
Once harvested, you can use these flavorful green goodies in various dishes like stir-fries, pesto, soups, and even scrambled eggs. Plus, removing the scapes helps redirect energy back into growing bigger bulbs – so it’s a win-win situation for both you and your garlic crop!
Conclusion
In conclusion, growing garlic can be a piece of cake if you follow these tips and techniques. Just remember to:
- Choose the right container size
- Stagger your planting
- Find some good companion plants
- Consider any environmental factors that might affect your crop
Don’t forget about those flavorful garlic scapes too! By harvesting them at the right time, you’ll have an extra treat for your cooking adventures.
Happy gardening!