Why Should I Choose a Pre-Made Tiny House Instead of Building My Own?
When considering the advantages of pre-made tiny houses for spacious living, the main benefit lies in convenience and time-saving. Opting for a pre-made house eliminates several stages of planning, designing, and construction. By selecting a ready-to-move-in option, individuals can avoid the hassle and potential stress associated with building their own tiny homes from scratch. Additionally, pre-made houses often come with essential amenities and features already included, making the entire process more streamlined and efficient.
4 DIY Bird Bath Ideas for a Lovely Backyard
1. Old Sink DIY Bird Bath
Do you have an old sink lying around? Why not use it to build a really creative DIY bird bath? A wall-mount sink would be perfect, but you can turn every sink into a bird bath with a little bit of creativity. In the case of a wall-mount sink, things are easier because you can just mount it on a tree trunk instead of a wall, eliminating the need to build an extra support system for it. In order to complete this DIY, you need some wood screws that you’re going to use to attach the sink to the tree trunk. Don’t forget that you’ll also have to buy a drain plug for the sink.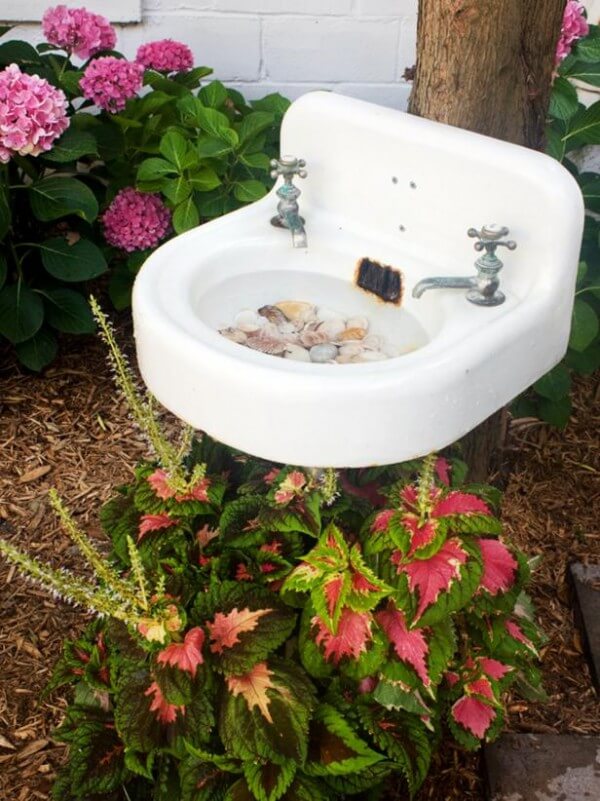 The rest of the DIY is completely up to you, which is what makes it so great. You can simply fill the sink with water and do nothing else, or you can get really creative and make the sink more than a bird bath. For instance, in the image above, there are seashells on the bottom of the sink, which adds a touch of marine charm. If you’re someone who loves the sea, bringing even a small part of it into your backyard would be an awesome idea.
You should also consider doing something to the bottom of the sink, especially in order to cover the empty tree trunk. Because using a kitchen cabinet for the sink isn’t realistic or in tune with the theme, you can plant flowers under and surrounding the sink, in order to provide it with a natural and colorful background. As you could see in the previous image, the colorful flowers contrast nicely with the white sink. Plus, they turn this DIY bird bath into a real decorative object for your garden or backyard.
The rest of the DIY is completely up to you, which is what makes it so great. You can simply fill the sink with water and do nothing else, or you can get really creative and make the sink more than a bird bath. For instance, in the image above, there are seashells on the bottom of the sink, which adds a touch of marine charm. If you’re someone who loves the sea, bringing even a small part of it into your backyard would be an awesome idea.
You should also consider doing something to the bottom of the sink, especially in order to cover the empty tree trunk. Because using a kitchen cabinet for the sink isn’t realistic or in tune with the theme, you can plant flowers under and surrounding the sink, in order to provide it with a natural and colorful background. As you could see in the previous image, the colorful flowers contrast nicely with the white sink. Plus, they turn this DIY bird bath into a real decorative object for your garden or backyard.
2. Pots DIY Bird Bath
This is one of the easiest DIY bird baths you can build in your garden. All you need are a couple of pots, some construction adhesive, a stake, and two saucers. The optional materials are: spray paint and acrylic paint. For the base of the bird bath, you should use large terracotta pots. Glue them together using the construction adhesive as in the image below. This is something that you can do in a matter of minutes, so the whole DIY shouldn’t take long. In order to decorate the pots, you can cover them in spray paint. This is a good idea because the adhesive will be noticeable on the terracotta pots and the spray paint can cover it up. After doing this, if you want to achieve the results in the image above, you can use acrylic paint to paint the pots. This can be done using an interesting technique called pour-painting, in which you pour the paint from the top of the pots and allow it to flow over to the sides. Mix whatever colors you like and you’ll get a unique result. Just make sure you put some papers down before you do it. Also, we advise doing this outdoors in order not to create a mess.
After the paint dries, it’s time to assemble the rest of the bird bath. Take the stake and put it through the hole in the center of the pots. This will create a support system for the bird bath and ensure strong winds or storms won’t knock it over. Push the stake into the ground and you’ve just assembled the base of the bird bath. Then, glue a larger saucer that you’ve previously spray painted on top of the pots. This is where the water for the birds will actually go.
In order to make the design more interesting, top that off with a smaller terracotta pot that you cover with another small saucer. While this is not something you need to do, it does make this DIY bird bath look better. Not to mention the fact that the colors and the interesting patterns you’ve made with the acrylic paint turn this bird bath into a decorative garden object that both birds and people can enjoy.
In order to decorate the pots, you can cover them in spray paint. This is a good idea because the adhesive will be noticeable on the terracotta pots and the spray paint can cover it up. After doing this, if you want to achieve the results in the image above, you can use acrylic paint to paint the pots. This can be done using an interesting technique called pour-painting, in which you pour the paint from the top of the pots and allow it to flow over to the sides. Mix whatever colors you like and you’ll get a unique result. Just make sure you put some papers down before you do it. Also, we advise doing this outdoors in order not to create a mess.
After the paint dries, it’s time to assemble the rest of the bird bath. Take the stake and put it through the hole in the center of the pots. This will create a support system for the bird bath and ensure strong winds or storms won’t knock it over. Push the stake into the ground and you’ve just assembled the base of the bird bath. Then, glue a larger saucer that you’ve previously spray painted on top of the pots. This is where the water for the birds will actually go.
In order to make the design more interesting, top that off with a smaller terracotta pot that you cover with another small saucer. While this is not something you need to do, it does make this DIY bird bath look better. Not to mention the fact that the colors and the interesting patterns you’ve made with the acrylic paint turn this bird bath into a decorative garden object that both birds and people can enjoy.
3. Basic DIY Bird Bath
If you don’t want to invest that much time and effort into building a DIY bird bath, you should definitely try this option. You need the following materials in order to complete it: 3 rods, a dish, a hammer, and some paint. The rods are what will provide the base of the bird bath. You can use whatever rods you have around the house, even old broomstick handles. The trick is to make them all the same size. Then, place them into the ground in a triangle shape. This will make the base more stable. Now, it’s time to take care of what will actually be the bird bath in this DIY: the dish. Again, you can use any kind of dish you want. We recommend one made of plastic because it will make the whole thing lighter and easier to carry around. Naturally, you’ll have to use glue to attach the dish to the rods. However, before doing that, you should place the dish on the rods and fill it with water. This will show you whether the base is level. If the water isn’t spread equally in the dish, that means you have to adjust the rods. Only after you’re sure everything is level, glue the dish on top of them.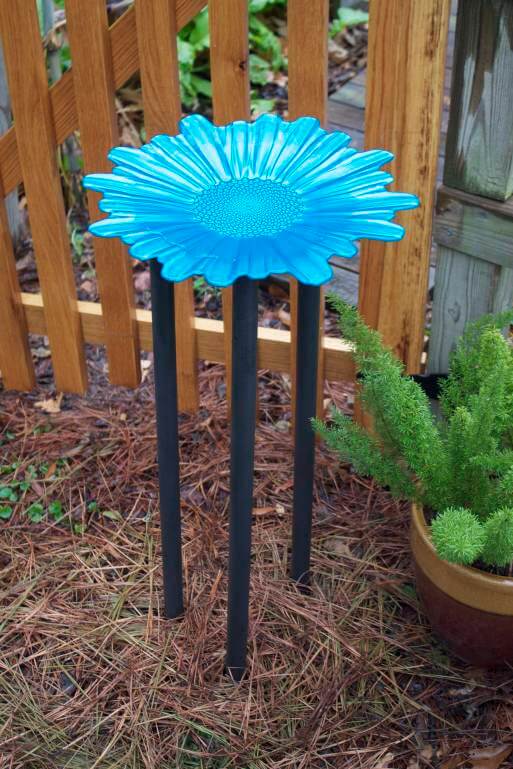 Finally, what we’d also like to mention is that since this DIY doesn’t contain a lot of elements, like the previous ones we’ve presented, you should do your best to make it stand out. One of the best ways in which you can achieve that is by choosing an eye-catching dish. A colorful one would help, and so would one in an interesting shape, just like in the image above. If you want to make this DIY bird bath even more creative, you can add things in the water, such as seashells or a larger stone on which the birds can sit when visiting your bird bath.
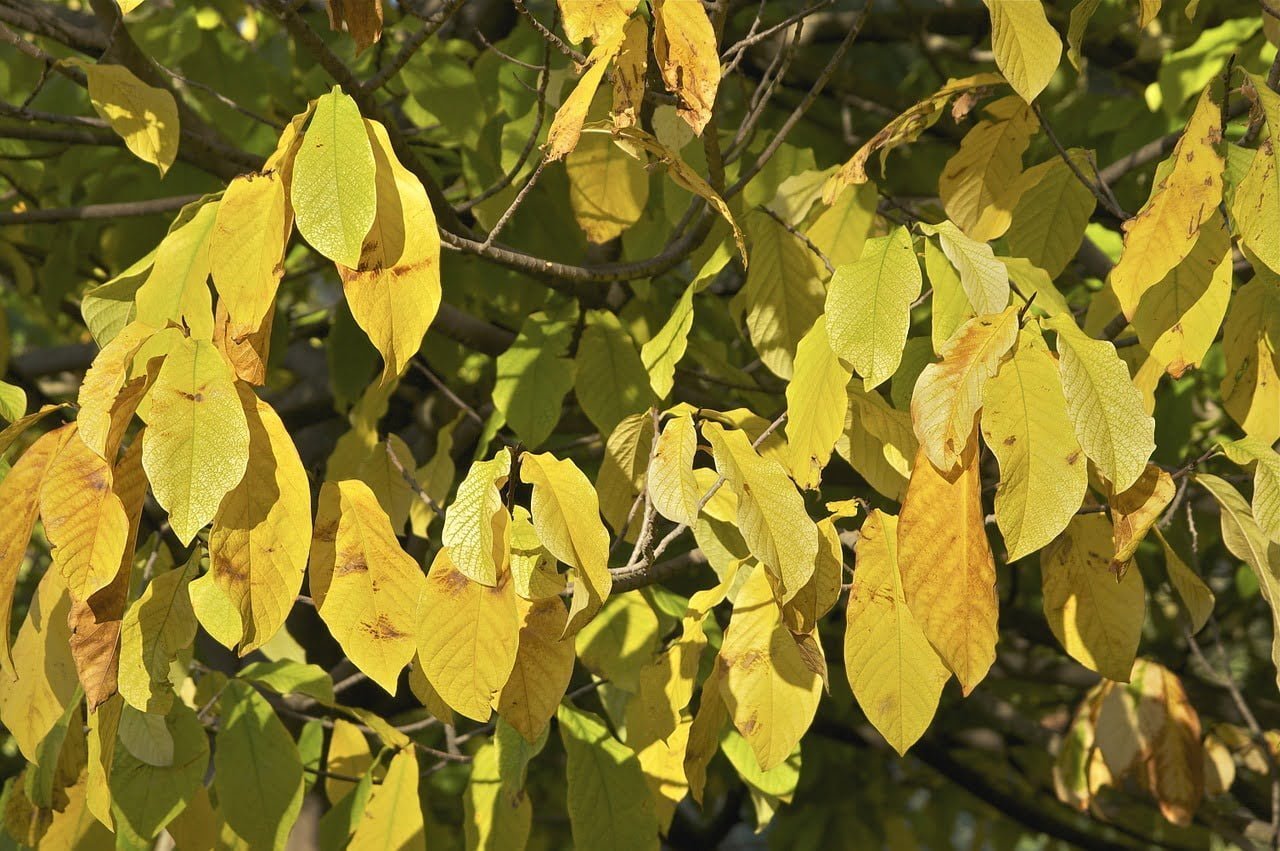
4. Leaf DIY Bird Bath
Even though this DIY isn’t difficult to make, it does imply more work than the previous one, as well as more materials. You’re going to need a large leaf (the choice is completely up to you), contractor’s sand (3 to 4 cups), Portland cement (1 to 2 cups), play sand (1/2 to 1 bag), and concrete fortifier. The great thing about this DIY is that you can really make it your own when choosing the type of leaf you want to use. This way, you’ll ensure no one else has the same bird bath as you. First, you need to take the leaf, remove its stem, and make a pile of play sand next to it, preferably on a plastic sheet so that the sand doesn’t go everywhere. Then, wet the sand and shape it so that it resembles the size and shape of the leaf. Use a plastic bag to cover the sand and place the leaf on top of it, as centered as you can, with the vein side up.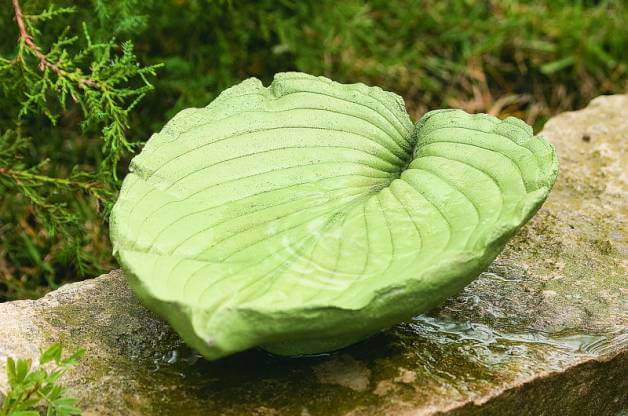 In a separate bowl, mix one part Portland cement to three parts contractor’s sand. In another cup, mix 1/4 cup of concrete fortifier and 1/4 cup of water. Then, pour the mix into the sand until it reaches a thick batter consistency. Next, you’re going to spread this mixture onto the leaf. Its consistency will help pick up the leaf’s veins. You should make the cast relatively thick, in order to ensure the bird bath will be sturdy and resistant. Right in the center of the cast, add more of the mixture to create a pedestal.
Use a plastic sheet to cover the cast and allow it to dry for about a day. Don’t rush the drying process, since this might cause the cast to crack. Once the cast is dry, slowly and carefully peel off the leaf. Before doing anything else to it, such as painting it, allow it to dry for one more week. Then, place it wherever you want in your garden and the birds will definitely enjoy it.
In a separate bowl, mix one part Portland cement to three parts contractor’s sand. In another cup, mix 1/4 cup of concrete fortifier and 1/4 cup of water. Then, pour the mix into the sand until it reaches a thick batter consistency. Next, you’re going to spread this mixture onto the leaf. Its consistency will help pick up the leaf’s veins. You should make the cast relatively thick, in order to ensure the bird bath will be sturdy and resistant. Right in the center of the cast, add more of the mixture to create a pedestal.
Use a plastic sheet to cover the cast and allow it to dry for about a day. Don’t rush the drying process, since this might cause the cast to crack. Once the cast is dry, slowly and carefully peel off the leaf. Before doing anything else to it, such as painting it, allow it to dry for one more week. Then, place it wherever you want in your garden and the birds will definitely enjoy it.