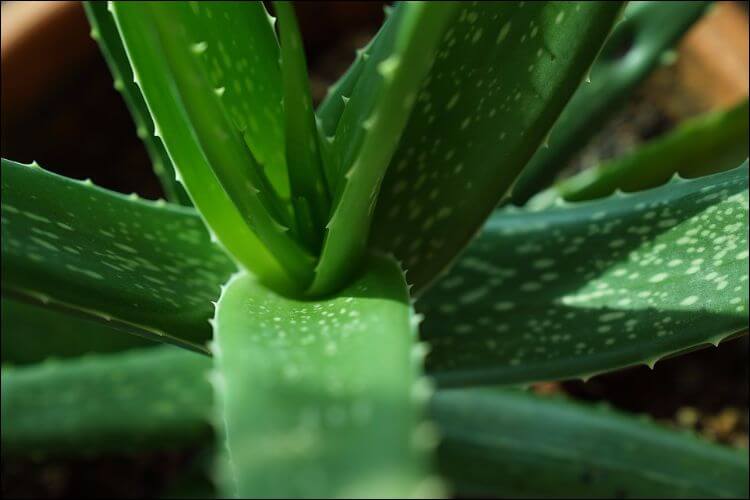
Aloe vera grows well as a houseplant when it has bright light, a freely draining potting mix and time to dry between waterings. It is a succulent: keeping its roots constantly wet is a more common mistake than forgetting an occasional watering. Grow it as an ornamental plant rather than assuming home-grown leaves are a safe food or medicine.

Choose a bright, frost-free position
Place aloe near a bright window and watch how it responds. Window direction is a starting point, not a guarantee of enough light: trees, buildings, glass and season all matter. Introduce stronger direct sunshine gradually, especially when moving a plant outdoors after winter indoors.
A pale, stretched plant may need better light, while a sudden move into hot sun can scorch leaves. Avoid interpreting every brown patch as a single problem; also check cold exposure, watering and root condition. Protect aloe from frost rather than treating 25°F as a safe minimum.
In a frost-prone climate, keep it in a movable container and bring it into suitable conditions before cold weather. Outdoors, choose a position that does not collect persistent rainwater. Indoors, keep it away from cold drafts and a windowpane that becomes very cold overnight.
Use a suitable pot and mix

Choose a stable container with drainage holes and room for the existing root system. Avoid an unnecessarily large pot that holds much more wet mix than the roots can use. A commercially prepared cactus or succulent mix is a straightforward starting point; the essential feature is reliable drainage.
Do not put the root ball directly against the bottom of an empty pot. Add mix underneath so the plant sits at its previous depth, then settle mix around the roots. Keep the crown and leaves above the surface. Empty collected water from a saucer or decorative outer pot.
A decorative layer of stones is optional, not a requirement for warmth or drainage. Leave enough access to check the mix beneath it. If you make your own mix, use a tested container recipe rather than equal parts of arbitrary garden soil, sand and gravel.
Repot and separate offsets carefully
Repot when the root system or offsets have outgrown the container, or when the mix has deteriorated. Handle the plant by supporting its base, protect your hands from leaf edges and inspect roots before moving it into clean mix. Remove obviously rotted material with clean tools rather than burying it.
Small offsets, often called pups, provide a practical way to propagate aloe. Choose an established offset with its own roots where possible and separate it carefully. Let damaged or cut surfaces dry before placing the offset in suitable mix; avoid keeping fresh wounds constantly wet. A detached leaf is not as dependable a starting point as a rooted offset.
Water according to conditions
Check the potting mix below the surface before watering. Let it dry substantially between waterings, then water the root zone and let excess drain freely. Do not leave the container standing in water or repeatedly pour water into the leaf rosette.
The interval depends on pot size, mix, temperature, light and season. Growth often slows in cooler, darker conditions, when much less water may be needed. A fixed rule such as twice a month cannot suit every heated room and outdoor pot.
Thin leaves can occur with insufficient water, but damaged roots can also leave a plant unable to take up moisture. If leaves collapse or the base softens, inspect the roots and drainage before adding more water. Avoid compensating for a dry period by keeping the pot saturated afterward.
Feed lightly and keep the plant clean
Aloe does not need heavy feeding. If feeding is appropriate during active growth, use a suitable cactus or houseplant fertilizer at its labeled rate. Do not assume a high-phosphorus formula will solve poor growth. Check light, drainage and root condition first.
Remove weeds gently from outdoor containers and clear dead plant material without damaging healthy leaves. Inspect for mealybugs or scale, especially around leaf bases. Isolate a plant with an infestation, identify the pest and use a treatment labeled for the plant and setting if needed. “Natural pesticide” is not a diagnosis or a guarantee of safety.
Troubleshoot before changing several things
- Soft base or mushy roots: investigate excess moisture and decay promptly.
- Stretched growth: assess whether light is adequate.
- Dry, damaged patches: consider recent sun exposure, cold or physical injury.
- White deposits or insects: inspect closely rather than assuming all white material is a disease.
Make one considered adjustment at a time and record the response. Do not add sulfur to a pot simply because leaves look unhealthy; a soil amendment should address an identified need.
Handling leaves and avoiding unsafe uses
Use clean tools if removing a damaged or mature outer leaf, and avoid stripping the plant. Keep cut leaves and plant material away from children and pets. Do not make drinks or supplements from home-grown leaves: inner gel, latex and whole-leaf preparations are different materials.
NCCIH describes adverse effects and interactions associated with oral aloe, and skin reactions are possible too. Growing the plant does not establish that its raw gel is suitable for a burn or other injury. Use appropriate first aid and medical guidance rather than placing an unprocessed leaf on an injury.