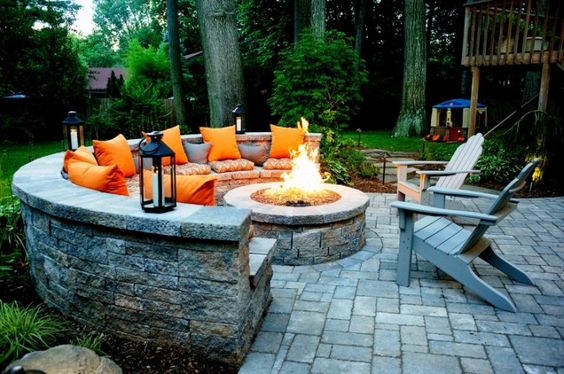
A practical DIY fire pit starts with a permitted location and a purpose-designed kit whose installation instructions suit that site. Do not build a fire container from waste flower pots, scrap wood or unidentified stones. Heat exposure, the base, drainage and required clearances all need to be considered before assembly.
This guide explains the project sequence. The exact excavation depth, materials, dimensions and assembly details must come from the chosen design and local requirements, not a generic recipe for every yard.

Confirm the location first
Ask the local fire authority whether the proposed fuel and fire-pit type are allowed, whether a permit is needed, and which separation distances apply. Check temporary burn bans again before use. A product sold locally is not proof that every backyard installation is permitted.

Sketch buildings, fences, branches, seating and access routes around the proposed position. Include overhead space and neighboring property. The U.S. Fire Administration provides general outdoor-fire precautions; meet the applicable local rules and appliance instructions as well. If the available space cannot meet them, choose a flame-free feature.
Choose the fuel and project type

A wood-burning kit needs an appropriate noncombustible installation and a plan for smoke, sparks and ash. Portable equipment still needs an approved operating surface. A mat does not automatically make a wood deck suitable.
Gas equipment has different enclosure, ventilation, fuel and service requirements. Do not improvise burner parts or connect a pit to a household gas line yourself without the required qualifications and approvals. Arrange a qualified installer for fuel work. Neither propane nor natural gas makes a fire feature harmless.

A fire table should be a complete product designed for that purpose, not a normal table holding an improvised bowl. Cooking is appropriate only where the equipment’s instructions allow it.
Read the complete kit instructions before buying

Confirm exactly what is supplied and what you must obtain separately: the specified base material, liner or insert, approved assembly materials, tools and any accessories. Manufacturer resources such as Belgard’s installation guides illustrate why instructions are product-specific. Use the guide for the actual model and region you buy.
Compare the manual’s requirements with your sketch. Check finished dimensions, working room and whether delivery can reach the site. A bargain kit can become expensive if the location needs major preparation. Keep construction planning separate from the full project budget.
Prepare the site to the specified design

Locate underground services before excavation. Mark the footprint and check that chairs and circulation space fit around it. Follow the design’s requirements for excavation, base preparation, drainage and a level foundation. Do not substitute an arbitrary one-foot hole or a layer of pea gravel for those requirements.
If the site has poor drainage, unstable ground or nearby structures affected by excavation, resolve that issue before assembly. Get appropriate professional advice where the work exceeds the kit’s straightforward installation conditions.

Assemble and inspect before use
Lay out the components and identify the correct orientation and sequence. Follow the supplied instructions for joints, approved adhesive where specified, inserts, ventilation openings and curing time. Do not close a required air gap to improve appearance or substitute ordinary materials in a heat-exposed part.

Stop if the parts do not fit or the structure rocks. Confirm the completed assembly against the manufacturer’s checklist and arrange any required inspection. Gas installations require their own qualified commissioning. Do not light a fire simply to see whether an uncertain assembly survives.
Plan operation and shutdown

Use only the fuel the appliance permits. Keep children and pets away from the hot area, maintain active adult supervision and have the required extinguishing equipment available. Wind, smoke affecting neighbors or current restrictions may mean postponing use.
Do not leave while a fire remains active. Follow the shutdown instructions and allow components to cool before handling or covering them. Ash and metal can remain hot after visible flames disappear. Inspect the pit between uses and address cracks, corrosion or damaged components before the next gathering.
A successful DIY project is one whose design, location and upkeep you understand. A larger fire or cheaper improvised container is not an improvement when the site cannot support it safely.