Summer is fast approaching and your little ones are going to be itching to get outside! Many of my favorite childhood memories are of playing in the sand box in my backyard. We’d build roads and tunnels and castles for hours on end, interrupted only by the occasional snack break when Mom would bring popsicles or lemonade. Sand boxes are an awesome way for kids to unleash some creativity while getting some fresh air in the great outdoors! It’s super easy to build your own sand box in the backyard. Your kids will love it and you’ll have the satisfaction of having built something for them with your own two hands!
Sand Box Building 101
Step 1
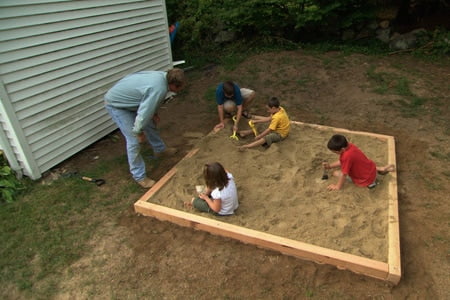
The first thing you want to do is determine how large you want the sand box to be. You want it to be large enough for at least 3-4 children to play in it at one time. Arrange four timbers (of whichever length you’ve chosen) on the ground. Make sure they’re butting up against each other. This forms the shape of your sand box. Using chalk, spray paint, or a shovel, mark both the inside and outside of the timbers.
Step 2
Once you’ve marked where the timbers are, remove them from the area. You’ll next want to dig down 4-6 inches within that space. This creates a space for the sand. Fill with 3-5 inches of sand. At this point, you may need to readjust the timbers to make sure they are correctly spaced out around the sand box perimeter.
Step 3
You’ll need a piece of wood to serve as a brace. You can use pretty much anything, even a scrap piece of a 2×4. Just something that can go on the corners and hold it together. Make sure your timbers are level. You may need a second person to help you with this, making sure the braces work.
Step 4
Now it’s time to add a second layer of timbers. This will create the above-ground frame for your sandbox. At this point, you’ll need to get out your drill and screw the timbers together. Be sure to use screws that are long enough to go straight down through the top timber and into the bottom one. This will keep the sand box solid for many years of play.
Step 5
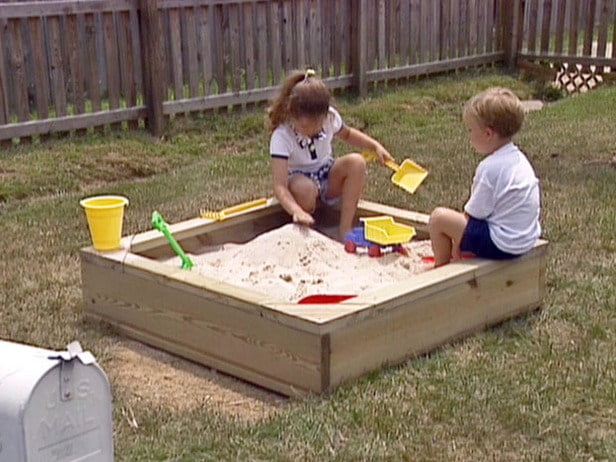
At this point, you’re set! You can fill the box with sand. Some people may choose to line it with landscape fabric before doing so. That’s entirely up to you. If so, we’d recommend adding another layer of timbers on top of the fabric. This will keep things tightly nailed down. This will also make the sides of the box higher. So it’s really up to your personal preference which you’d like to do.
The advantage to just doing the two levels of timbers is it makes the level lower. If you have young children playing in the sand, this is simply easier for them to get in and out of.
The nice thing about building a sand box is that you really can make it as fancy or simple as you like! You could add multiple sections or levels. These changes really aren’t difficult. You can just dig things down deeper or add more pieces of wood to raise it higher or lower.
Summing Up
Have fun with being creative and building something your kids will love! You can’t go wrong, no matter how basic or luxurious you build the sand box. Little ones only need an area to play, some sand, and a few toys. They’ll be entertained for hours and you’ll have time to get some stuff done! Happy designing!