Of all the outdoor furniture and decorations on porches, rugs may be the most essential items. Rugs add so much beauty to a porch or patio. In addition to enhancing the decor of your porch, rugs also help trap dirt outside. Thanks to rugs, your floors inside stay clean and protected from the mud and dirt. Unfortunately, outdoor rugs cost a lot of money. To make matters worse, a lot of outdoor rugs do not last long since people and pets are constantly walking on top of them. Because of this, many people feel that an outdoor rug isn’t necessary for their porch. Before you give up the thought of having a rug on your porch, consider making a DIY rug. Homemade rugs are so easy to make and are much cheaper than store-bought rugs. If you are interested in making a DIY rug, you have come to the right place. In this article, you’ll learn everything you need to know about how to make a rug. Let’s get started.
5 DIY Rug Options
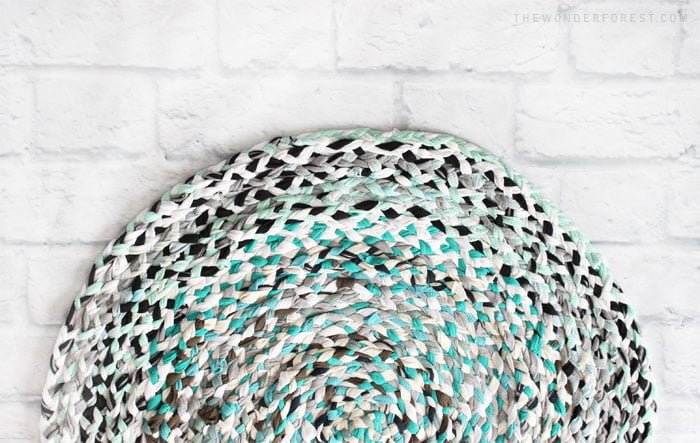
1. DIY No-Sew Braided Rug
Image Source: The Wonder Forest
Braided rugs are one of the most popular types of homemade rugs. They are durable, pretty, and are often made of upcycled fabric such as old T-shirts. While most braided rugs need to be sewn, it is also possible to make a new-sew braided DIY rug. Here are the steps to creating a braided rug without using a sewing machine.
Supplies Needed:
- A variety of t-shirts and/or tank tops
- Scissors
- Rotary cutter (optional)
Step 1:
Cut your t-shirts into 1.5″ strips along the width of the body. If you have a rotary cutter, this process will go much quicker. Otherwise, use scissors to cut the strips.
Step 2:
Gather three strips and stack them. Tie a knot tightly into the top to begin. Next, start braiding the strips together.
Step 3:
Once you’ve braided about 4″ of the strips, coil the braid into a circle with the knot in the center.
Step 4:
Take the strand closest to the center and pass it under and through one of the loops in the braid you coiled. This is how you will attach the braid to the coil.
Step 5:
Continue to braid another few inches. If it is done correctly, the braid should be attached to the center coil where you passed the one strand through.
Step 6:
Every few inches, pass the strand closest to the center under and through the existing braid to attach it. You’ll need to do this for the entire rug. While it may not seem like you are making any progress, it should begin to resemble a rug.
Step 7:
If you reach the end of one of your strips of fabric, you’ll need to attach another strip on. To do this, fold over the very end of the attached strand and cut a small slit into the center. Do the same with your new strand. Line up together the two slits from both strips. Take the other end of the new strand and pull it through the back of the slits towards the front. Pull on both strands so that the knot becomes tight.
Step 8:
The rug will tend to bunch up as you go along. To flatten it, use a spray water bottle to spray some water onto it. Then, use your hands to push it back into shape. If needed, place some heavy objects on your braided rug until you are done braiding it. This will help keep the rug flat.
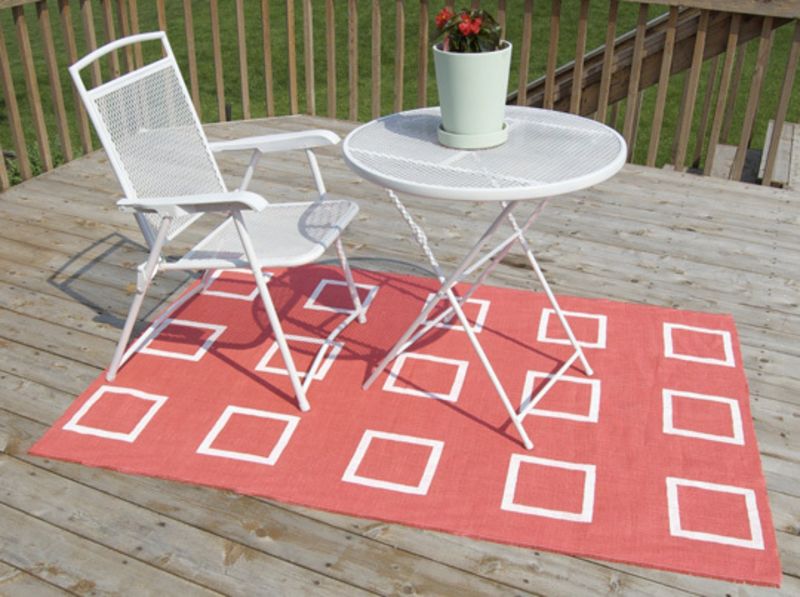
2. How to Make a Burlap Rug
Image Source: Apartment Therapy
Do you have some colored burlap that you’re not sure that you should do with? Consider making a DIY rug out of it. Instead of learning how to weave a rug, the rug is basically already woven for you. All you have to do is add some finishing touches to make it durable and pretty. Making a burlap rug is extremely simple. Here are the steps to making this kind of rug.
Supplies Needed:
- Burlap
- Acrylic paint
- Painters tape or stencils
- Clear acrylic caulk
Step 1:
Begin by spreading out the burlap. Decide how you would like your DIY rug to be decorated. You can use stencils, tape off stripes with painters tape, or freehand it. If you want to get the spacing right, you’ll want to use some kind of tape or stencil.
Step 2:
Paint your design with outdoor quality acrylic paint and a paintbrush. Be sure to spread plastic or papers under your burlap because the paint will come through the fabric. Let the paint dry completely.
Step 3:
On the back of the rug, squirt a bead of caulk around the perimeter and work your way around adding smaller concentric rectangles toward the center. The caulk will keep the edges from unraveling and will make the rug more sturdy. Make sure you use clear caulk so it doesn’t show from the front. Let the caulk completely cure from white to translucent before turning it over.
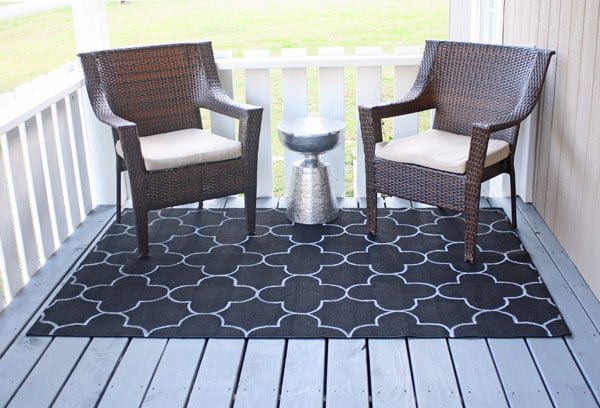
3. Painted Outdoor Rug
Image Source: The Shabby Creek Cottage
If you happen to have a simple indoor or outdoor rug, you can easily decorate it by painting on it. Painting rugs is an inexpensive way to decorate your porch or patio. Making painted rugs is also very simple and a great project to do. Here are the steps to making an outdoor painted rug.
Supplies Needed:
- A plain-colored rug
- Scrap cardboard from an old box
- Pencil
- Cereal bowl
- Chalk
- Water (in the cereal bowl)
- Fabric paint
- Soft bristle paint brush
- Scissors
- Measuring tape
Step 1:
Begin by tracing the bowl four times on a piece of cardboard in a square pattern. The edge of each circle should be touching. Use your scissors to cut out the pattern. Once it is cut out, it should look like a four-leaf clover.
Step 2:
Next, measure the rug and place the pattern in the center. Using chalk, trace around the pattern, then move it to the right and left, making a whole line all the way across the rug. Use the bowl to put water in to soak your chalk, because dry chalk won’t show up well. It will take a lot of chalk, so be sure to have 5 to 6 sticks ready.
Step 3:
Once you have used the chalk to draw the pattern, paint over the pattern with the fabric paint. This will give the pattern a bolder look. Let the paint dry once you are done. If there are any chalk smudges, use a vacuum to clean it up.
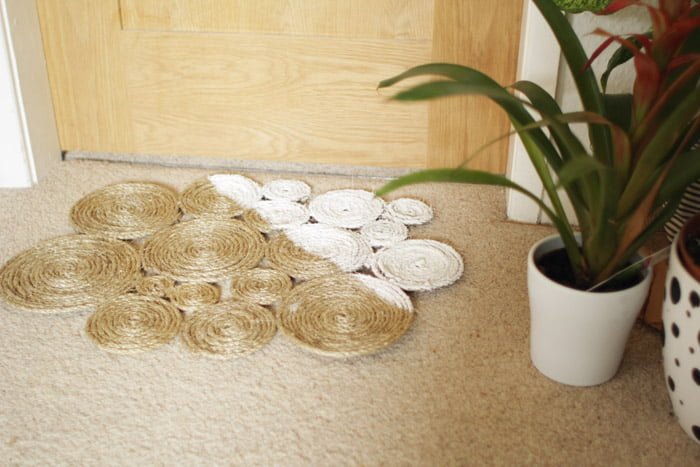
4. DIY Coiled Rope Door Mat
Image Source: Design Sponge
This next DIY rug is made of lots of rope coiled ropes. Unlike most rugs, you can make this DIY rug be any shape you want it to be. This rug is very easy to make and is very durable. Here are the steps for how to make your own rug out of ropes.
Supplies Needed:
- Rope
- Glue gun
- Glue gun sticks
- Paintbrush
- Masking tape
- Paint
Step 1:
Using a hot glue gun, seal the end of the rope so that it doesn’t fray. Let the glue cool before moving on to the next step.
Step 2:
Begin to coil the rope. Create a small coil of around two circles. Next, add some glue onto the outer ring.
Step 3:
Repeat these steps using the glue gun to adhere small sections around the coil. You don’t need to glue all of the rope together. Just a few dabs of glue here and there will keep the rope in place.
Step 4:
Once your first coiled rope reaches the desired size, cut the rope and glue the end to secure it. Continue making more rope coils of different sizes.
Step 5:
Place the individual mats in different layouts until you find the perfect order. Keep the coils close together, as you don’t want large gaps between the rope coils. Use the glue gun to adhere them together where the coils touch.
Step 6:
Section off the area you want to paint with masking tape and dab paint onto the exposed rope. Another idea is to paint each coil in different colors. You could also paint the entire rug one color or simply leave it the color it is. Decorate this rug in whatever way you like.
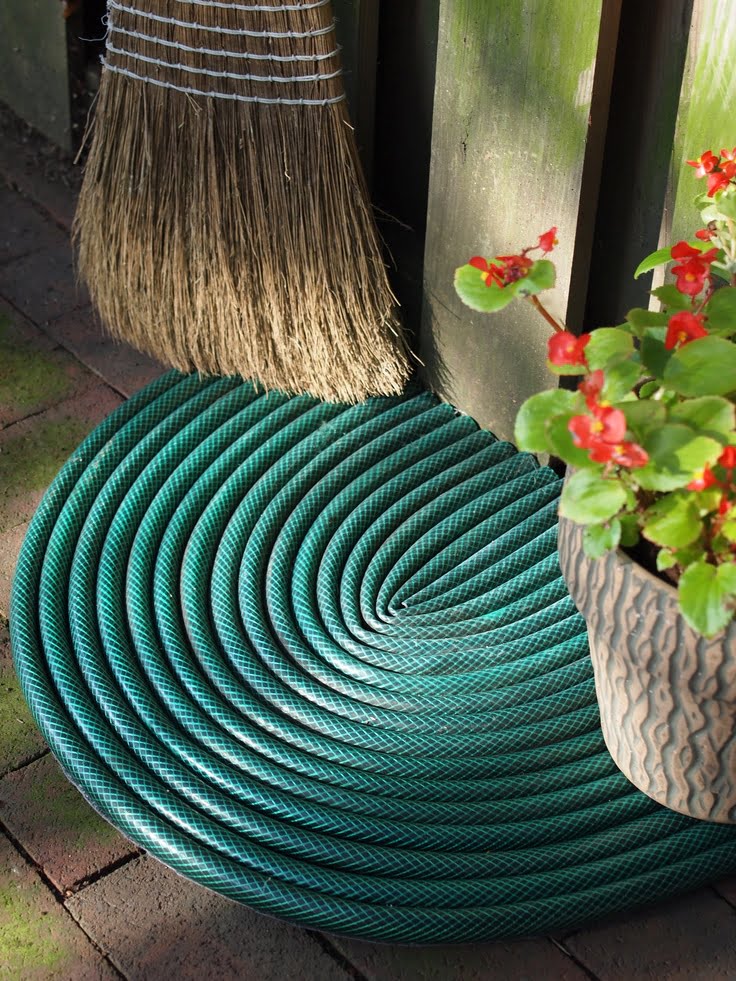
5. Garden Hose Welcome Mat
Image Source: Mark Kintzel Design
Even if you take great care of your garden hoses, at some point they will probably spring a leak. When they do, instead of throwing them away, consider making a garden hose welcome mat. A garden hose rug is so simple to make and is perfect for sheds, garages, or your porch.
Supplies Needed:
- A leaky garden hose
- A square mat
- Glue
- Garden pruners (to cut the garden hose)
- Strong, sharp scissors to cut down the mat
- Heavy objects to hold down the mat as it dries
- Corks to put in the ends of the hoses
Step 1:
Place your garden hoses on a flat surface. Using the garden pruners, cut a section of the hose so that it creates the outer half circle of the mat.
Step 2:
Next, place a generous amount of glue on the hose. Place the garden hose on the mat. Remember to work with the outer half circle first.
Step 3:
Position heavy objects on this first section to keep in place. Let it dry overnight.
Step 4:
Once this one section is dry, repeat this process with the other cut pieces of hose.
Step 5:
Once you are finished gluing your garden hose rug together, cut off the ends of the hoses with the pruners.
Step 6:
Glue and insert corks into each of the ends to seal the openings.
Step 7:
The last step is to cut the bottom mat so that it is the same shape of the garden hose mat you made. The bottom mat is there to help keep your garden hose mat in place.
Final Thoughts
I hope this article on how to make a rug for your porch has been helpful to you. Not only are rugs decorative, but they also prevent dirt from entering your home. In this article, I went over the top five options for how to make rugs at home. Homemade rugs are so much cheaper than store-bought rugs. They can also be very creative looking. Some of the DIY rug options I went over in this article use upcycled materials such as old T-shirts, ropes, and even old garden hoses. Remember to be creative when making your DIY rug. Feel free to design your homemade rug in any design you’d like. Have fun!


