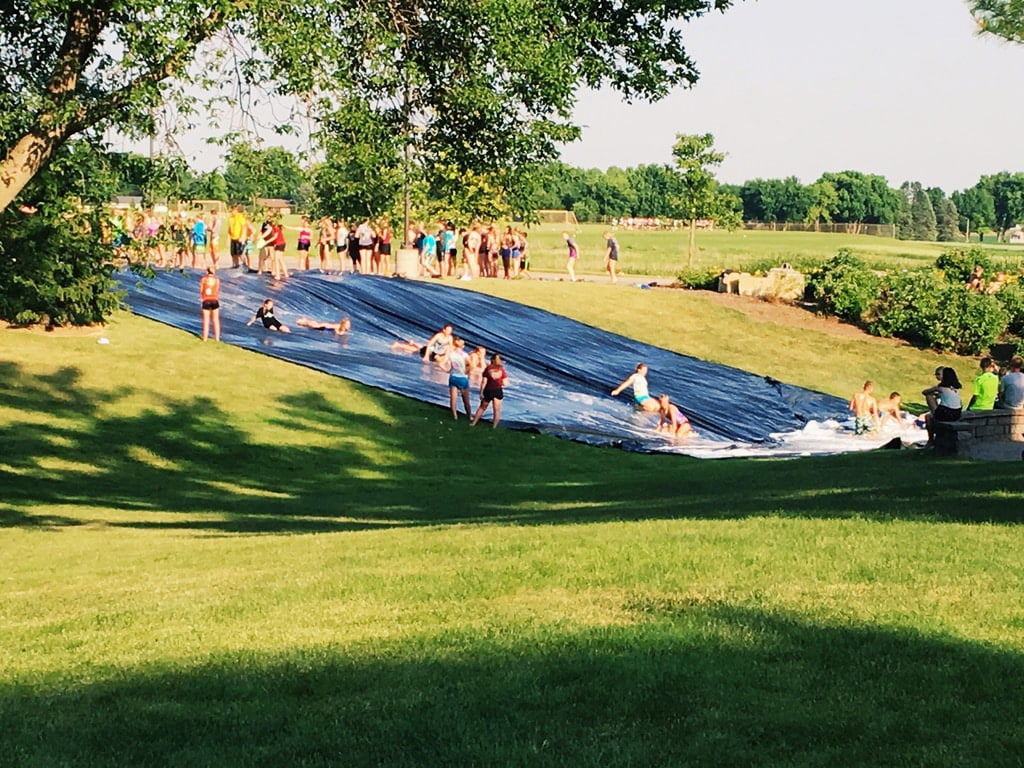
Some of my fondest memories as a child were when I played on a slip and slide in my backyard during hot summer days. I remember getting a slip and slide as a gift. My family did not have a pool, so this new version of a water slide became the center of our summer fun when we wanted to cool off. There is no need to buy a pre-made slip and slide if you want to have your kids and their friends enjoy a fun daytime activity. I will show you how to make one yourself without spending a small fortune. A slip and slide can be inexpensive and custom designed to your specifications. Let’s get started!
Materials Needed
- A sheet of plastic (50-foot or 100-foot plastic is a good size)
- Pool noodles
- Dish soap
- Water
- Lawn sprinklers/sprinkler hose (optional)
- Velcro
How to Build It
Building a slip and slide can be very easy and requires little time to set up. Some slip and slides only take around 20 minutes to build. Here’s how to build your own:
- Begin by unrolling the plastic sheeting in your backyard. Decide which end you want to be the top (both sides should be the same), and then lay it face down.
- Lay the pool noodles along the perimeter of the plastic. If you don’t have a lot of pool noodles, you can leave a 12-inch gap between each noodle.
- Starting at one end of the plastic, take a noodle and lay it on the plastic a couple inches in from the outside edge. Pull the plastic up over the noodle. Attach a 2-inch piece of Velcro to the underside of the plastic near both ends and the middle of the noodle. Attach the other part of the Velcro to the slide, pull the plastic, and attach the Velcro. Once you are finished attaching the Velcro to the underside of the slip and slide, flip it over.
- Next, you need a water source. Place the hose at the top of the slide. If your yard is sloped, place the top of the slide and hose at the top of the slope. Lawn sprinklers can be substituted for a hose. Place the slip and slide on the lawn and turn on the sprinklers. You can also buy various hose attachments that can be placed on the side of the slide. This will create a shower down the slip and slide. To make the slide more slippery, you can pour dish soap on the slide.

Photo Credit: Twenty20
Cost
A homemade slip and slide should not be costly. Some DIY slip and slides have been made under $30. Others have been made for slightly more money. It mainly depends on how much the materials cost. Some materials may be found in a clearance aisle or for some materials may be on sale. Most plastic sheets will cost around $30, but the prices vary from $10 to $200. The cost of plastic will depend on what size plastic sheeting you purchase. Pool noodles are very inexpensive and usually cost just a couple of dollars. However, if you buy in bulk or buy a jumbo noodle, you may have to pay around $30. Most lawn sprinklers, sprinkler hoses, and regular hoses cost $50 or less. Heavy duty hoses may cost more.
Where to Buy Materials
Slip and slide materials can be found almost anywhere. The plastic sheeting can either be bought online or you purchased at your local hardware store. Common places to find plastic are Home Depot, Amazon, Lowe’s, and Walmart. Pool noodles can be purchased there as well. You will find pool noodles during the summer season since they are in high demand. Sprinkler hoses and attachment can be found online and at most hardware stores. And lastly, you will need dish soap and velcro, which can be found almost anywhere. Check dollar stores as well. Additionally, you may want to buy fun slip and slide accessories, such as jumbo pool noodles, floats, and balls.

Photo Credit: DIY Network
Fun Games to Play With It
There are many fun games to play on a slip and slide. Even if you read no further, both children and adults will invent their own games. Just watch any videos online of adults playing silly games on slip and slides and you’ll see for yourself! Listed below are some games that you may want to try or even tweak to fit your own needs. All you need is a little imagination and your homemade slip and slide.
Judging the Slides
It’s fun to have kids take turns sliding while onlookers score the slide on a scale from 1 to 10. Let kids be silly and creative when taking their turn. Those not sliding at that time can call out the numbers. You can either keep score or just laugh along with kids as they “perform.”
Relay Races
Races are what childhood games are made of. Competition can be an especially fun thing when it involves water and a slippery surface. You won’t have to worry about kids taking wins and losses too seriously with a slip and slide. If you have two slides or one really big slide that can support two teams, divide kids into two teams and have a relay race. The first set of sliders (one participant from each team) goes down the slip and slide first. After they reach the bottom, they run on the grass back to the sop and tag the next person on their team. Continue on until everyone has a turn. The first team to finish is the winner. You may want to have kids sit down after they take their turn to see which team is in the lead.
Slip and Slide Kickball
Play kickball just the way that you would a regular kickball game but instead of runners running from base to base, kids slide. You will need four strips of slip and slide to serve as the running spaces on the diamond. Home base could be a soft-sided baby pool, outdoor pillows or cushions that runners may slide into. This is great fun as calls of “Safe!” or “Out!” are heard.
Bowling
Set up “bowling pins” at one end of the slide like two-liter soda bottles. Participants are literally the “ball” as they slide into the pins. Make sure that whatever you use as pins are not too hard. This game will produce lots of laughs, especially when someone gets a strike.
Slip and Slide Baseball
Lay out the plastic in a square shape on a flat surface, like a baseball field. Make a first base, second base, third base, and home base on the slip and slide. Play the game just as you would with regular baseball, only use plastic bats and balls. You may want to establish your own set of rules, such as whoever slips is out of the game. Have fun with this game and remember that you can tweak the rules to fit your needs.
Inner Tubing
Inner tubing is fun. There are many different kinds of inner tubes and rafts that can be used. Tubes and rafts come in all shapes and size. You can purchase rafts like flamingos, chickens, sharks, whales, and other fun animal shapes. You and children and friends can simply have fun floating down the slip and slide or you can turn it into a game. For example, you could have a race to see who floats down the fastest. You could have a relay race as in the ideas above, but instead of sliding down, children could “float” down on their rafts. Or you could judge who floated down the best. Whatever game you choose to play, make it a fun memory for both you and your friends and family.

Photo Credit: Sears
Conclusion
A homemade slip and slide can become the center of your backyard fun this summer. There is no need to purchase a slip and slide when you can make one yourself that is more suitable for you and your family than any store bought slip and slide. You know how to make one, what materials you need and where to purchase the materials, approximate costs, and ideas for fun games that you can play on your slip and slide. Now all you need is to go get those materials and get making. This truly is a very easy, fun way to create many summer memories. So get going and get ready to make this summer epic. And don’t forget the sunscreen!
Image Source: Rudy and Marta