A floating deck is a deck that is built a few inches off the ground. So rather than being placed directly on the ground, it “floats” in the air and is built just a few inches off the ground. It can bring a unique and creative look to your yard, and will be a great place to spend your Summer evenings. There are also many benefits to having a floating deck. Surprisingly, a floating deck can be very easy to make. Let’s take a look at how to build one.
Supplies Needed
In this article I will be going over two different ways to make a floating deck. Because each way is slightly different, you will need different tools. With that being said, here are the supplies you’ll need for both types of floating decks:
Supplies Needed for Building a Deck with a Cement Block Foundation:
- Deck blocks or pier blocks
- Galvanized deck screws
- 2×6 boards
- 2×6 pressure-treated boards
- Shovels
- Screwdriver
- Laser level
- Hammer
Supplies Needed for Building a Deck with a Wood Foundation
- 8 to 16 60 pound bags of concrete
- 1 box of 10 2½ inch wood deck screws with bit
- 20 2 x 6 joist hangers
- Exterior wood stain/paint
- Sealer for the stain
- Foam paint roller
- Paint tray and liner
- Rubber gloves
- Work gloves
- Measuring tape
- Pencil
- Drill
- Drill bit
- Compound miter saw
- Reciprocating saw
- Circular saw
- Post hole digger (or auger)
- Post level
- Laser level
- Wheelbarrow
- Shovel
- Chalk reel
- Stakes
- String
- Safety goggles
- Ear protection
- 8) 4 x 4 x 8 pieces of pressure treated lumber (for footer posts)
- (25) 2 x 6 x 10 pieces of pressure treated lumber (for interior frame)
- (4) 2 x 10 x 16 pieces of pressure treated lumber (for exterior frame)
- (23) 2 x 6 x 16 pieces of decking boards (for deck top)
How to Build a Floating Deck
Building a floating deck is very easy to make. Unlike decks and patios that are attached to your house, a floating deck can even be built by those who aren’t too skilled. Like I said earlier, I’ll be going over two different ways to make a deck. Here are the steps to building the first type of floating deck, which is made with blocks as the foundation.
Step 1:
Flatten out the area where you will be building the floating deck. Use a level to check if it is level and flat.
Step 2:
Set the four corners for the deck. Dig about 6 inches into the ground and create holes for the blocks. The blocks should be spaced to make a 7′ x 19′ rectangle, leaving about 6 inches from each block for deck boards to add another 8′ x 20′ rectangle. Using a string level or laser level, make sure each block is level.
Step 3:
Measuring 2 feet from each corner, spray paint a straight line down the short portion of the deck. This is the line for the interior blocks. Spray paint another line 2 feet between the two interior lines. You should then have three horizontal lines. Dig a 6-inch trench along the lines, and then dig a trench between your corner blocks.
Step 4:
Place four interior blocks 2 feet apart from one another on each trench line. Level the interior blocks to your corner blocks. Next, continue setting the outer block. The blocks should be equally spaced. Set them and make sure they’re level. A good way to check that all blocks are lined up is by using a straight piece of board and setting it through the X indentation of each block and see how they line up.
Step 5:
Once everything is level, lay the 2″ x 6″ deck joists inside the deck blocks. Measure from each 2×6 to make sure they are evenly spaced, 2 feet apart. Once the deck joists have been laid, begin placing the boards onto your deck. Place one board in the middle of the deck area, making sure it hangs evenly off each end of the 2x6s. Attach the board to the deck joists by using screws. Where the deck plank meets each joist, screw two square-head trim screws 1-1/4 inch from each side of the deck plank. Hammer the screws down a little so they don’t stick up. Repeat on each plank. This process shouldn’t take too long. Once the boards are on, you are done.

Image Source: DIY Network
How to Build a Floating Deck with a Wood Foundation
The next type of floating deck you can build is a floating deck with a wood foundation (not cement blocks). This type of floating deck can take a while to build. Be aware that you will need to spend a lot of time building this type of deck. Here is how to build it:
Step 1:
Decide how large you would like to make your floating deck. Measure out the space in your yard or sketch out the design of your deck, making notes regarding it’s length, depth, width, and interior framework.
Step 2:
After you have sketched and/or decided how large you want it to be, measure out the size of the deck in your yard. Use stakes and string to mark off the dimensions of your future deck. Create a line to lay your floating deck’s foundation along. Make sure you are building your floating deck on flat, level ground.
Step 3:
Now it is time to mark your posts. To figure out the height of your posts, add 2 ft. to the height you want your deck to be off the ground. Mark that height on your 4 x 4 posts.
Step 4:
Use a compound miter saw (similar to a circular saw) to cut your posts down to the desired size. Make sure you wear safety goggles and ear protection.
Step 5:
Now it is time to dig the holes. You can either use a post hole digger or an auger. A post hole digger is going to be simpler and cheaper, but an auger won’t require as much physical work. Decide what will work best for you. Dig each hole 8 in. wide by 18-in. deep.
Step 6:
Begin mixing the concrete. You’ll need to mix 1 to 2 bags of concrete per post hole. Mix the bags of concrete in a wheelbarrow until it’s chunky and wet. Next, set the posts into the ground. Shovel the concrete mixture around the post, and repeat this process until all of your posts are set in concrete. Let the concrete dry for at least 24 hours.
Step 7:
While your concrete is drying, use a measuring tape and pencil to measure and mark your 2 x 6 pieces of pressure treated lumber. You want each board to be 2 inches more than your desired floating deck’s width. Once again, wear your safety goggles and ear protection and cut the wood with the compound miter saw.
Step 8:
After the concrete has had at least 24 hours to dry, use a drill and decking screws to screw a 2 x 10 to either side of a 4 x 4 footer post (post in concrete). Continue attaching your 2 x 10’s until all of your 4 x 4 posts have a floor joist attached to them. Make sure they are level.
Step 9:
Now it is time to cut the exterior 2 x 10 boards. Once they are cut, use a drill and decking screws to screw the perimeter 2 x 10 pieces of pressure treated lumber to the main 2 x 10 joists. Continue attaching your 2 x 10’s until your frame is finished.
Step 10:
It’s now time to cut your footer posts flush with the floating deck’s frame so the decking boards can lay across it. Use a reciprocating saw to do this. Make sure you wear goggles and ear protection.
Step 11:
Next, cut and measure the interior boards. Use a measuring tape and pencil to measure and mark your desired dimensions on your 2 x 6 pieces of pressure treated lumber. Each 2 x 6 should fit just inside the frame. Use a compound miter saw to cut your 2 x 6’s down to your desired lengths.
Step 12:
Use a drill and decking screws to attach joist hangers to the interior of your floating deck’s frame. Attach each joist hanger at 16-inches on center for strong support under foot. This will be what holds up the floor. After all of the joists are attached, start laying your pre-cut 2 x 6 interior boards into the joists. Attach the boards through the joist bracket using deck screws.
Step 13:
It is finally time to begin laying your floor boards. But first, use a measuring tape and pencil to measure and mark the desired dimensions on the 2 x 6 decking boards. Cut it to the desired size. Once your boards are cut, paint or stain them with the color of your choice. Make sure you apply a sealer after staining/painting the deck boards. After the paint has dried, begin drilling the boards onto the joists. You will want to stagger the boards so that they have a unique look.
Step 14:
After all of your decking boards have been attached, use a chalk reel to mark the end of your deck. Pop it so that it leaves a cut line on your decking boards. Repeat this process for the other end of your deck. Use a circular saw to cut along the chalk line for a nice clean cut across all the ends of the boards.
Step 15:
If you want, you can try to landscape around your new floating deck. Perhaps you want to put some stones and rocks around and under your deck. You may also want to plant some flowers around your floating deck. The decision is up to you. Enjoy your new floating deck!

Image Source: Home Depot
Where to Build a Floating Deck
Unlike a regular deck, a floating deck doesn’t have to be attached to your house. Therefore, you can build your floating deck almost anywhere. Just make sure the ground is level. You should not build it on a hill. Other than that, you can build your floating deck at almost any place in your yard. Make sure it is in a convenient place. For example, if the floating deck is the only deck you have, you will want it close by the house so that you can easily reach it. Also, decide if you need to build it buy a water source. If you will be hosting a lot of parties, you may want it by water so that people can easily wash their hands, get a drink, water flowers etc.

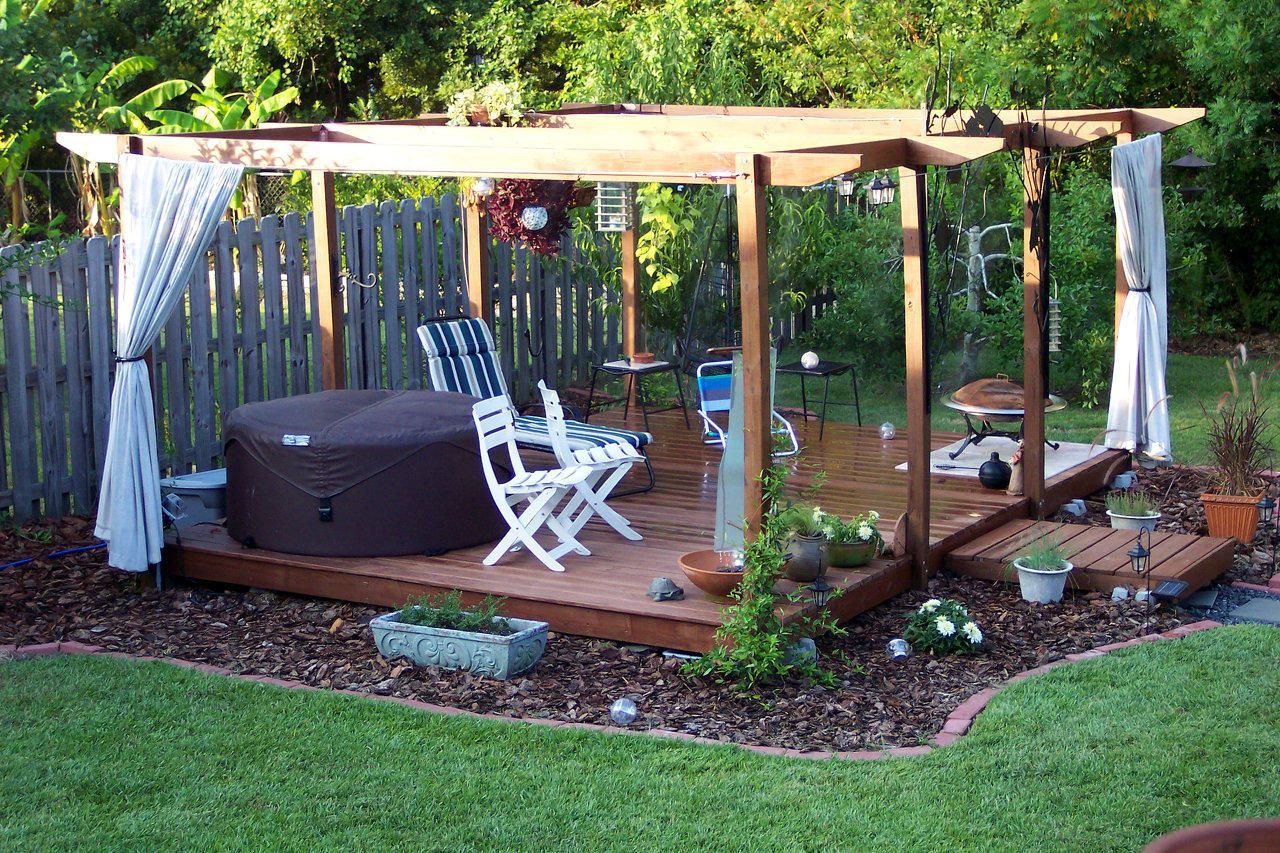
Image Source: House By The Bay Design
Benefits of a Floating Deck
There are many benefits of building a floating. I’ll go over some of the benefits here.
- Can Be Built Anywhere – Unlike some decks that must be installed against a house, a floating deck can be installed anywhere. This means that if you have a hill right next to your house, you can build your floating deck somewhere else that is flat.
- Easy To Expand – If you find that your floating deck is too small, it is very easy to add on to it.
- It Can’t Damage Your Home – When you attach a deck to your house, there is always a chance that a strong wind could pull it, and therefore damage the exterior of your home. A floating deck, on the other hand, cannot harm your house at all.
- Easy To Build – Floating decks are easy to build. You don’t have to attach it to your house, all you have to do is build it on a flat surface.
- Can Be a Great Place For Gatherings – Whether it’s a wedding, Summer party, or backyard barbecue, a floating deck can be a great place to host gatherings.

Image Source: Homestratosphere
In Summary
Well, I hope this article has helped you understand more about how to build a floating deck. Unlike regular decks, a floating deck does not need to be attached to a house. It is built just a few inches off the ground, which gives it a floating look. There are two ways to build a floating deck, either with a deck block foundation or wood foundation. I went over both ways in this article. I also went over the supplies you’ll need, where to build your floating deck, and the benefits of a floating deck. So go get building your floating deck. Hopefully this article will help you get started on building the deck of your dreams.
Image Source: Pinterest