

These five spring garden crafts reuse small household items without turning them into poorly drained planters or unsuitable wildlife housing. Wash containers first, reject chipped glass, and let an adult handle cutting or puncturing. Use what you already have before buying craft supplies.
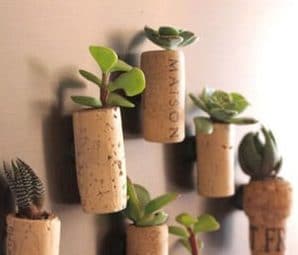
1. Cork plant markers
Write the plant name on a clean cork with a weather-resistant marker. Attach it securely to a short, blunt garden marker or craft stick. If a hole is needed, an adult should prepare it on a stable work surface; children should not push sharp skewers through corks.
Keep the marker beside the planting rather than through its roots. Add the sowing date if you have room. Check that the lettering stays readable after watering, and keep small loose corks away from young children.
2. Seed-packet letters
Empty seed packets can decorate wooden letters, a small sign or a garden journal cover. Save the growing instructions and variety name before cutting up the artwork. Arrange the pieces first, then attach them with a craft adhesive suitable for the surface.
Use the adhesive and finish according to their labels, including ventilation and drying time. Display paper-covered decorations indoors or under cover unless the materials are rated for outdoor exposure. A sealed paper surface is not automatically rainproof.
3. A teapot plant holder
An intact old teapot can hold a small plant in a separate nursery pot. Choose an inner pot that fits the opening and has drainage holes. Remove it for watering and return it only after it drains; empty any water collected in the teapot.
Place it on a stable shelf or table. Do not hang a heavy planted teapot by an untested handle. Keep broken or sharp-edged pieces out of this project. A decorative teapot is not a substitute for a species-appropriate bird nest box with suitable ventilation, drainage and an entrance designed for that bird.
4. Cardboard-tube seed starters
Stand clean cardboard tubes in a tray. Fold short cuts at the bottom inward if you need a base, fill with seed-starting mix, and sow according to the seed packet. Label each tube and water gently. Provide the light and temperature the seedlings need rather than leaving them in a dark craft corner.
Before transplanting, harden off seedlings as appropriate for the crop. Moisten and gently open or peel away cardboard that could restrict roots, disturbing the root ball as little as possible. Do not leave a cardboard rim protruding above the soil. Cardboard does not guarantee freedom from transplant shock, and its decomposition is not a replacement for suitable soil fertility.
5. Jar holders for herbs
Clean food jars make decorative outer holders for small herb pots. Keep each herb in a removable pot with drainage holes instead of planting directly in a jar with no outlet. Water outside the jar, drain, then put it back. Gravel at the bottom does not create a drainage hole.
Choose a jar with a wide enough opening to remove the pot easily. Match the herb to the available light and move it to a larger pot as it grows. Our indoor herb garden guide covers planning a growing space beyond the craft itself.
When a project wears out, separate reusable parts from waste. These garden recycling ideas can help you plan what to keep for the next season.