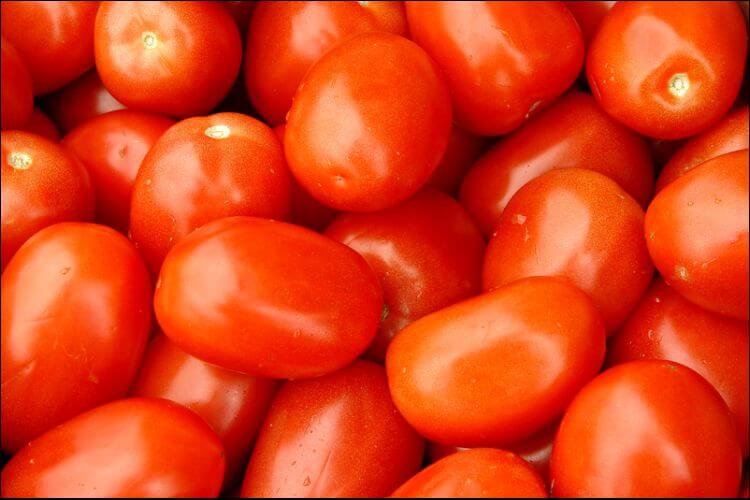
Grow Roma tomatoes in a sunny position after frost danger has passed, using well-drained soil, steady moisture and support suited to the variety. Their meaty fruit is useful for sauces and paste, but the name does not make them immune to disease or automatically safe for any canning method.
Choose the variety before planning the bed
‘Roma’ is a paste tomato cultivar, while “Roma-type” is also used loosely for similar plum-shaped tomatoes. Many familiar Roma selections are determinate, producing a relatively concentrated crop. Other paste tomatoes grow as indeterminate vines. Check the seed packet or transplant label for growth habit, maturity and named disease resistance.
Resistance abbreviations apply to specified diseases or strains, not to every tomato problem. Keep the label so you can interpret symptoms and compare results next season. A concentrated harvest suits a large sauce-making session; staggered plantings or different varieties may better suit a steady kitchen supply.

1. Find a sunny growing space
Choose a site with at least six hours of direct sun, preferably more where conditions allow. A bright indoor window is not equivalent to an outdoor full-sun site for a fruiting tomato. Check for shade from buildings and trees through the day before setting out plants.
For containers, select a substantial pot with drainage and enough room for the cultivar’s roots and support. Small decorative pots dry quickly and become unstable under a loaded plant. Place the filled pot before installing a cage so it does not need moving later.
2. Prepare soil using evidence
A soil test helps determine whether lime or nutrients are needed. Tomatoes generally suit slightly acidic soil; avoid changing pH with improvised mixtures of coffee grounds, pine needles or lime. These are not interchangeable, predictable treatments.
Incorporate mature compost where appropriate without burying the bed under excessive amendments. Use a suitable container mix in pots rather than dense garden soil. Neither granite dust nor eggshells in the planting hole is a required step.
3. Start seeds or buy healthy transplants
Start seeds indoors according to the packet and local transplant date, allowing time for sturdy growth under adequate light. Or choose compact, healthy nursery plants without obvious lesions or severe root crowding. A very tall, stressed transplant is not necessarily ahead of a smaller vigorous one.
Gradually acclimate indoor-grown plants to outdoor light and wind. Hardening off reduces transplant stress, but it does not make tomatoes frost tolerant. Wait for warm soil and suitable weather.
4. Space for the actual growth habit
Spacing depends on variety, support and growing method. Maryland Extension’s tomato guide gives a general range of 18–36 inches between plants, with wider row access, rather than a single spacing for all tomatoes. Follow cultivar guidance and leave enough room to tend and harvest the crop.
Avoid squeezing plants together simply because summers are hot. Crowding complicates watering and inspection. If heat is a recurring problem, choose locally adapted varieties and an appropriate site instead.
5. Plant and support together
Tomato stems can form roots when buried, allowing an elongated transplant to be planted deeper after lower leaves are removed. Keep healthy foliage above the soil and avoid placing the root ball into a cold, poorly drained layer. Water the plant in.
Install a suitable cage or stake at planting, before roots spread widely. Determinate plants also benefit from support when laden with fruit. Use ties that do not cut into stems, and check them as stems thicken.
6. Water the root zone consistently
Inspect soil moisture rather than giving every plant the same daily volume. Pots, sandy beds and hot weather can demand more frequent attention than moisture-retentive ground. Water thoroughly as needed, allowing drainage instead of keeping roots saturated.
Mulch after the soil has warmed, keeping material clear of stems. Uneven moisture can contribute to fruit disorders. Blossom-end rot involves calcium supply to developing fruit, often affected by water uptake; adding eggshells is not a quick correction.
7. Feed and prune with restraint
Follow soil-test and fertilizer-label guidance. Excess nitrogen may favor leafy growth at the expense of the crop. Container plants may need a different feeding schedule from garden beds.
Do not remove all side shoots from a determinate Roma plant: that removes potential fruiting growth. Pruning an indeterminate variety depends on the chosen support system. Remove diseased foliage as appropriate, but avoid stripping away the canopy that shades fruit.
8. Inspect for pests and disease
Check leaves, stems and fruit regularly. Keep foliage as dry as practical when watering, improve access around plants and remove affected debris appropriately. Use a local diagnostic resource when symptoms are unclear; disease resistance on a label does not rule out early blight or other unrelated problems.
The University of Minnesota tomato guide covers the differences between bush and vining plants and practical seasonal care. Adapt planting dates to your own climate.
9. Harvest for the intended use
Pick fruit when it has developed the cultivar’s ripe color and suitable firmness. Handle gently and discard spoiled fruit. Harvest frequently during the main flush, and plan kitchen time before a determinate crop peaks.

10. Preserve with a tested recipe
Roma tomatoes can be eaten fresh, cooked, frozen or canned using an appropriate tested method. Their texture does not establish acidity. The National Center for Home Food Preservation explains tomato acidification: required acidification steps still apply when a listed recipe offers a pressure-canning option. Follow the exact tested product, jar size, processing method and altitude adjustment; do not substitute an improvised salsa or sauce.
Image source: depositphotos.com.