If you really want your garden to turn heads next summer, then you should consider investing in a topiary. You can find beautifully shaped topiaries at your local nursery or garden center. Unfortunately, topiaries purchased at the store can come with a hefty price tag. Some topiaries will only cost a few hundred dollars while some of the bigger topiaires can cost a few thousand dollars. Ouch! For those DIYers looking to save some money, this article will give you the basics of pruning your own topiary tree. You would be surprised at how easy it is can be to make and prune your own topiary tree like a pro.
Types of Topiary
There are two basic types of topiary plants you can choose from: a vine topiary and a shrub topiary. Both styles of topiary can be used to create very simple designs like a classic spiral, globe, or pyramid. They can also both be used for intricate designs like animals. Each style requires patience and diligence to turn your plants into a pristine topiary. However, in as little as one growing season you will see your vine or shrub turn into a healthy and thriving work of art.
Vine Topiary
Step 1: Choose a Vine
The first step of creating a vine topiary is to choose your vine. There are quite a few factors you should consider, before deciding which vine you will work with. The biggest question you should be asking yourself is what kind of sunlight will your topiary be receiving. If you are planting your vine outdoors in full and direct sunlight consider clematis or sweet pea for your vine. You will find that vines such as jasmine, angel vine, or hoya will work well indoors away from direct sunlight. There are some versatile vines such as English Ivy that will work well in both sunlight or the shade. If you are not sure which vines will best suit your location talk to your local plant nursery for some help.
Step 2: Make a Frame
This next step is a fun one! Using chicken wire, wire cutters and floral tape, you can easily create a DIY topiary frame. It is easiest if you can find a mold to wrap your chicken wire around. You can use a cardboard package to make a nice square frame, a balloon or ball for a sphere, or a stuffed animal or statue for more unique shapes. Gently mold the chicken wire around the shape. You can now very carefully remove the object you were molding, and use your floral tape to hold the seams together. Leave an opening about 5-6 inches long in one of the wire seams for planting your vine later. Next, trim off any extra chicken wire with your wire cutters. You now have the base of your vine topiary.
Step 3: Fill the Mold With Moss
You are now ready to stuff your mold with sphagnum moss. Soak your sphagnum moss in the sink in large batches. Once it is thoroughly soaked, you may gently squeeze out the moss until it is damp, but not dripping. Then you can stuff the moss into your frame. Be sure to start with the hard to reach places first. Stuff the moss in tightly because the moss will naturally shrink as it dries out. If your moss is falling out of the chicken wire mold, you can use dental floss or fishing wire to wrap around the mold to help hold the moss in place.
Step 4: Plant Your Vine
When your mold is about ⅓ full of moss you should place your vine inside. Carefully remove the vine from its pot, and break up the root ball. Try not to lose too much soil. You can now arrange the roots to fill up space within the topiary mold. Once you are satisfied with the root placement, you can use your floral tape to seal the seam around the root ball. Then fill in the rest of the mold with the sphagnum moss. Next, you should begin to spread the vines over the surface of the mold. Attach vines with dental floss or fishing wire to hold in place.
Step 5: Maintain
Once your mold is full of moss and the newly planted vine, you should soak the topiary and place it in a shady spot to recuperate. Remember that your vine will need plenty of water in the first two weeks. You may move your topiary to sunnier locations as long as the move is gradual over those first two weeks. You do not want to shock your plant. As the vine continues to grow and send out new shoots, wrap them around the surface of the mold, and tie them in place with floss or fishing wire. In about 4-9 months you will have a full and thriving vine topiary that will need little maintenance beyond weekly watering.

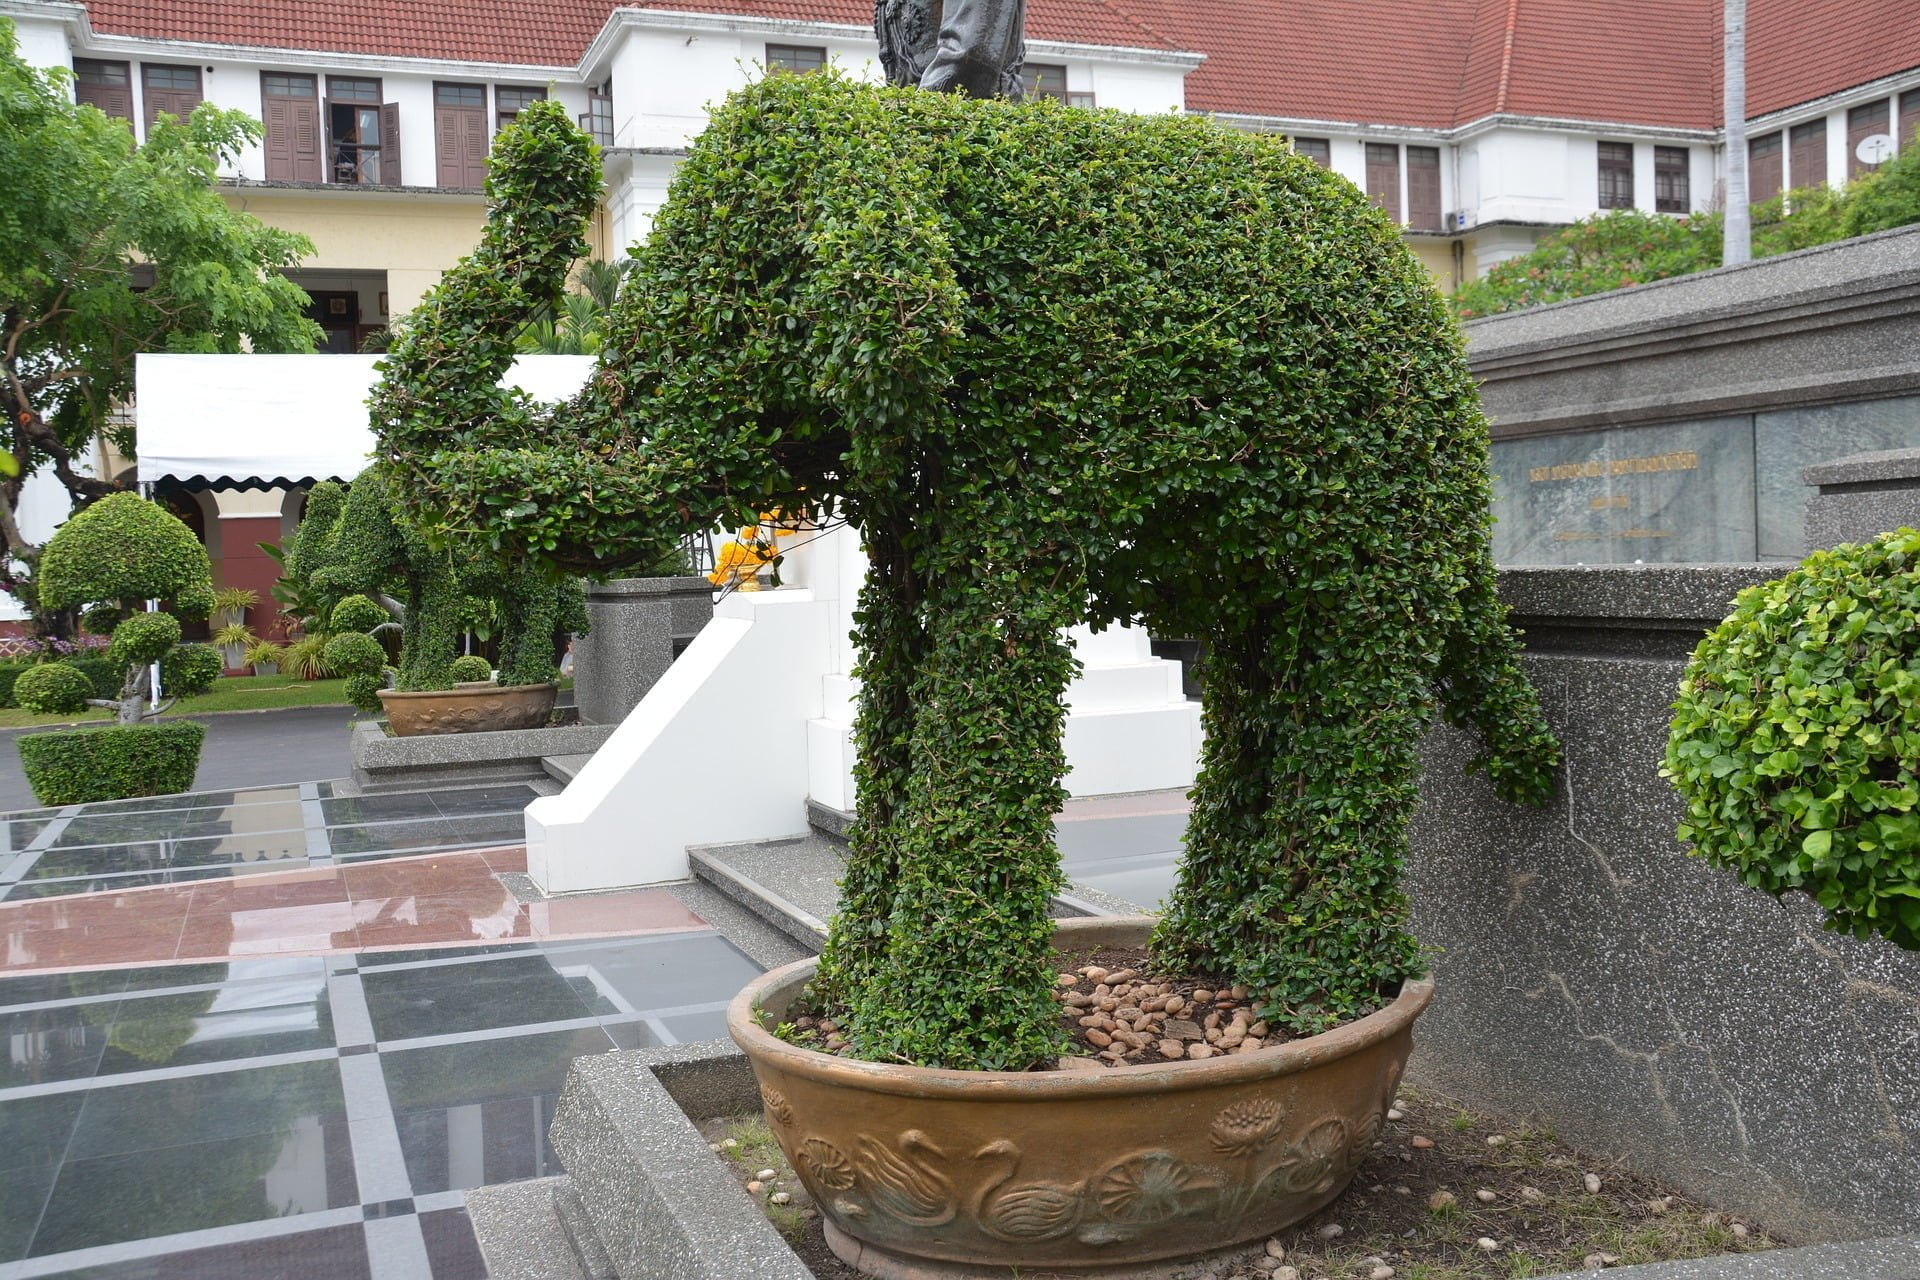
Shrub Topiary
Step 1: Choose a Shrub
The next style of topiary you can build is a shrub topiary. These topiaries can be small or large, depending on the size of the shrub you have. If you are nervous about trimming a big shrub, start with a smaller one until you feel comfortable in your trimming abilities. The most popular shrubs to use for a topiary include boxwood, holly, juniper, and rosemary. These shrubs are popular because they are dense and grow well in full or partial sun.
Step 2: Prepare to Shape
Unlike vine topiaries you are not teaching your shrub to fill in an empty space, rather you are trimming away shrub to create a shape. You can purchase pre-made frames to use as a cutting guide for your shrub topiaries. You can also build a topiary frame using the same method as described in the vine section above. If you choose to use a simple shape for your topiary such as a sphere, cube, or spiral you can simply use masking tape to outline the shape.
What are the Best Christmas Trees to Use for Topiary Projects?
When it comes to topiary projects, there is a range of best christmas trees to choose from. Fir trees like the Nordmann fir or the Fraser fir are popular choices due to their dense and symmetrical shape. Alternatively, the sleek and slender shape of a cypress tree or a spruce tree can provide an elegant touch to topiary designs. Ultimately, the best tree to use will depend on personal preferences and the specific project’s requirements.
Step 3: Shape Your Shrub
Once you have the frame or outline of your shape prepared it is time to trim your shrub. Remember to work slowly and carefully during this portion of the project. Once you trim away a section of shrub you cannot “undo” your cut. Frequently step back and look at your work so you can get a better perspective. You will want to start trimming with hand shears until you have your basic shape established. Once the basic shape is established it is easier to go through with a hedge trimmer to clean up your lines.
Can Pruning Techniques Used for Topiary Trees be Applied to Okra Plants?
Can pruning techniques used for topiary trees be applied to okra plants? Topiary trees are known for their intricate shapes and designs, achieved through careful pruning. However, when it comes to growing okra with pretty flowers, traditional topiary techniques may not be the most suitable. Instead, focusing on proper pruning practices specific to okra plants will ensure healthy growth and beautiful blooms.
Once you have the frame or outline of your shape prepared it is time to trim your shrub. Remember to work slowly and carefully during this portion of the project. Once you trim away a section of shrub you cannot “undo” your cut. Frequently step back and look at your work so you can get a better perspective. You will want to start trimming with hand shears until you have your basic shape established. Once the basic shape is established it is easier to go through with a hedge trimmer to clean up your lines.
Step 4: Maintain
You can now plant your shrub in the ground or into a large pot. The shrubs will grow best in climates that do not dip below freezing very often. If the weather is too cold it will cause the roots to freeze, but if the weather is too warm your shrub will come out of dormancy and grow spindly shoots. Keep the plant well watered all year long. Regular trimming of your shrub during growing season will help maintain the shape as well as encourage thicker growth.
In Conclusion
A topiary can be a beautiful and attractive piece for any garden. With a little patience and a steady hand you may find that shaping a topiary is a relaxing and rewarding way to get you into your garden.
Related Article: Best Hedge Trimmer: Top 10 Reviewed and Our Pick