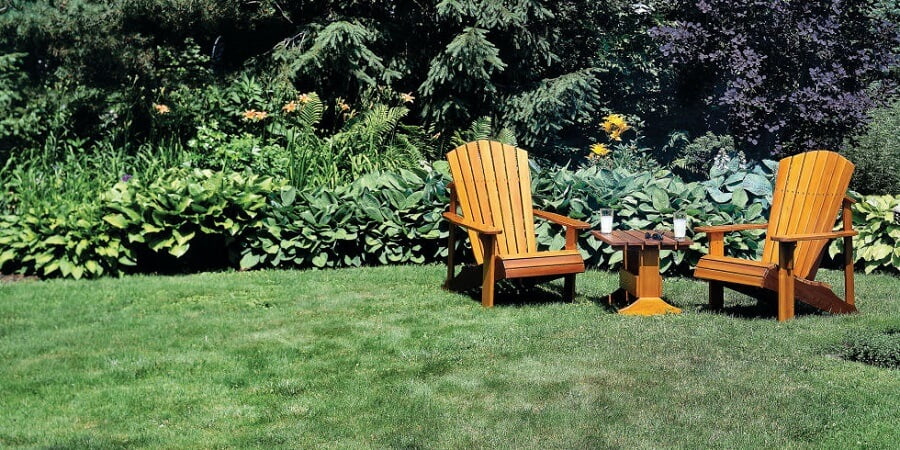
Adirondack chairs are extremely popular all around the world. If we consider the way they look, how comfortable they are, and how unique they can make your garden or patio look, this should come as no surprise. While you can always buy an Adirondack chair, making one yourself is a great way to make sure no one else will have a chair exactly like yours. Especially if you enjoy building things around the house and using your creativity and craftiness, you’re going to love what we’ve prepared for you today. We have all the steps of creating the ultimate DIY Adirondack chair. Let’s see what they are!
Make a DIY Adirondack Chair in 8 Steps
Step 1: Gather the Materials and Establish the Dimensions
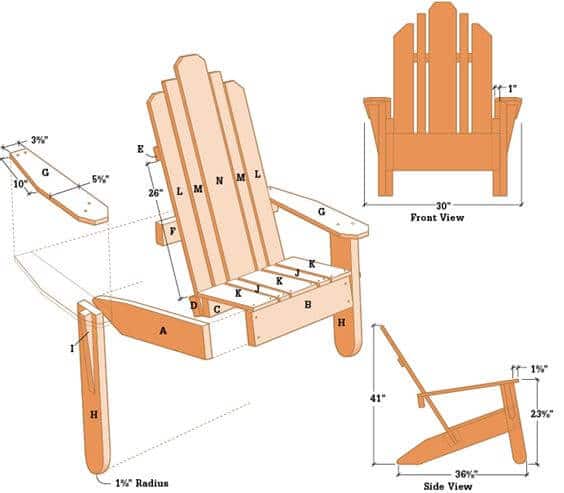
The DIY Adirondack chair we’ve prepared for you today is made of cedar. This is one of the most reliable materials you could use. If cedar is not your thing, you can replace it with pine. Pine is another type of wood a lot of people use when building Adirondack chairs. Before starting to build the DIY Adirondack chair, you have to know the dimensions of every piece of wood you’re going to use.
You need two wood pieces for the legs (1 ½ x 5 ½ x 34 ½ inches), 1 piece for the apron (1 ½ x 5 ½ x 21 inches), 1 piece for the seat support (1 ½ x 3 ½ x 18 inches), 1 for the low back brace (1 ½ x 3 ½ x 18 inches), 1 for the high back brace (3/4 x 1 ½ x 18 inches), 1 for the arm cleat (1 ½ x 3 ½ x 24 inches), 2 for the arms (3/4 x 5 ½ x 28 inches), 2 for the posts (1 ½ x 3 ½ x 22 inches), 2 for the arm braces (1 ½ x 2 ¼ x 10 inches), 2 for the narrow seat slats (3/4 x 1 ½ x 20 ¼ inches), 3 for the wide seat slats (3/4 x 5 ½ x 20 ¼ inches), 2 for the end back slat (3/4 x 3 ½ x 36 inches), 2 for the narrow back slats (3/4 x 1 ½ x 38 inches), and one for the center back slat (3/4 x 5 ½ x 40 inches).
Step 2: Build the Legs
Now, it’s time to cut the legs according to the dimensions we established above, by marking 2 inches from the edge of an end of your choosing. Then, you’re going to have to mark 6 inches on the adjoining side. Use a straightedge to connect the points and mark 2 ¼ inches on the same end, but from the other edge. On that edge, you’ll have to mark 10 from the very end, and then connect the points. The goal is to create a cutting line for the next taper. With the help of a circular saw, you’re going to cut the wood following the marks you’ve just made, not before you replicate them on the other leg.
Step 3: Build the Seat
Next, you have to cut the seat support and the apron to size. Then, attach the front ends of the legs you’ve just built to the apron. Use 3-inch deck screws and glue to do that. Remember that the seat support must be positioned so the apron’s inside edge and the inside face are 16 ½ inches apart. The seat support is supposed to go between the two legs. Keep in mind that the part tops should be flush. After you’ve also cut the seat slat according to the dimensions above, make sure its ends are smooth by sanding them. The slats go on top of the seat box, as well as 5/8 inches away from one another. Finally, they should be 3/4 inches longer than the front of the seat.
Step 4: Secure the Seat Slats
If you’re wondering how you can do that, the answer is quite simple. All you have to do is use 2-inch deck screws that you drive into previously drilled counterbored pilot holes. They should reach the seat support and the tops of the apron. The plugs should create straight lines since they’ll be visible both on the back and front of the DIY Adirondack chair.
Step 5: Build and Attach the Back Slats
After cutting the back slats according to the dimensions above and trimming off 1 inch from the corners of the largest one, take the next largest one and mark two inches from one of the top corners, going in both directions. After trimming, you’ll notice that these are actually the outer slats which will go on the back of the chair.
On to attaching the back slats, after cutting both the high back brace and the low back brace, and making sure you level the tops of the braces, place the back slats over the braces, leaving 5/8 inches between the slats. Before drilling holes in the wood and attaching all the pieces together with deck screws, there are a couple of things you should check. First of all, the slats’ ends have to be flush with the low back brace, more precisely its bottom edge. Second of all, the bottom of the other brace, namely the high back brace, has to be 26 inches above the top of the low one. Finally, the braces should be perpendicular to the slats.
Step 6: Build and Assemble the Arms
When it comes to the arms of the chair, you won’t only have to cut them according to the dimensions we’ve already provided you with, but also make sure their outer ends have decorative angles. In order to do that, you’ll have to mark 1 inch starting from each corner, going along both of the edges. Then, draw two cutting lines of 1 ½ inches on each of the arms. With the circular saw, cut following the lines, and then mark the places that will help you get a tapered cut on the back edge of both arms. The first marks should be of 3 ¼ inches from the inside edges you can find on the back of the arms. The second ones should be of 10 inches, right on the outside edges on the back. After connecting the points and cutting, it’s time to assemble the arms.
First of all, you’re going to have to attach the arms to the cleats by using glue. Then, it’s time for the posts to connect to the arms. The arms should be right on top of the posts, more precisely on their square ends. In order to connect them, you’re going to need some more glue. You’re also going to need some 3-inch deck screws that you drive through both the arms and the posts. Second of all, you’ll have to get some arm braces to position on the outside of each of the arms. Use glue to attach the braces, and drive some screws from the posts into the braces as well.
Step 7: Assemble Everything
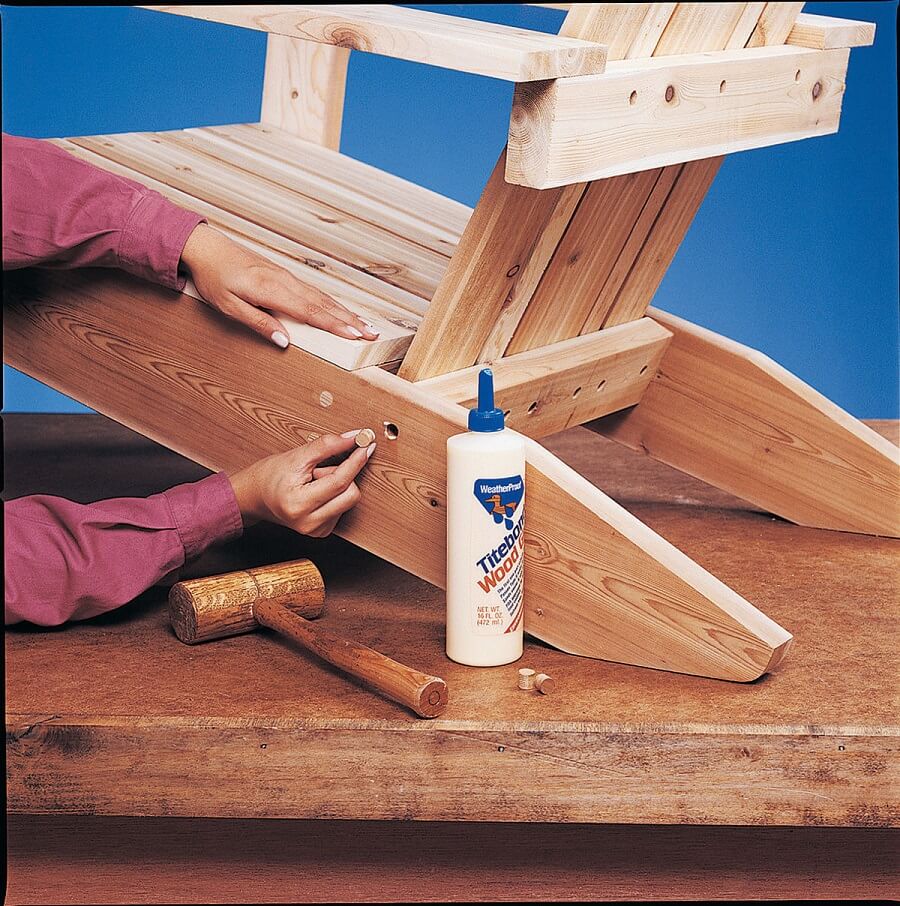
Now that you’ve assembled several parts of the chair, it’s time to complete the DIY Adirondack chair by putting everything together. This means attaching the back to the arm/post assembly and the seat/leg one. For this step, you’re going to need two lag screws and a couple of deck screws.
Step 8: Consider Some Finishing Touches
No DIY Adirondack chair would be complete without a couple of finishing touches. First of all, you’ll need some wood plugs that you place into the counterbores using glue. Once the glue has dried, make sure the plugs don’t stick out from the surface of the chair by sanding them down. Speaking of sanding, this is something you should do to the entire DIY Adirondack chair since it’s not pre-made. Use 120-grit sandpaper for this task.
Second of all, you should also consider the coating of the chair. Here, the choice is completely up to you. You can simply apply a clear wood sealer, or you can paint the chair if you’re into more colorful furniture items. Regardless of the choice, you should seal the chair with something.
Summing Everything Up
We hope today’s guide has managed to successfully teach you how to make a DIY Adirondack chair. As long as you follow the instructions above, the process won’t take too long or be too complicated. Still, you have to pay a lot of attention when you measure and cut the chair pieces. Otherwise, the chair won’t fit together perfectly.
Finally, if you don’t have the time to build your own DIY Adirondack chair, you can also buy one. Because we want to help you out with that as well, we have three suggestions for some great Adirondack chairs for sale. The first one is the POLYWOOD AD7030GY Classic Adirondack Chair in the color slate grey that you can find here. The second one is called the Lifetime 60064 Adirondack Chair, and it’s a more traditional one. You can purchase this one right here. The second and last one is the Leigh Country TX 94050 Adirondack Chair in red that you can order here.