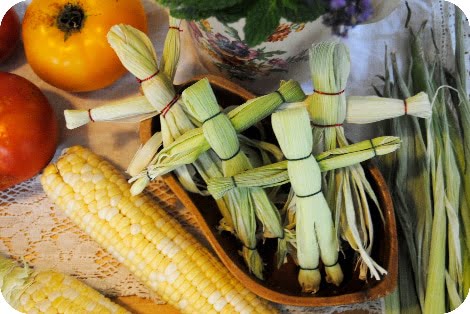
Corn husk dolls are an easy and fun project for kids. If you’re looking for fun crafts and projects for your kids now that Summer is approaching, this is a great place to start! Your kids will have so much fun decorating, designing, dressing, and making their corn husk dolls. You’ll see how simple and easy this little project is.
How to Make Corn Husk Dolls
Materials
Square-cut dried corn husks
Wool felt for doll clothing (or any material you like)
Twine
Yarn
Paper towels
Buttons
Scissors
Glue
Step 1
Soak the con husks in water for 10 minutes and dry them off by blotting them with a paper towel. Soaking the corn husks will allow them to bend and be pliable without breaking. You don’t want your corn husks to fray or snap while you are bending them to the shape you want. This is a very important step, do not skip it!
Step 2
Lay 4 or 6 husk pieces on top of each other in a stack. Make sure that you always use an even number of husks or the doll won’t turn out right. After you’ve stacked the husks on top of each other, use the yarn or some thin twine to tie the husks together. Tie the twine about an inch from the top.
Step 3
Separate the corn husks into equal sections. If you have 4 husk pieces separate into two sections of 2. If you have 6 husk pieces separate into two sections of 3. Then fold the sections of the husk in half towards the piece of twine you tied. The piece of twine you tied earlier, should now be covered by the husks. Tie another piece of twine about an inch from the top and then the head is created!
Step 4
Roll up a single husk and tie each end. This will be the arms. Insert the rolled up husk between the equal portions of husks with the head. Tie another piece of twine below the inserted arms to create a waist for the doll. If you’re creating a female doll with a skirt you are finished! You can trim the husks to an even length at the bottom, or leave them uneven.
Image Source: Martha Stewart
Step 5
If you’re making a male doll, just tie more twine at the knees and ankles of the doll, then he’s all done!
Image Source: Martha Stewart
Step 6
Make clothing for you doll by using a square piece of felt and cutting an “X” in the middle of it. Put the doll’s head through the “X” and secure the felt around the doll’s waist. You can glue buttons on the doll, and use yarn for hair. Have fun with this step and really let your kids create the doll any way they want it to look.
Summing Up
There you have it! You have a finished doll that your kids made and had fun with. Your kids will love playing with the corn husk dolls they created. They can make up names and stories for their dolls and act out the stories for you. Simple, easy, affordable, and fun!
Image Source: Garden Mama


