Are you tired of dealing with excess water pooling in your yard or basement? Installing a French drain can be the solution you need. With this comprehensive DIY guide and expert tips, you’ll have the knowledge and confidence to install a French drain system that effectively manages water and prevents flooding.
A French drain is a trench filled with gravel or crushed stone, containing a perforated pipe that redirects water away from your property. It’s a proven method for proper water management and can be a cost-effective alternative to professional drainage systems.
To install a French drain successfully, it’s essential to follow a step-by-step process that ensures optimal performance. From planning the location to backfilling the trench, this guide will walk you through each stage, providing expert tips and insights along the way.
Key Takeaways:
- Installing a French drain can effectively manage excess water in your yard, preventing flooding and protecting your basement.
- Proper planning of the drain’s location is crucial, considering the direction of water flow, zoning restrictions, and outlet options.
- When digging the trench, ensure the size and slope meet the required specifications, and take precautions to avoid damaging underground utility lines.
- Lining the trench with filter fabric helps keep the drain free from debris, but it can be skipped for gravel-free drainage systems.
- Gravel bedding and proper pipe installation are essential for the drain’s functionality and longevity.
Stay tuned for the next section, where we’ll dive into the crucial first step: planning the location for your French drain installation.
Continue reading the article here
Planning the Location
Before installing a French drain, it’s important to plan the location properly. Start by determining where the excess water is pooling in your yard and where you want it to go. This will help you determine the best placement for your drain.
Choose an outlet for the runoff water, ensuring that it leads to retention ponds, existing drainage systems, or road curbsides if allowed. It’s essential to direct the water away from your home to prevent flooding and water damage.
When planning the location, consider drainage direction and elevation. The trench and pipe system should always drain from a higher elevation to a lower elevation to ensure proper water flow. This will help the water naturally flow away from the problem areas.
Additionally, it’s crucial to be aware of any zoning restrictions in your neighborhood. Check local regulations and obtain any necessary permissions before proceeding with the installation. This will help you avoid any legal issues and ensure compliance with the rules.
While planning, confirm that the water issue is not caused by leakage from underground pipes. If you suspect that there may be an issue with the plumbing system, it’s best to address and fix the problem before installing the French drain.
Remember, proper planning of the location is the foundation of a successful French drain installation. By considering drainage direction, zoning restrictions, and potential underground leaks, you can ensure an effective drainage solution for your property.
Digging the Trench
To install a French drain, you need to dig a trench from the problem area to the chosen outlet. It is an essential step in the installation process.
The trench size is an important consideration. The trench should be approximately 18 inches deep and 9 to 12 inches wide. This size ensures that it can effectively accommodate the drainage pipe and provide enough space for proper water flow.
Additionally, it’s crucial to maintain the correct trench slope. The trench should have a slope of at least 1 percent, which means there should be a drop of at least one inch for every 10 feet of pipe. This slope ensures that gravity can effectively pull the water towards the outlet and prevent stagnation.
Before digging the trench, make sure to check for any underground utility lines and pipes. This step is crucial for safety reasons and to avoid any accidental damage to existing infrastructure. You can contact the appropriate authorities or use utility locating services to identify the location of underground lines.
Digging a trench can be a labor-intensive task, especially for larger projects. Depending on the scale of your French drain installation, you can use shovels or consider renting trenching tools such as a trencher. Trenchers are equipment specifically designed for digging trenches, making the process faster and more efficient.

Lining the Trench with Filter Fabric
To keep your French drain free from dirt, silt, and tree roots, it’s essential to line the trench with water-permeable filter fabric or a weed barrier. This protective layer helps maintain the efficiency and longevity of your drainage system.
When lining the trench, ensure that the filter fabric extends at least 10 inches beyond the sides of the trench. This extra coverage prevents any potential infiltration of debris or sediment from the surrounding soil.
If you’re using a gravel-free French drain system, you can skip this step, as the absence of gravel eliminates the need for the filter fabric. The filter fabric primarily acts as a barrier between the gravel and the surrounding soil, preventing clogs and maintaining proper water flow.
Pouring the Gravel Bedding
Once the trench is properly dug and lined, it’s time to pour the gravel bedding. This crucial step provides a stable base for the drainage piping and ensures effective water flow within the French drain system.
To begin, pour and compact approximately 3 inches of gravel or landscaping stone along the bottom of the trench. The gravel acts as a sturdy foundation for the drainage piping, creating a solid bed that promotes proper water movement.
Next, it’s essential to install an inlet grate at the point where water tends to pool the most. This allows the excess water to enter the French drain system and prevents it from stagnating or causing damage to your property.
To connect the drainage pipes and create a reliable system, secure the necessary fittings using flexible drainage hoses or PVC pipes with drilled holes. Flexible hoses provide versatility and easy installation, while PVC pipes offer enhanced durability.
If you opt for PVC pipe, consider drilling holes spaced approximately 6 inches apart along its length. These holes ensure efficient water entry, allowing the excess water to be swiftly carried away through the French drain system.

Setting the Pipe Drain in the Trench
Now that you’ve prepared the trench and lined it with filter fabric, it’s time to set the pipe drain in place. This step is crucial for ensuring the proper functioning of your French drain system. Follow these guidelines to complete this stage effectively.
Step 1: Lay the Connected Pipe Structure
Carefully lay the connected pipe structure in the prepared trench. Make sure the drainage holes in the perforated pipe are pointed downwards. This orientation allows water to enter the pipe easily, ensuring efficient drainage.
Step 2: Perform a Flow Test
Before covering the pipe, it’s essential to test the flow of the drain system. Pour water into the inlet grate and observe how the water flows through the pipe. Ensure that the water moves freely, without any obstructions or backflows. This step helps identify any blockages or issues that need to be addressed before completing the installation.
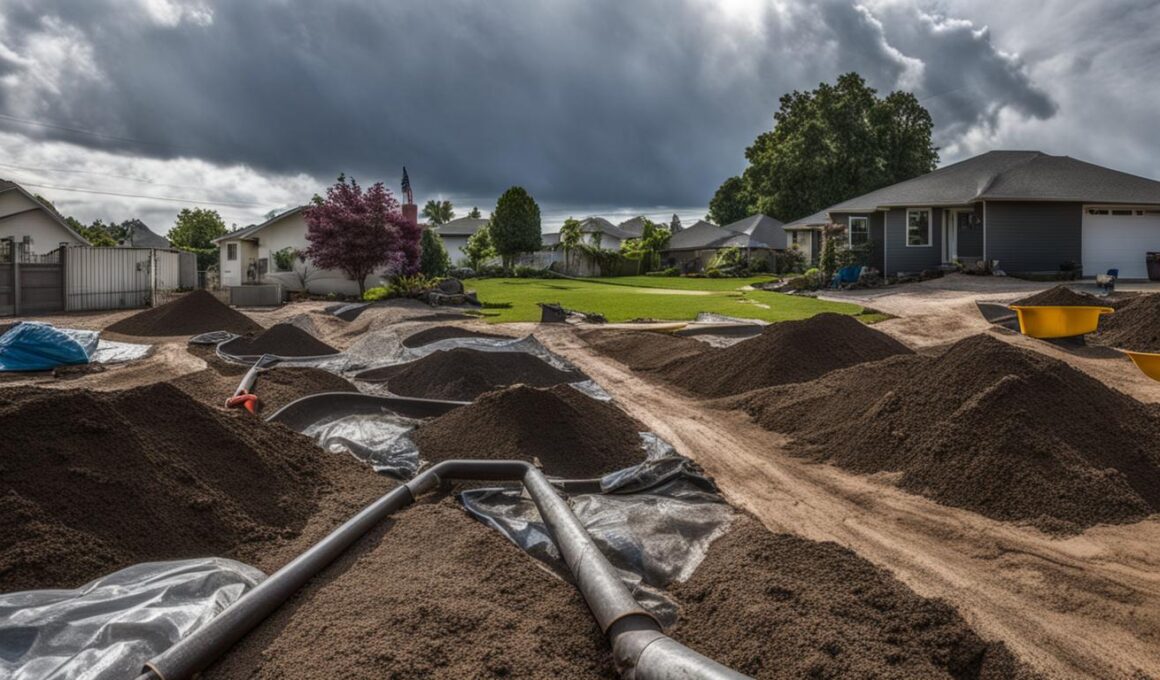
In the image below, you can see an example of a pipe drain being set in the trench:
Pro Tip: Testing the flow of the drain is crucial for ensuring its effectiveness. If you notice any issues during the flow test, such as slow drainage or water pooling, you may need to make adjustments to the pipe placement or check for any blockages.
Once you are satisfied with the flow test results and the pipe drain placement, you can proceed to the next step — covering and backfilling the trench. This will complete the installation of your French drain system.
Covering and Backfilling
To complete the installation of your French drain, it’s time to cover and backfill the trench. This step ensures the drain is protected and seamlessly integrated into your yard. Follow these instructions to properly cover and backfill your French drain:
- Cover the pipe: Place about 3 inches of gravel or crushed stone over the pipe. Make sure the covering doesn’t extend above ground level.
- Add filter fabric: Wrap the excess filter fabric over the gravel to provide an extra layer of protection. This helps prevent dirt, silt, and roots from clogging the drainage system.
- Backfill with topsoil: Gradually fill the trench with topsoil until the entire French drain system is covered. Use a tamper or your feet to compact the soil as you go, ensuring a stable surface.
Once your French drain is covered and backfilled, ongoing maintenance is crucial to keep it functioning effectively:
- Reseed the surface: If any grass or vegetation was displaced during the installation, reseed the area to promote regrowth and maintain a visually pleasing landscape.
- Inspect and clean the inlet grate and outlet point: Regularly check for debris or obstructions that may hinder water flow. Clean the inlet grate and outlet point as needed to maintain optimal drainage.
- Repair or unclog the drain if necessary: If you notice any issues, such as leaks or blockages, promptly address them to ensure the French drain functions properly.
Following these guidelines and performing ongoing maintenance will help your French drain effectively manage excess water, prevent flooding, protect your home, and safeguard against erosion. Now that you’ve completed the installation process, you can enjoy a well-drained yard and peace of mind.
Conclusion
Installing a French drain is a DIY project that requires careful planning and execution. With a properly installed French drain, you can effectively manage water in your yard, prevent flooding, protect your basement, and prevent erosion. By following expert tips and guidelines, you can ensure optimal drainage and a well-functioning French drain system.
French drain installation is a great solution for water management, especially if you have areas in your yard that are prone to pooling water or excessive moisture. Instead of dealing with the headaches and potential damage caused by standing water, a French drain redirects the water away from your property, ensuring proper water flow and preventing potential issues.
Optimal drainage is essential to maintaining the integrity of your property and preventing water-related damage. Whether you’re dealing with heavy rainfall, melting snow, or underground water sources, a French drain provides an effective water management solution. By implementing proper French drain installation techniques, you can protect your landscaping, foundation, and overall property from water damage and costly repairs.
Can Removing a Bush Interfere with the Installation of a French Drain?
Yes, removing a bush can interfere with the installation of a French drain. The roots of the bush may disrupt the proper placement of the drain, causing it to be less effective. It is important to understand how to remove a bush properly to avoid any issues with the drain installation.
FAQ
What is a French drain?
A French drain is a trench filled with gravel or aggregate that helps redirect excess water away from an area. It is commonly used to manage water in yards, prevent flooding, protect basements, and prevent erosion.
Why is it important to plan the location properly before installing a French drain?
Planning the location properly ensures that the French drain effectively redirects water and prevents future water issues. It involves determining where the excess water is pooling, choosing a suitable outlet, ensuring proper drainage direction, and avoiding zoning restrictions.
What size trench should I dig for a French drain?
The trench for a French drain should be about 18 inches deep and 9 to 12 inches wide. It’s important to ensure the trench has a slope of at least 1 percent, with a drop of at least one inch for every 10 feet of pipe, to facilitate proper drainage.
What tools can I use for digging the trench for a French drain?
You can use shovels for smaller projects or consider renting a trencher for larger projects. Always be cautious and check for any underground utility lines or pipes before digging.
Do I need to line the trench with filter fabric?
Yes, lining the trench with water-permeable filter fabric or a weed barrier is recommended to prevent dirt, silt, and tree roots from clogging the French drain. Make sure the fabric extends at least 10 inches beyond the sides of the trench. However, if you’re using a gravel-free drainage system, you can skip this step.
What is the purpose of the gravel bedding in a French drain?
The gravel or landscaping stone acts as bedding for the drainage piping in a French drain. It provides support and allows water to flow freely through the system. Pour and compact about 3 inches of gravel along the bottom of the trench.
How do I test the flow of the French drain?
After setting the pipe drain in the trench, pour water into the inlet grate – the point where the water pools the most. Ensure the water flows freely through the pipe and reaches the chosen outlet. This helps confirm that the French drain is working properly.
What ongoing maintenance is required for a French drain?
Ongoing maintenance for a French drain includes reseeding the surface, inspecting and cleaning the inlet grate and outlet point, and repairing or unclogging the drain if necessary. Regular maintenance helps ensure the optimal functioning of the French drain system.