Are you concerned about using traditional ice melt on your wood surfaces? Don’t worry, we’ve got you covered! In this article, we will show you how to make homemade ice melt that is safe for wood.
By following our simple steps, you can protect your valuable wood surfaces from damage caused by harsh chemicals. With just a few ingredients that you probably already have at home, you can create a homemade solution that will effectively melt ice and snow without harming your wood.
We will guide you through the process, from gathering the necessary ingredients to applying the solution to your wood surfaces. So, say goodbye to worries about damaging your wood and hello to a safe and effective homemade ice melt solution!
Quick Summary
- Homemade ice melt is a safe and effective alternative to traditional ice melt for wood surfaces.
- Natural alternatives such as warm water and vinegar, sand, or kitty litter can also be used to melt ice on wood without causing damage.
- Calcium magnesium acetate (CMA) is a recommended option for ice melt on wood surfaces.
- It is important to test homemade ice melt on a small area of wood before applying it to the entire surface.
Understand the Risks of Using Traditional Ice Melt on Wood Surfaces
Using traditional ice melt on wood surfaces can be like pouring acid onto delicate, beautiful wooden floors – it’s a recipe for disaster. When it comes to keeping your wood surfaces safe during icy conditions, it’s crucial to understand the risks associated with using traditional ice melt.
The chemicals found in these products can cause serious damage to your wood, leaving behind unsightly stains, discoloration, and even warping. It’s important to protect your wood surfaces from these harmful effects.
One of the main risks of traditional ice melt is the high salt content. Salt can seep into the wood, causing it to lose its natural moisture and become dry and brittle. This can lead to cracking and splitting, compromising the integrity of your wood surfaces.
Additionally, the chemicals in ice melt can strip away the protective finish on your wood, leaving it vulnerable to further damage.
To protect your wood surfaces, it’s essential to use a homemade ice melt that is safe for wood. There are several natural alternatives that can effectively melt ice without causing harm. For example, you can mix equal parts of warm water and white vinegar to create a safe and effective ice melt solution. Another option is to use sand or kitty litter, which provide traction on icy surfaces without damaging your wood.
By understanding the risks of traditional ice melt and taking steps to protect your wood surfaces, you can ensure that they remain beautiful and intact, even during the harshest winter conditions. Safety should always be a priority when it comes to caring for your wood surfaces.
Gather the Necessary Ingredients for Homemade Ice Melt
To ensure the protection of your wooden surfaces during winter, it’s essential to gather all the ingredients needed for a DIY ice melting solution. When making homemade ice melt safe for wood, it’s important to consider ingredient alternatives that won’t damage or discolor the wood.
One alternative to traditional ice melt is using calcium magnesium acetate (CMA). CMA is a safer option as it’s less corrosive and less likely to harm the wood. Another alternative is using sand or sawdust to provide traction on icy surfaces without causing any damage.
When gathering the necessary ingredients, it’s important to keep safety precautions in mind. Always wear gloves and protective eyewear when handling any chemicals. Store the ingredients in a cool, dry place, away from any flammable materials. Be cautious when mixing the ingredients, ensuring that there are no spills or splashes.
It’s also important to test the homemade ice melt on a small, inconspicuous area of the wood before applying it to the entire surface to ensure it doesn’t cause any adverse effects.
By gathering the right ingredients and following safety precautions, you can create a homemade ice melt that’ll effectively melt ice without harming your wooden surfaces.
Mix Salt, Water, and Dish Soap to Create a Homemade Solution
When it comes to protecting your wooden surfaces during winter, nothing beats the effectiveness of a homemade solution made with salt, water, and dish soap. Not only is this solution easy to make, but it also provides several benefits for your wood. Here’s how you can mix salt, water, and dish soap to create a homemade ice melt solution:
- Start by filling a bucket with warm water. Warm water helps dissolve the salt faster.
- Add a generous amount of salt to the bucket. Salt is effective in melting ice and preventing it from refreezing.
- Pour a small amount of dish soap into the bucket. Dish soap helps break down the surface tension of the ice, making it easier to melt.
- Mix the ingredients together until the salt has dissolved completely.
Once the solution is ready, use a spray bottle or a watering can to apply it to your wooden surfaces. Make sure to apply a thin layer to avoid any damage to the wood.
By using this homemade solution, you can ensure the safety of your wooden surfaces during winter while also benefiting from its effectiveness in melting ice.
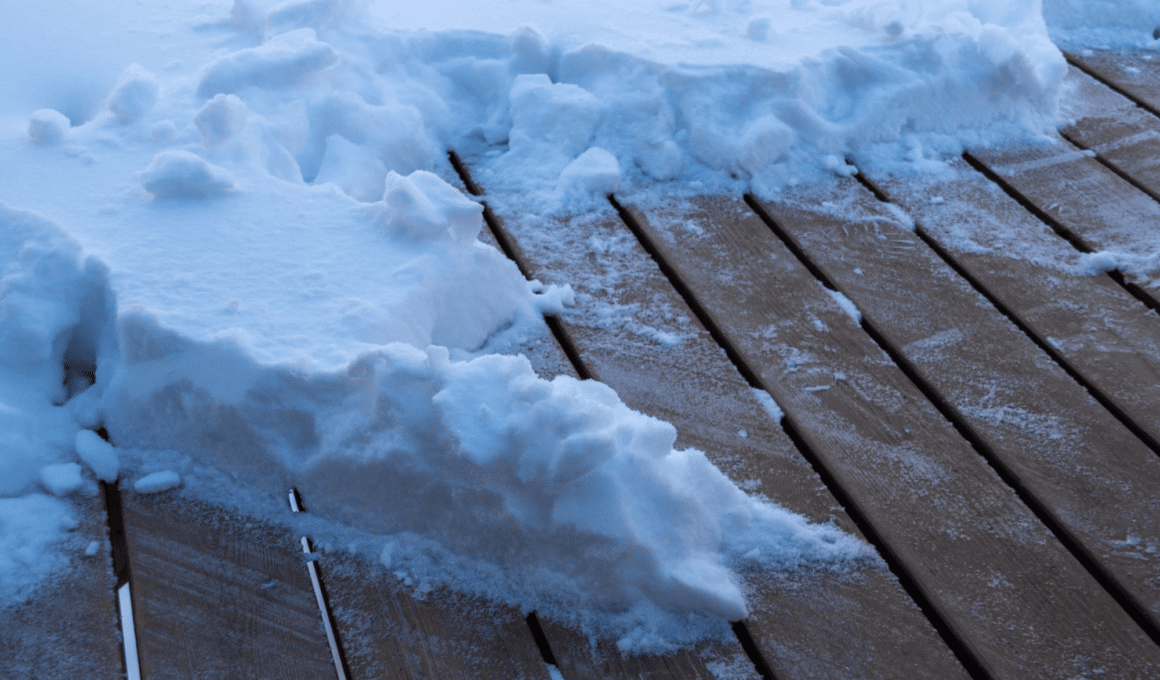
Apply the Homemade Ice Melt Solution to Wood Surfaces
Simply apply the solution you’ve created to your wooden surfaces, ensuring a thin layer is evenly distributed, for maximum protection during the winter months. Applying homemade ice melt to wood not only helps to remove ice and snow but also prevents damage that can be caused by freezing temperatures. Follow these steps to effectively apply the solution and keep your wood safe:
- Prepare the surface: Before applying the homemade ice melt, clear the wooden surface of any loose debris or snow. This will ensure that the solution can penetrate evenly and provide better protection.
- Use a sprayer or brush: To apply the solution, you can use a garden sprayer or a brush. A sprayer allows for a more even distribution, while a brush allows you to control the amount and target specific areas.
- Apply the solution: Start by spraying or brushing the solution onto the wood, working in small sections. Make sure to cover the entire surface, including any cracks or crevices where ice and snow can accumulate.
- Let it sit: Allow the solution to sit on the wood for a few minutes, giving it time to penetrate and break down the ice. This will make it easier to remove the ice and snow.
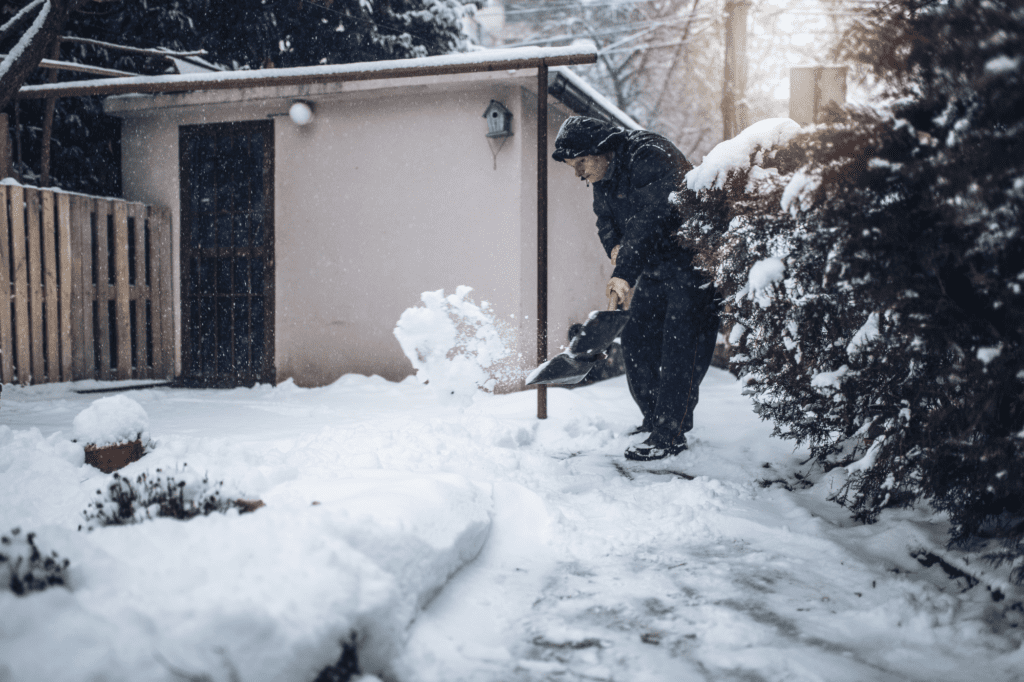
Once the solution has had time to work, use a shovel or broom to gently remove the ice and snow. Avoid using excessive force or sharp tools that can damage the wood. By following these steps, you can effectively apply your homemade ice melt solution and protect your wood from winter weather hazards. Stay safe!
| Pros | Cons |
|---|---|
| Environmentally friendly | May require multiple applications in severe weather conditions |
| Safe for pets and children | May leave a residue on the wood surface |
| Cost-effective | Requires regular reapplication |
| Easy to make at home | May not be as effective as commercial ice melt products |
Use a Soft Bristle Brush to Remove Ice and Snow
Using a soft bristle brush is a gentle and effective way to get rid of ice and snow from your wooden surfaces. It allows you to remove the snow without causing any damage to the wood. Start by gently sweeping the brush over the surface of the wood, working in small sections at a time. Be sure to brush in the direction of the wood grain to avoid scratching the surface.
For stubborn ice that’s difficult to remove with just the brush, you can use a scraper. However, it’s important to use a plastic or rubber scraper to avoid any scratches or damage to the wood. Gently slide the scraper under the ice and lift it off the surface. Be careful not to apply too much pressure, as this may cause the scraper to dig into the wood.
In addition to removing the ice and snow, it’s also important to provide traction on the wooden surface to prevent slips and falls. One way to do this is by using sand. Sprinkle a thin layer of sand on the surface of the wood to create a rough texture that’ll help improve grip. Make sure to spread the sand evenly and avoid using too much, as it may cause the wood to become slippery.
By using a soft bristle brush, a scraper for stubborn ice, and sand for traction, you can effectively remove ice and snow from your wooden surfaces while ensuring their safety and protecting them from any damage.
Repeat the Application as Needed
To ensure the effectiveness of the ice and snow removal process, it’s important to repeat the application as needed. This will help maintain the safety of your wood surfaces and prevent potential damage. Here are some key points to keep in mind:
- Frequency of Application:
- Pay attention to weather conditions and the amount of ice and snow build-up. If there’s heavy snowfall or freezing rain, you may need to apply the homemade ice melt more frequently.
- Consider the temperature. If it’s extremely cold, the ice and snow may take longer to melt, so you may need to repeat the application more often.
- Repeat Application:
- Start by removing any remaining ice and snow with a soft bristle brush (as mentioned in the previous subtopic). This ensures that the homemade ice melt can penetrate the surface more effectively.
- Apply a thin layer of the homemade ice melt, making sure to cover the entire area. You can use a shovel or a gloved hand to spread it evenly.
- Monitor the surface and reapply the homemade ice melt as needed. If you notice any ice or snow accumulation or if the surface becomes slippery again, it’s time to repeat the application.
By following these guidelines and repeating the application as necessary, you can effectively remove ice and snow from your wood surfaces while keeping them safe from damage. Remember to always prioritize safety and take necessary precautions during the removal process.
Consider Alternative Ice Melt Options for Wood Surfaces
If you’re looking for alternative options to protect your wooden surfaces from ice and snow, there are a few other choices you might consider. While homemade ice melt can be effective, it’s important to explore other options that are safe for wood.
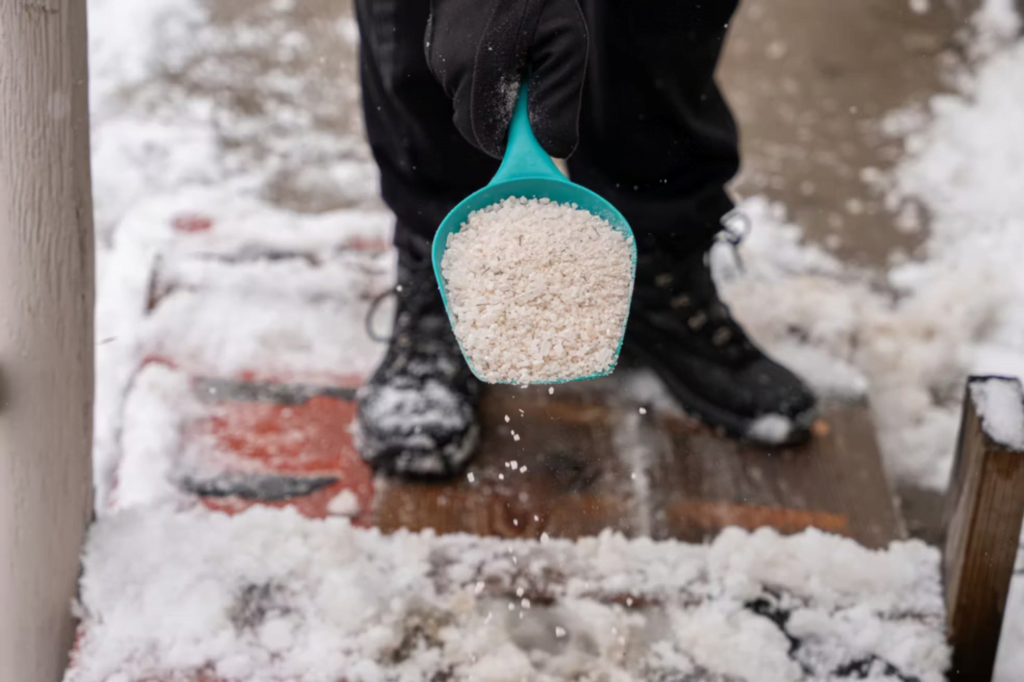
One alternative ice melt option that you might find beneficial is using sand. Sand provides traction on slippery surfaces without causing any damage to the wood. It’s a natural and cost-effective solution that can be easily applied to your wooden surfaces.
Another option to consider is using cat litter. Cat litter, specifically non-clumping clay litter, can help absorb moisture and provide traction on icy surfaces. It’s important to choose a litter that is safe for pets and doesn’t contain any harmful chemicals. Spread the cat litter evenly across your wooden surfaces to prevent slipping and protect the wood from potential damage.
Additionally, using calcium magnesium acetate (CMA) can be a safe alternative for wood surfaces. CMA is an environmentally friendly ice melt product that is non-corrosive and safe for plants and animals. It works by preventing ice from bonding to the surface, making it easier to remove. This option is particularly beneficial if you have pets or children who frequently come into contact with the wooden surfaces.
When searching for alternative ice melt options for wood surfaces, consider using sand, cat litter, or calcium magnesium acetate. These options provide traction and protection for your wooden surfaces without causing any harm.
Protect and Maintain Wood Surfaces Throughout the Winter Season
Ensure the longevity and beauty of your wooden surfaces this winter by implementing proper maintenance techniques. Follow these tips to protect and maintain your wood surfaces throughout the winter season:
- Apply protective coatings: Before winter arrives, make sure to apply a protective coating to your wood surfaces. This will create a barrier between the wood and the elements, preventing damage from moisture, snow, and ice.
- Use natural alternatives: Instead of using traditional ice melt products that can be harmful to wood, opt for natural alternatives. For example, you can sprinkle sand or kitty litter on icy areas to provide traction without damaging the wood.
- Clean regularly: Snow and ice can leave behind salt and debris that can harm your wood surfaces. Clean your wood regularly with a mixture of mild soap and water to remove any residue and prevent damage.
- Remove snow promptly: Snow can accumulate on wood surfaces and cause them to become slippery and potentially damaged. Remove snow promptly using a snow shovel or broom to prevent accidents and protect your wood.
By following these maintenance techniques and using protective coatings and natural alternatives, you can ensure the safety and beauty of your wooden surfaces throughout the winter season.
Frequently Asked Questions
Can I use traditional ice melt on wood surfaces?
Yes, traditional ice melt can be harmful to wood surfaces. Instead, consider using alternative ice melt options or making your own homemade ice melt recipe that is safe for wood.
What are the risks of using traditional ice melt on wood surfaces?
Using traditional ice melt on wood surfaces can pose risks such as damage, discoloration, and deterioration. To ensure safety, it’s best to opt for a homemade ice melt solution that is safe for wood.
Can I use homemade ice melt on other types of surfaces besides wood?
Yes, you can use homemade ice melt on surfaces other than wood. There are alternative ice melt options available, using ingredients like vinegar, rubbing alcohol, or table salt. These options can be safer for various surfaces.
How often should I apply the homemade ice melt solution to wood surfaces?
Apply the homemade ice melt solution to wood surfaces as needed. It’s important to consider how long homemade ice melt lasts and if it damages wood surfaces. Regular application ensures safety and protects your wood.
Are there any alternative ice melt options that are specifically safe for wood surfaces?
There are alternative ice melt options that are specifically safe for wood surfaces. These options provide the benefits of homemade ice melt without damaging the wood, ensuring the safety of your surfaces.
Conclusion
In conclusion, making homemade ice melt safe for wood surfaces is a simple and effective solution. By understanding the risks of using traditional ice melt on wood, gathering the necessary ingredients, and creating a homemade solution, you can protect your wood surfaces during the winter season.
Remember to apply the solution, use a soft bristle brush to remove ice and snow, and repeat the application as needed. Consider alternative ice melt options and continue to protect and maintain your wood surfaces throughout the winter.
Stay safe and enjoy the season!