Are you looking to enhance the longevity and durability of your outdoor wood projects?
Treating untreated wood is essential to protect it from the harsh elements and ensure its longevity. Whether you’re building a deck, a fence, or a garden furniture set, taking the necessary steps to treat your wood properly will help it withstand the test of time.
In this article, we will guide you through the process of treating untreated wood for outdoor use, ensuring that your projects remain safe and sturdy. You’ll learn how to assess the condition of the wood, clean and sand it, apply a wood preservative, seal it, and even consider staining or painting.
By following these steps and maintaining your treated wood regularly, you can enjoy your outdoor space worry-free, knowing that your wood is protected and built to last.
Quick Summary
- Assess wood for signs of decay, mold growth, cracks, splits, and insect infestation.
- Clean wood surface to remove dirt, debris, stains, and grime.
- Apply wood preservative to prevent rot, decay, and insect damage.
- Seal wood to protect against moisture and enhance appearance.
Assess the Condition of the Wood
Now, take a close look at the wood and imagine yourself running your hands along its rough, weathered surface, feeling the splinters prickling against your skin. Assessing the condition of untreated wood is crucial before treating it for outdoor use.
Start by examining the wood quality. Look for any visible signs of decay, such as discoloration, soft spots, or mold growth. Pay special attention to areas where water might have penetrated, like the ends and joints. These are potential trouble spots that could lead to rot if not addressed.
Next, check for any cracks or splits in the wood. These can allow water to seep in, accelerating the rotting process. It’s important to identify these areas early on so you can address them before treating the wood. Additionally, inspect the wood for any signs of insect infestation, such as holes or sawdust. Insects can further weaken the wood and make it more susceptible to damage.
By thoroughly assessing the wood quality and identifying potential rot or insect infestation, you can make informed decisions about how to treat the wood for outdoor use. Remember, safety is paramount, so don’t overlook any signs of decay or damage. Taking the time to properly assess the wood will ensure a longer lifespan for your outdoor projects.
Clean the Wood Surface
To clean the wood surface, you’ll want to start by removing any dirt and debris. Use a brush or broom to sweep away loose dirt, leaves, and other debris.
Next, you’ll want to use a wood cleaner to remove any stains or grime that may be stuck to the surface. Apply the cleaner according to the manufacturer’s instructions, scrubbing the wood with a brush or sponge.
Remove Dirt and Debris
First, let’s get rid of any dirt and debris from your untreated wood for optimal outdoor use. Before preparing the wood for outdoor wood treatment, it’s crucial to ensure a clean surface.
Start by using a broom or brush to sweep away loose dirt and debris. Next, use a damp cloth or sponge to gently wipe down the wood, removing any remaining dirt or grime. For stubborn stains or stuck-on debris, you can use a mild detergent mixed with water to scrub the affected area.
Rinse thoroughly with clean water and allow the wood to dry completely before moving on to the next step of outdoor wood treatment. By removing dirt and debris, you’re creating a clean foundation for the treatment process, promoting longevity and durability for your untreated wood in outdoor environments.
Use a Wood Cleaner
Before diving into the treatment process, it’s essential to give your wood a deep clean using a wood cleaner. This ensures a pristine surface that will stand up to the elements and make your outdoor space truly shine. Using a wood cleaner has several benefits when it comes to treating untreated wood for outdoor use.
Here are some reasons why using a wood cleaner is important:
- Removes dirt and grime: A good wood cleaner effectively removes dirt, dust, and other debris that can accumulate on untreated wood over time. This helps create a clean and safe environment for you and your family.
- Eliminates mold and mildew: Wood cleaners are designed to kill mold and mildew spores, which can thrive in outdoor environments and cause health issues. By using a wood cleaner, you can ensure a mold-free surface.
- Prepares the wood for treatment: Cleaning the wood with a suitable cleaner helps open up the wood’s pores, allowing for better absorption of treatment products.
When choosing a wood cleaner, make sure to select one that’s specifically formulated for outdoor use and safe for humans and pets. Look for eco-friendly options that are free from harsh chemicals and toxins.
Sand the Wood
To prepare the wood for outdoor use, you need to sand the surface. Sanding will help smooth out any imperfections and create a clean surface that’s ready for treatment.
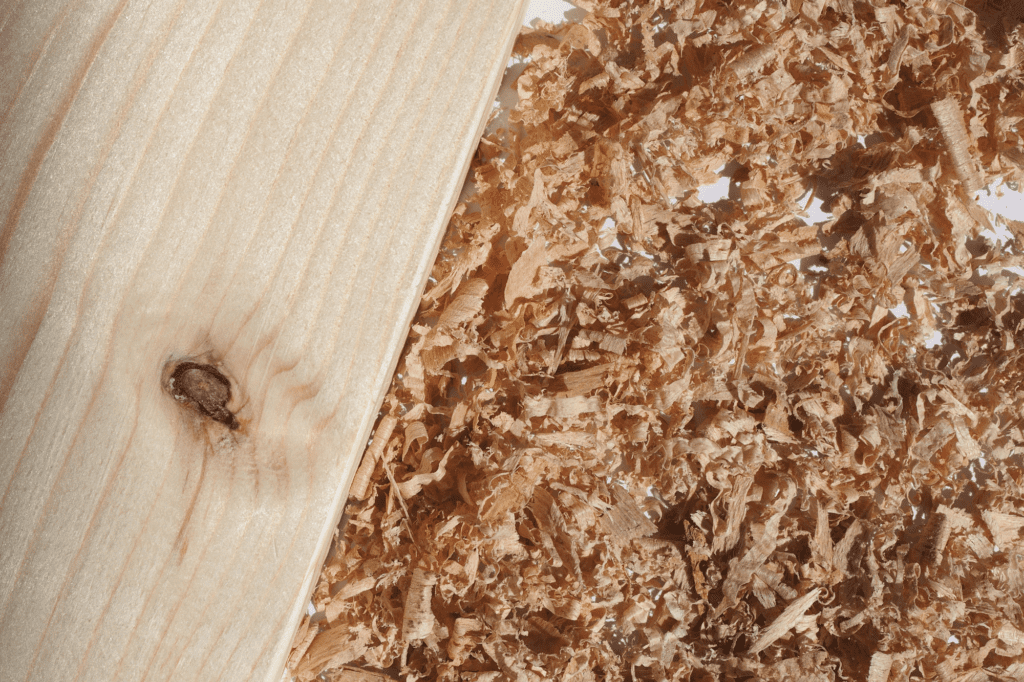
By using a coarse-grit sandpaper, you can easily remove any rough spots or splinters, ensuring a smooth and even finish.
Smooth Out Imperfections
One way to make your untreated wood look even more beautiful outdoors is by smoothing out any imperfections. By using sandpaper, you can easily smooth out roughness and create a more polished finish.
Start by choosing the right grit sandpaper for the job, typically between 120 and 220. Make sure to sand in the direction of the wood grain to avoid damaging it.
Next, use a sanding block or a power sander to make the job easier and more efficient. As you sand, pay close attention to any cracks or holes in the wood. Fill them in with wood filler, allowing it to dry completely before sanding again. This will help prevent any potential injuries or splinters when handling the wood.
Finally, wipe away any dust with a clean cloth before applying a protective finish such as wood sealer or outdoor paint.
Create a Clean Surface for Treatment
Achieving a pristine surface is key to preparing your wood for a stunning transformation. Before applying any treatment, it’s important to thoroughly clean the wood to remove any dirt, debris, or mold that may be present.
Start by using a stiff brush or broom to sweep away loose dirt and dust. Next, mix a solution of mild soap and water and use a scrub brush to gently scrub the surface, paying special attention to any stained or soiled areas.
Rinse the wood thoroughly with clean water and allow it to dry completely. Once the wood is clean and dry, you can choose the right treatment method for your outdoor project.
Options include applying a protective stain, sealant, or paint to enhance the wood’s natural beauty and provide long-lasting protection against the elements. Remember to follow the manufacturer’s instructions for the chosen treatment method to ensure optimal results and safety.
Apply a Wood Preservative
Before diving into the process of applying a wood preservative, let’s take a moment to consider how we can make our outdoor wooden structures last longer and withstand the elements. Wood preservation techniques and natural wood finishes can greatly enhance the durability and longevity of untreated wood.
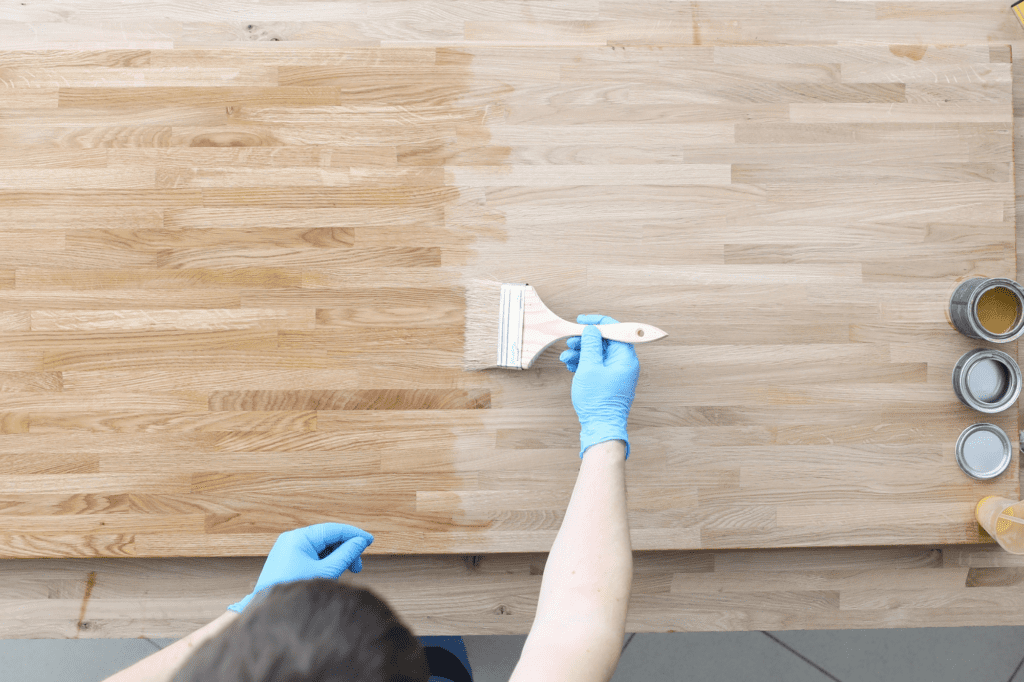
To protect your outdoor wooden structures, it’s important to apply a wood preservative. This will not only prevent rot and decay but also deter insects and fungi that can cause damage. Here are three important steps to follow when applying a wood preservative:
- Clean the wood surface: Before applying the preservative, make sure the wood is clean and free from dirt, dust, and any previous coatings. Use a mild detergent and water to wash the wood and allow it to dry completely.
- Choose the right preservative: Select a wood preservative that’s specifically designed for outdoor use and is safe for humans, animals, and the environment. Look for products that contain natural oils and resins, as these provide excellent protection against moisture and UV rays.
- Apply the preservative: Using a brush, roller, or sprayer, evenly apply the wood preservative to all exposed surfaces of the wood. Make sure to follow the manufacturer’s instructions for application and allow sufficient drying time between coats.
By following these steps and using a wood preservative, you can ensure that your outdoor wooden structures are well-protected and will withstand the test of time. Remember, safety always comes first, so wear protective gloves and goggles when handling wood preservatives.
Seal the Wood
To properly seal the wood, you need to protect it against moisture and enhance its appearance. By sealing the wood, you create a barrier that prevents water from penetrating the surface, which can cause it to warp or rot over time.
Additionally, sealing the wood can enhance its natural beauty, bringing out the rich colors and grain patterns for a more visually appealing finish.
Protect Against Moisture
In order to properly protect untreated wood for outdoor use, it’s important to take measures to guard against moisture. Waterproofing techniques are essential to prevent wood rot and prolong the lifespan of your outdoor wood projects.
One effective method is to apply a waterproofing sealant or stain that contains water repellents. These products create a protective barrier on the wood’s surface, preventing water from seeping in and causing damage. Make sure to choose a sealant that is specifically designed for outdoor use and offers UV protection to shield the wood from sun damage as well.
Additionally, it’s crucial to regularly inspect the wood for any signs of moisture buildup or rot. If you notice any issues, address them immediately to prevent further damage.
By taking these precautions, you can ensure the longevity and safety of your untreated wood in outdoor environments.
Enhance the Wood’s Appearance
Make sure you give your outdoor timber a stunning makeover by enhancing its appearance. When it comes to treating untreated wood for outdoor use, it’s important to both enhance the wood’s appearance and protect it against moisture. There are several wood finishing techniques that can help you achieve this.
One option is to use natural wood treatments, such as oils or waxes, which can bring out the natural beauty of the wood while also providing protection. These treatments penetrate the wood, nourishing it from within and giving it a rich, warm glow.
Another option is to use a stain or paint to add color and character to the wood. Whichever method you choose, make sure to follow the manufacturer’s instructions and apply the treatment evenly for a beautiful and long-lasting finish.
Consider Staining or Painting
Consider staining or painting the untreated wood for outdoor use to enhance its durability and protect it from the elements.
When it comes to treating untreated wood, there are a few options to consider. One alternative finish to consider is staining. Staining not only enhances the natural beauty of the wood but also provides a protective barrier against moisture, UV rays, and insect damage. It penetrates deep into the wood, ensuring long-lasting protection.
Another option to explore is painting. Painting the wood not only adds a pop of color but also provides a strong protective layer. Look for paints that are specifically formulated for outdoor use, as they’re designed to withstand harsh weather conditions. Remember to choose a paint color that complements your outdoor space and matches your personal style.
When it comes to natural wood treatments, there are products available that are environmentally friendly and safe for outdoor use. These treatments can help protect the wood from rot, decay, and insect damage without the use of harsh chemicals.
Overall, by considering staining or painting the untreated wood and exploring natural wood treatments, you can enhance its durability and ensure its longevity in outdoor settings.
Maintain Regularly
To maintain the longevity of your untreated wood for outdoor use, it’s important to regularly clean and reapply a preservative. By doing so, you can protect the wood from weathering, rot, and insect damage.
Additionally, make sure to inspect the wood for any signs of damage, such as cracks or splintering, and address them promptly to prevent further deterioration.
Clean and Reapply Preservative
Revive your weathered wood by cleaning it thoroughly and giving it a fresh coat of preservative, ensuring its longevity and protection against the elements. To reapply preservative, start by choosing a suitable product that offers maximum protection. Look for preservatives that are specifically designed for outdoor use and provide resistance against water, UV rays, and mold. Once you have selected the right preservative, follow these steps to clean and reapply it:
- Clean the wood: Use a mild detergent mixed with water to remove dirt, grime, and mildew. Scrub the surface gently using a soft brush or sponge.
- Rinse thoroughly: After cleaning, rinse the wood with clean water to remove any residue from the detergent.
- Apply the preservative: Use a brush, roller, or sprayer to evenly apply the preservative, following the manufacturer’s instructions. Make sure to cover all surfaces and edges.
- Allow drying and curing: Let the preservative dry and cure according to the recommended time specified on the product label before using or exposing the wood to the elements.
Regularly cleaning and reapplying preservative will help maintain the beauty and durability of your outdoor wood, ensuring a safe and long-lasting investment.
Inspect for Any Damage
Check for any signs of damage to ensure the longevity of your weathered wood. Before treating untreated wood for outdoor use, it’s important to thoroughly inspect the material for any potential damage.
Look for signs of rot, decay, or insect infestation. Assess the wood for any cracks, splits, or warping that may compromise its structural integrity. If you notice any defects, it’s crucial to repair them before proceeding with treatment.
Start by removing any loose or damaged sections of wood and fill any gaps or holes with a suitable wood filler. Sand down rough areas and smooth out any sharp edges.
This careful assessment and repair process will help ensure that your untreated wood is in good condition and ready for outdoor use.
Enjoy Your Treated Wood Outdoors
Make the most of your treated wood by embracing the great outdoors and enjoying its natural beauty. When you’ve properly treated your wood for outdoor use, you can be confident in its ability to withstand the elements and last for years to come. Here are some tips to help you enjoy your treated wood outdoors while ensuring its durability and preventing rot:
- Regularly clean your treated wood to remove dirt, debris, and any potential mold or mildew growth. Use a mild soap and water solution, and gently scrub the surface with a soft brush.
- Apply a protective sealant or stain to your treated wood every few years. This’ll help maintain its appearance and increase its resistance to water damage, UV rays, and pests.
- Avoid placing heavy objects or furniture directly on your treated wood, as this can cause indentations and damage the protective coating. Instead, use protective pads or rugs to distribute the weight evenly.
By following these guidelines, you can ensure the longevity of your treated wood and enjoy its natural beauty in your outdoor space. Remember, regular maintenance and care are key to keeping your wood looking its best and preserving its durability. So go ahead, relax, and enjoy the great outdoors on your beautifully treated wood!
Frequently Asked Questions
Can I use untreated wood for outdoor projects?
Yes, you can use untreated wood for outdoor projects, but it’s important to consider alternatives like pressure-treated or naturally decay-resistant woods. To maintain untreated wood outdoors, regularly seal and protect it from moisture, rot, and insects.
What are the signs that untreated wood needs treatment?
To ensure safety, it’s important to recognize signs of untreated wood deterioration. Look for discoloration, cracks, rot, or insect damage. Treating untreated wood for outdoor use helps protect it against these issues and extends its lifespan.
How often do I need to clean and maintain treated wood?
To ensure the safety of your treated wood, it’s important to clean it regularly. Aim to clean it at least once a year using a mild detergent and a soft brush. Additionally, inspect for any damage or rot and repair as needed.
Should I use a specific type of wood preservative for outdoor use?
To ensure the safety of your outdoor wood, it is recommended to use a specific wood preservative. There are various options available, each offering benefits such as protection against rot, insects, and weathering.
Is it necessary to seal treated wood if it will be exposed to the elements?
Sealing treated wood is important for outdoor longevity. It protects against moisture, rot, and insects. Untreated wood is cheaper, but it’s more susceptible to damage. To keep your outdoor projects safe and durable, seal the wood properly.
Conclusion
So there you have it – a complete guide on how to treat untreated wood for outdoor use! By following these steps, you can ensure that your wood remains protected and durable in any weather condition.
Remember to assess the condition of the wood, clean and sand it, apply a wood preservative, seal it, and consider staining or painting for added protection and aesthetics.
With regular maintenance, your treated wood will last for years, allowing you to enjoy your outdoor space to the fullest.