There’s no doubt that a scarecrow looks adorable in a front lawn or porch. But scarecrows can also be pricey. Because store bought scarecrows can be rather expensive, you may be interested in making your own homemade scarecrow. If so, you have come to the right place. In this article I will be going over ideas for making your own DIY scarecrow. Not only will they save you money, but they can look very adorable on your deck. They can also be used for scaring birds away from your garden. Let’s get started on learning how to make a scarecrow.
Supplies You’ll Need
Below, you’ll see a list of different types of scarecrows you can make. Because there are so many different types, each DIY scarecrow will need slightly different supplies. That said, they all have common features and materials. Here is a list of supplies that you may need when making a scarecrow.
- Pillowcase for the head
- Milk jug (this can be used as a head too)
- Straw or hay fro stuffing
- Alternatives to straw stuffing: Styrofoam peanuts, plastic bags, newspaper, old clothes, shredded paper, or dry leaves.
- Clothing (shoes, gloves, western shirt, jeans, overalls, etc.)
- 2 x 4s (if you make a scarecrow not made with stuffing)

Front Porch Sitting Scarecrow
A sitting scarecrow is always cute on a porch. There are so many different options for where you want the scarecrow to sit. You could set the scarecrow in a rocking chair, on a bench, or on your stairs. This scarecrow is extra unique because it is not made with straw, but instead it is made of wood. This makes it heavier, and therefore it shouldn’t blow away. Here are the supplies you’ll need for this DIY scarecrow:
Supplies:
- 2 x 4’s
- Screws, bolts, and nuts
- Wooden scarecrow head (to make your own you need plywood and paint)
- Clothing, shoes, gloves, and fall decorations
Instructions:
- Cut the 2 x 4’s into desired lengths, making arms, legs and a body. You can use your own arm and leg length to determine how you want to cut the wood.
- To make arms that are movable use bolts and washers for free range of motion. Otherwise use drywall screws to secure the parts together.
- Next, you’ll need to make the head. You can also buy a wooden scarecrow head online, but making your own can be fun too. Cut plywood into the shape of a circle. Use paint to make eyes, a nose, and a mouth. Then cut plywood into the shape of a hat. Screw the hat onto the scarecrow’s head, and then screw the head onto the body of the scarecrow.
- Put clothes onto the scarecrow. This could be a little difficult, especially if you screwed the scarecrow so that his legs and arms wouldn’t move. Add whatever decorations you want to the scarecrow.
- Place the scarecrow onto a bench or the stairs.

Image Source: Ohio Thoughts
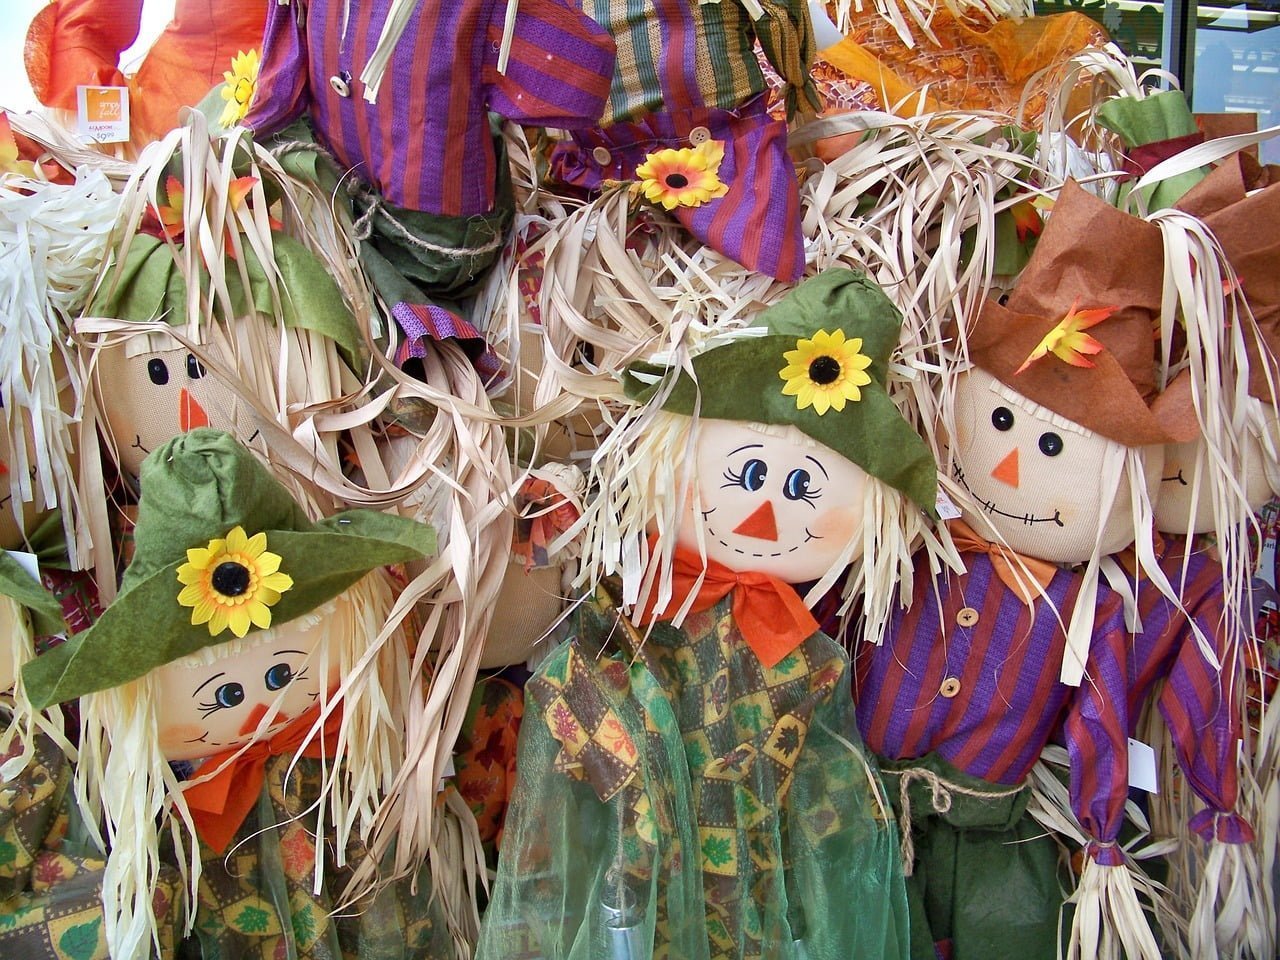
DIY Scarecrow Couple
What’s better than one scarecrow is two! These two adorable scarecrows are standing, unlike the last scarecrow, and they are wearing simple clothes that you can probably find in your closet. Here are the steps to making these cute scarecrows.
Supplies:
- 2 x 4’s
- Marker or paint
- Screws, bolts, and nuts,
- Straw
- Straw hat
- Clothing (a dress, necklace, western shirt, jeans, and shoes)
Instructions:
- Using the 2 x 4’s, build the scarecrows’ body similar to the previous scarecrow. But this time, do not have the scarecrows be sitting down. Instead, have them have straight legs and a 2 x 4 to help support each of them.
- Next, use two pillowcases (milk jugs will work too) stuffed with straw to make the heads. Using either a marker or paintbrush, draw faces onto the pillowcases. Sew hats onto their heads. Connect the heads to the wooden bodies.
- Not it is time to add the clothing. For the “lady”, place a dress stuffed with straw onto it. It’s ok to let some of the straw stick out of the sleeves, because the straw can be the hands. If you want, you can have her hold flowers by tying flowers around the sleeve of the dress. For the other scarecrow, have it wear jeans and a western shirt stuffed with straw.

Image Source: Inside Storey
Fall Pumpkin Scarecrow
If you want to try something different than the traditional scarecrow stuffed with straw, you may like this fall pumpkin scarecrow. This cute scarecrow is a great way to use a pumpkin instead of carving it.
Supplies:
- Medium size orange pumpkin (you can also use an artificial pumpkin)
- Variety of small pumpkins and gourds
- Pumpkin seeds
- Raffia
- Fall fabric
- Brown Felt
- Ribbon
- Medium size round container
- Scissors
- Hot glue gun
Instructions:
- Start by choosing two small pumpkins for the scarecrows eyes. Use a sharp craft knife to slice the pumpkins in half. Next, pick a gourd for the nose and use the knife to cut it in half.
- Place a toothpick through the center of the half cut pumpkin and gently push it into the larger pumpkin. The eyes and nose should stay in place, but you can add a little hot glue to make sure they are secure.
- Use a hot glue gun to create a smile using the pumpkin seeds.
- Use a medium size round container to make the scarecrow’s body. A trash can works well. Cut the fabric to cover your container. Use the hot glue gun to secure the fabric to the container. It doesn’t matter if the inside looks messy, because that will be covered up. Add any other decorations you want to the container.
- Start adding the raffia around the top edge of the container. Use the hot glue gun to keep the raffia in place.
- Next, you will need to make the scarecrow’s hat. Lay out the brown felt and cut a circle slightly larger than the pumpkin. Cut the felt to create a cone shape. Add a dab of hot glue all the way around the hat to secure it. Add ribbon and fabric patches if desired. Glue the hat to the top of the pumpkin.
- Finally, glue the pumpkin scarecrow head onto the top of the container.

Image Source: Giggles Galore
DIY Tin Can Scarecrow
Not only does this cute scarecrow brighten up your yard, but it is also a great way to reuse cans. You will need cans of all different shapes, including large cans, small cans, and rectangular shaped cans.
Supplies:
- Cans
- Wire
- Screws
- Old water hose
- Coat hanger
- Clear plastic beads
- Acrylic paints and clear spray-on sealer
- Transition strip
- Gloves, hat, and bandanna
Instructions:
- Drill holes into each can so that you will be able to wire them together. After all the holes are drilled, wire and screw the cans together to form the shape of a scarecrow.
- Using an old water hose, cut a long piece and run a coat hanger through it so that you can bend the hose and make it look like the scarecrow is watering a garden. The “water” is made by stringing clear plastic beads on a wire and attaching it to the coat hanger inside the end of the hose.
- Paint the scarecrow with the colors of your choice, and then spray it with a clear sealer.
- Screw a transition strip (what you use to transition from tile to flooring) to secure the scarecrow.
- Add gloves, a hat, and a bandanna to the scarecrow.

Image source: Craft Imaginings
Easy DIY Scarecrow
This DIY scarecrow is very easy to make. You actually do not have to make the scarecrow, but you use a store bought scarecrow and then add on to it.
Supplies:
- Inexpensive scarecrow
- Clothing (jeans, sweaters, western shirt, etc.)
- Straw
- Straw hat
Instructions:
- Buy an inexpensive scarecrow from the store. Don’t spend too much money on a scarecrow, because the purpose of making your own is that it is cheaper.
- Add some clothing to the scarecrow. Stuff straw into the clothing. If you add a sweater to the scarecrow like in the image below, button up the sweater.
- Staple the pants to the scarecrows previous pants.
- You can add shoes if you want, but it is easier to glue some straw to the ends of the scarecrow’s pants. The straw can be the scarecrow’s feet.
- Stick the scarecrow into the ground. Enjoy looking at your new scarecrow this fall.

Image Source: House Of Hawthrones
Final Thoughts
It is time to start decorating for fall, and what better way to decorate than to place scarecrows in your yard. Long ago, and still to this day, scarecrows are used to scare crows and other birds away from gardens. Although scarecrows may scare birds away, scarecrows can also make homes look adorable and ready for fall. In this article I went over some unique scarecrow ideas that you can make yourself. The benefits of making your own homemade scarecrow is that it is a much cheaper option and it can be a fun experience. I hope you have fun making your own DIY scarecrow. Whether you use it to scare birds away from your garden or to brighten up your yard, making a DIY scarecrow is easy, fun, and a cheap alternative to buying a scarecrow.