What are some tips for caring for Spider Orchids during the autumn season?
The autumn spider orchid care guide provides key tips for nurturing these delicate flowers during the season. It is crucial to regulate watering, allowing the roots to dry slightly between waterings. Ensuring adequate humidity levels and providing good air circulation are also crucial. Pay attention to temperature fluctuations and avoid exposing the orchids to cold drafts. Finally, maintaining consistent light conditions will help the spider orchids thrive throughout autumn.
How to Grow Orchids Step by Step
1. Choose the Right Orchid Variety
Keep in mind that some species of orchid are easier to grow. Among them, you can count the Paphiopedilum, Cattleya or Phalaenopsis ones. For this reason, they represent a great choice if you’re a beginner in gardening. Phalaenopsis is called the “moth orchid” and is perhaps the most popular variety. What’s important to know is that various genera of orchids require different levels of humidity, temperature, watering, and light. Because of this, you must be informed about the necessary conditions for a healthy growth.
2. Choose the Soil
One of the most popular mistakes is to choose the same potting soil as you would do with other blooming flowers. However, this can make your orchid die sooner than you would expect. This happens because most types of orchids need more air than the regular potting soil can offer them. Even so, you still need something that would anchor them. As such, the solution is a porous, looser mix. You can use charcoal, perlite, sphagnum moss, bark chips or Styrofoam pellets as a mix. Alternatively, you can ask an expert on how to grow orchids for the best solution.3. Mix the Soils
If you want to go simple, then you can create 2 basic types of potting mixes, suitable for orchid growing for beginners. Add water to the mix and strain it if you want the best results.
Fine Potting Mix
It works perfectly if want to learn how to grow orchids such as slipper ones, miltonias, oncidiums or varieties with small roots. If the species requires more moisture than usual, then you should prepare this type of mix.- 1 part perlite;
- 1 part fine grain charcoal;
- 4 parts fine fir bark or coco husk.
Medium Potting Mix
The second type of mix is preferred for Phalaenopsis, cattleyas or any mature orchid. If you don’t know which type to choose, you should go for the medium one before the fine one.- 1 part perlite;
- 1 part medium grain charcoal;
- 4 parts medium grain coco husk or fir bark.
4. Choosing the Pot
When reading about how to grow orchids, you should keep in mind that most species prefer to be root bound. Ideally, choose a smaller pot. It’s important for the pot to have plenty of holes so that you can offer the plant a good drainage. Don’t go for decorative pots, since the glaze found on them can damage the orchids. However, some of the orchids do need some deeper pots, since they have longer root systems.
- Clear plastic pots – the main advantage here is that they offer more sunlight to the roots. Moreover, you can have a look at the roots without damaging the orchid.
- Net pots – the wire mesh offers a more breathable environment for the plants. The best part is that you can hand them in convenient locations for sunlight.
- Wooden pots – the wood is a special type that is resistant to rot. Before adding the mixture, line these pots with sheet moss.
5. Potting the Orchid
When the orchid grows, you must remove it from the original pot. Before you do that, make sure you cut off rotting or dead roots. If needed, you should divide the root matter into various sections. Place the most mature section towards the bottom. Newer growth must be placed near the sides. Add some potting mix that barely covers the root system.6. The Right Moment for Re-Potting
Part of how to grow orchids is knowing when to re-pot them. Generally, you should do it every 2 years. It’s recommended you do it when you see that the leaves placed lower have died. Moreover, if the orchid outgrew the pot or if the roots are dying, consider moving the plant to a bigger pot.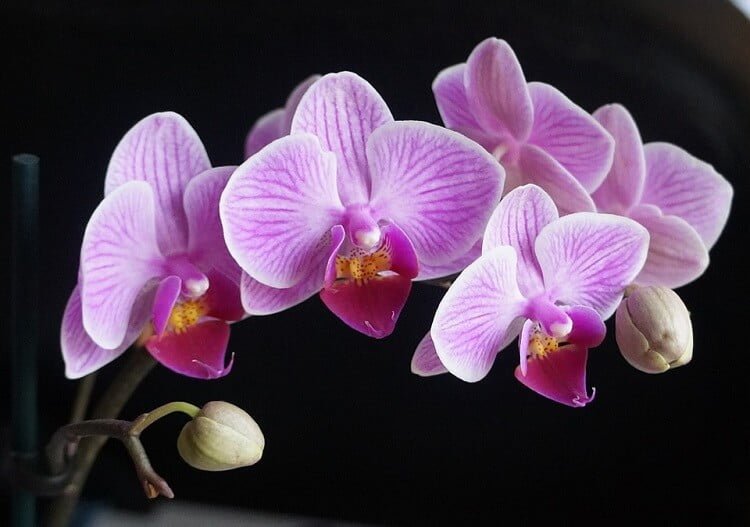
7. The Right Temperature
Remember that most orchids come from a tropical climate with lots of light and good air. Usually, the temperature varies for each kind of orchid, but it is placed between 65 and 75° F, which is between 18.3 to 23.8° C. One pro tip is to drop the temperature of the environment by 10 degrees. This will help the plant grow new buds.8. The Right Amount of Sunlight
Too little sunlight can kill the plant, but so does too much. The thing when learning how to grow orchids is that most of them love indirect sunlight. If they don’t have enough, they won’t flower, but too much direct sunlight can burn them. A window that faces south or east is perfect. Place them behind window blinds or curtains for enough indirect light. The leaves are the best indicator for sunlight. Ideally, they should have a light green color, complete with some yellow tones. If they are dark green instead, then you’re not giving it enough light. On the contrary, if they’re red, yellow or brown, give them more sunlight.9. Watering the Orchid
Ideally, you should water the orchid once a week. Be careful when learning how to grow orchids, since watering it too much can kill it. Make sure the soil dries out before you water it again. In summer, orchids need a shorter watering period. Water it for 15 seconds and then place the pot on a tray of pebbles. This will help it dry out faster.
10. Caring for Orchids
Keep in mind that orchids need much more attention than a regular flower or plant. The thicker the leaves of your variety, the more water it needs. The water intake is essential, which is why you need to take care of this with maximum attention. If you’re not sure, remember that they can deal with lack of water better than with an excess of liquid.11. Fertilizing the Plant
Usually, you should fertilize the orchid once a week. Use a diluted 20-10-20 fertilizer mix that should have ¼ strength. Once a month, use plain water to rinse out the fertilizer that was accumulated. If you fertilize it too often, the roots will be burned and the flowering process will be interrupted. At the same time, too little fertilizer can hamper the flowering.12. Humidity Levels
The orchids naturally prefer humidity. For this reason, the humidity of the environment should be between 50 and 75% all the time. You can use a humidifier next to the orchid. Another good idea is to keep a tray of pebbles with water next to the pot so that the plant can absorb the humidity in the air.13. Be Careful with the Differences
One of the most important things when reading about how to grow orchids is to remember that they are all different. Each variety or hybrid has different rules and needs if you want it to grow healthy and beautiful. From temperature to lighting and watering times, they have various needs. This requires some flexibility on your behalf since you must be informed about your own variety and its requirements. Obviously, this is an essential step in growing these plants, since you might kill them without even wanting to.
14. Pests and Diseases
You should always pay attention to signs of disease or pests. Most of the times, orchids can be attacked by aphids, scale or mealybugs. If you do find your orchid being damaged by these, you can wash them off or treat them with some special insecticidal soap. You can also make your own horticultural soap at home. Horticultural soap is used for cutting off soft bodied insects of small sizes, such as mealybugs, spider mites, whiteflies or aphids. The best part about it is that it’s environmentally friendly, so it doesn’t damage your health. You can use it for other plants as well, either indoor or outdoor. This is a better option than using pesticides since it doesn’t leave any residue and it doesn’t do anything to beneficial insects. Moreover, it can be cheap if you do it you do it yourself.15. Making Your Own Insecticidal Soap
Whether you want to prepare it beforehand or when you encounter a bug, it’s good to keep a recipe handy. Here you have what you need for your own insecticidal soap:- One cup of oil (vegetable, soybean, peanut, corn, etc.);
- One tablespoon dishwashing liquid or other soap (no bleach, degreaser or liquids for automatic dishwashers);
- One cup of warm water for every two teaspoons of the soap mixture.