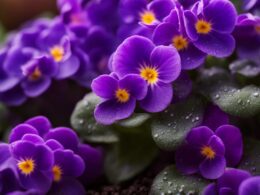
Growing Hydrangea Paniculata Flowers in 8 Main Steps
Step 1: Know Your Plants
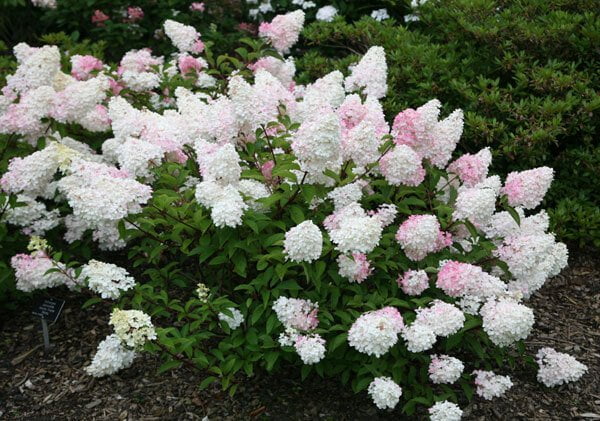
In order to make sure you’re going to provide your plants with the best care, you have to learn a little bit about them. This is why we thought we would start the guide with some general information about the hydrangea paniculata. This is a flower variety that you can grow almost anywhere in the United States as long as you provide it with a couple of hours of sun every day. The great news is that people who live in colder climates or in a place where they get a lot of shade can choose to plant some other variety of hydrangeas if they really love this type of flower and want to have it in their garden. If you’ve ever wondered where the name of this flower comes from, it’s from the fact that its blooms are usually panicle-shaped, thus resembling a cone more than a ball (which is the case with other hydrangea varieties). If you’ve ever seen a hydrangea paniculata flower bush, then you know they tend to grow rather tall and big, sometimes up to 10 feet or more. One of the main things that make the hydrangea paniculata a favorite of many gardeners is the fact that it is not high-maintenance. In fact, it’s a type of flower that most people call “hardy”. This means that it can stand a variety of conditions and it doesn’t need much attention in order to thrive. One of the most noticeable care features of this flower is its tolerance to pruning. You don’t need to worry about pruning it at a specific time. As long as it hasn’t just recently formed bloom heads, you can prune it at your discretion. An interesting thing you should know about pruning the hydrangea paniculata is that you can shape it like a tree. This is not something you can do with the rest of the hydrangea varieties out there. The blooms are one of the main attractions of the hydrangea paniculata flower. They grow in clusters that turn from white, to pink, to a dusky purple. In order to ensure the health and lovely appearance of the blooms, you have to provide the plant with well-drained soil and plenty of sun exposure.Step 2: Choose the Location
The location is extremely important when it comes to growing any type of plant. You have to pay attention to the plant’s requirements and choose a place where it can thrive. In the case of the hydrangea paniculata, the best possible location is one where it can get full sun exposure in the morning and a bit of shade in the afternoon. Even if it gets some shade in the morning as well, the plant might still be able to develop properly. Another thing you must keep in mind is that hydrangeas don’t thrive in extremely hot areas. So if you know that the soil in the area where you live tends to get extremely hot, make sure that your plants also get plenty of shade. This is why you should choose an area where the sun shines mostly in the morning, because then the soil won’t get too hot. The perfect growing medium for the hydrangea paniculata is soil that is relatively cool and moist.Step 3: Prepare the Soil
Before actually planting the hydrangea paniculata flowers, you’re going to have to make sure the soil in your garden is under the best conditions. Just add some sort of organic material to it. This is going to fill it with nutrients and give your flowers a head start. This type of hydrangea enjoys well-drained soil, but still slightly moist one. Adding compost manure or peat moss is going to help it by letting the soil drain faster and more effectively.
Step 4: Plant the Hydrangea Paniculata
The best time to plant the hydrangea paniculata is either in spring or in fall. You’re going to want to buy a small plant, or start the seeds inside before moving the plant outside. When the plant is ready to be transplanted, dig a hole in the place where you’ve decided to place it. The hole should be deep enough for its entire root ball to fit in. Also, make sure to make the hole at least two times wider than the root ball. Once you’ve carefully set the plant into the hole, making sure you didn’t damage its roots, you can fill half of the hole with part of the soil that you dug out previously. After doing this, water the soil, and then fill the second half of the hole. Only do this once the water you just poured has drained completely. Don’t be afraid to provide the soil with plenty of water. It’s going to need it in order for the plant to settle and thrive. Remember that if you’re going to plant more than one hydrangea paniculata flower, you’ll have to space them about 10 feet apart. That’s because they can grow quite large.Step 5: Water the Hydrangeas
Water is really important for the hydrangea paniculata. That’s why you have to make sure you always water it properly when nature doesn’t provide it with rainwater. The perfect interval for watering it is every three days, for 20 minutes at a time. If you fail to do so, you might notice the plant beginning to wilt. You should never neglect watering this type of hydrangea. Still, this is more relevant in the first two years after planting it.Step 6: Fertilize the Plants
Fertilization is not always required in the case of the hydrangea paniculata. This is yet another reason why some people love it so much. Fertilization depends largely on the type of soil you have in your garden. If it’s rich enough and full of nutrients, you might not need to add extra fertilizers to your hydrangeas. However, if you have sandy soil and if you think it’s too light, you’re going to need to fertilize the plants at least once a year. The best time to do that is either in spring or in late winter. Just make sure not to overfertilize them because this might cause the leaves to grow too much. In turn, this will take away energy from the blooms, resulting in fewer flowers and more foliage.Step 7: Hydrangea Paniculata Pruning
As we’ve already mentioned, the hydrangea paniculata is not at all high-maintenance when it comes to pruning. Still, there are some things we’d like to share with you in order to make sure you have all the information you need. First of all, we advise you to prune the plant in early spring. Second of all, the type of pruning you decide on is completely up to you. You can choose to simply give the shrub a little bit of shape, or you can prune it all the way to the ground. The second option might seem more drastic for some people, but the hydrangea paniculata grows really fast, so it will get back to normal sooner than you’d expect. Plus, it will have thicker foliage and a lot more blooms.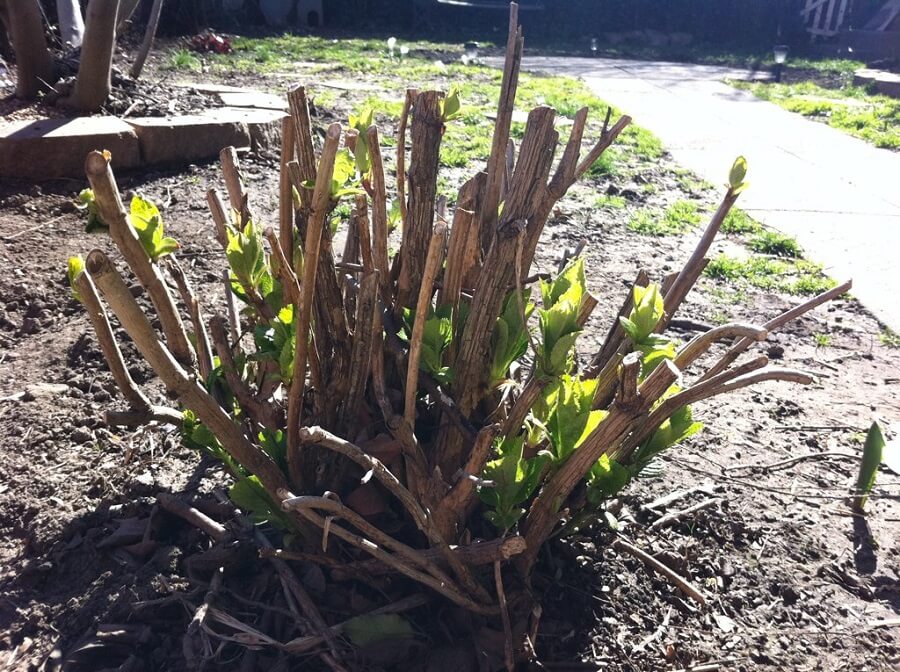 Regardless of the type of pruning you want to do, you shouldn’t neglect this step. That’s because if you don’t prune it, the hydrangea paniculata shrub will start growing erratically in just a couple of years. When it comes to deadheading, we recommend you not to do it on the flowers that are the biggest. If you keep them as they are during the winter and then remove them in early spring, you’ll get much more beautiful flowers in the future.
Step 8: Fall Care
Finally, the last step in today’s guide on how to grow and take care of the hydrangea paniculata flower involves a few tips for fall care. Fall is the perfect season to cover your plants with pine needles, bark mulch, straw, or leaves. If the height of your plant allows it, we recommend you to cover it completely. If this is not a possibility, at least cover as much of it as possible. In order to support the weight of the leaves or the mulch, you can build cages around the plants using chicken wire or snow fencing.Can I Plant Hydrangea Paniculata Flowers Based on My Birth Month?
When it comes to birth month flower options, Hydrangea paniculata is an exquisite choice for many. Planting this beautiful bloom aligned with your birth month can add a touch of personal significance to your garden. Whether it’s July or September, consider the Hydrangea paniculata to celebrate nature’s beauty in sync with your birth month.
Can I Use the Same Method to Plant and Grow Hydrangea Paniculata Flowers as I Would for Peruvian Lilies?
When it comes to planting the peruvian lily step-by-step, the process differs from growing Hydrangea paniculata flowers. While both plants require well-drained soil and ample sunlight, hydrangeas prefer partial shade whereas Peruvian lilies thrive in full sun. Additionally, consider the specific watering and pruning needs of each plant to ensure successful growth.