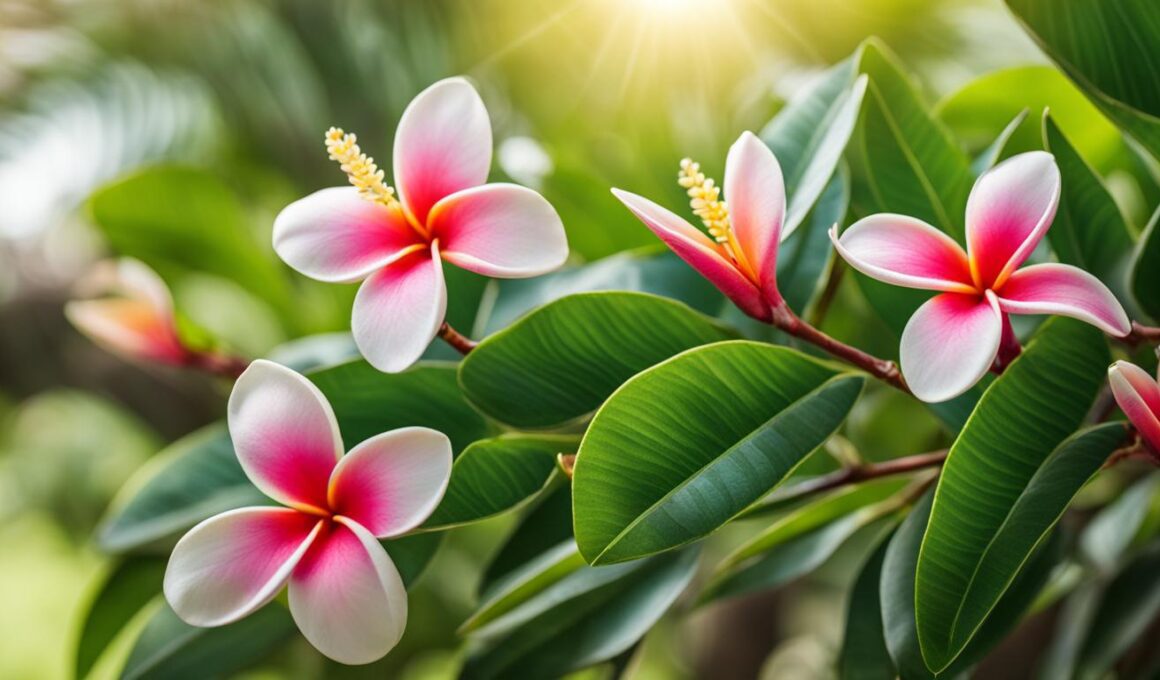
Are you ready to expand your collection of beautiful plumeria plants? Propagating new plants from cuttings is an excellent way to do so. But when is the best time to take plumeria cuttings? Let’s find out.
Spring and summer are the prime seasons for propagating plumeria from cuttings. During this time, the plants are actively growing, increasing the chances of successful rooting. To propagate plumeria, start by selecting a healthy branch on the mother plant and making a clean cut at the base of the branch.
Dip the cut end into powdered sulfur to prevent fungus and sap leakage. Remove flower stalks and most leaves from the cutting, as this encourages root growth. Next, place the cutting in a pot with well-draining soil mix, and keep it in a warm, protected spot with indirect light. It’s important not to water the cutting until new leaves appear, indicating successful rooting.
Key Takeaways:
- Spring and summer are the best times to take plumeria cuttings.
- Choose a healthy branch and make a clean cut at the base.
- Dip the cut end in powdered sulfur to prevent disease.
- Remove flower stalks and most leaves from the cutting.
- Place the cutting in well-draining soil mix and provide indirect light.
The Benefits of Propagating Plumeria from Cuttings
Propagating plumeria from cuttings offers numerous advantages for both experienced gardeners and beginners. By utilizing this method of plant propagation, you can expand your collection of beautiful plumeria plants without having to purchase new ones. This not only saves you money but also allows you to have a diverse assortment of plumeria varieties in your garden.
Another significant benefit of propagating plumeria from cuttings is that it ensures that the new plants will have the exact same characteristics as the parent plant. Each cutting produces an exact clone, meaning you can have confidence in the size, color, and fragrance of the new plant when it matures. This is especially valuable if you have a favorite plumeria with exceptional traits that you want to replicate.
Furthermore, propagating plumeria from cuttings is a relatively simple and cost-effective method. Even if you’re new to gardening, you can successfully propagate plumeria by following a few basic steps. This accessibility makes it an appealing option for those who want to try their hand at plant propagation but may be hesitant to tackle more complex methods.
Propagating plumeria from cuttings offers several benefits. First, it allows you to expand your collection of plumeria plants without having to purchase new ones. Second, it ensures that the new plants will have the same characteristics as the parent plant, as cuttings produce exact clones. Lastly, it is a relatively easy and cost-effective method of plant propagation, making it accessible even to beginner gardeners.
So, whether you’re an experienced gardener looking to increase your plumeria collection or a beginner eager to try your hand at plant propagation, propagating plumeria from cuttings can be a rewarding endeavor. It offers the opportunity to enjoy the beauty and fragrance of these magnificent plants while saving money and ensuring the continuity of desirable traits. With a little knowledge and care, you can successfully root plumeria cuttings and nurture them into flourishing plants that will bring joy to your garden.

Factors to Consider for Successful Plumeria Cuttings

When it comes to successfully propagating plumeria from cuttings, there are several factors that you need to consider. These factors play a crucial role in ensuring the rooting process is successful and that your cuttings thrive. Let’s explore some key considerations to keep in mind:
1. Timing:
The timing of taking plumeria cuttings is crucial for their successful rooting. Spring and summer are the best seasons as the plants are actively growing during this time. The increased growth activity enhances the chances of successful root development.
2. Clean Cuts:
Using sharp, sterilized tools for taking plumeria cuttings is essential to prevent the spread of diseases. Make clean cuts at a downward angle to minimize rot and increase the chances of successful rooting.
3. Pruning and Leaf Removal:
To divert the plant’s energy towards root growth, it is important to remove flower stalks and most leaves from the cuttings. This allows the cuttings to put all their focus on establishing a strong root system.
4. Suitable Growing Medium:
A well-draining soil mix is crucial for successful plumeria cuttings. This ensures that excess water won’t accumulate around the roots, preventing the risk of rot. Choose a soil mix specifically formulated for succulents or cacti for the best results.
- 5. Ideal Environment:
- Provide a warm, humid environment for the cuttings to encourage successful rooting.
- Place the cuttings in a protected spot with indirect light to prevent sunburn.
- Ensure proper airflow around the cuttings to avoid excess moisture buildup.
By carefully considering these factors, you can give your plumeria cuttings the best possible chance of success. Remember, each factor contributes to the overall health and growth of your cuttings, so paying attention to the details is key. With the right timing, clean cuts, proper pruning, suitable growing medium, and an ideal environment, you’ll be on your way to successfully propagating plumeria cuttings.
Step-by-Step Guide to Rooting Plumeria Cuttings
Rooting plumeria cuttings is a straightforward process that can be accomplished with a few simple steps. Follow this step-by-step guide to ensure successful propagation.

1. Select a healthy branch and make a clean cut at the base.
Look for a branch on the plumeria plant that is healthy and free from diseases or pests. Using sharp and sterilized pruning shears, make a clean cut at a slight angle just below a leaf node. This will provide the cutting with the best opportunity to develop roots.
2. Dip the cut end into powdered sulfur to prevent disease.
To protect the cutting from fungal infections, dip the cut end into powdered sulfur. This natural fungicide will help prevent rot and promote healthy root growth. Be sure to coat the entire cut surface with sulfur.
3. Remove flower stalks and most leaves from the cutting.
Trim off any flower stalks and remove most of the leaves from the lower portion of the cutting. By reducing the foliage, the cutting can focus its energy on root development rather than supporting excess leaves and flowers.
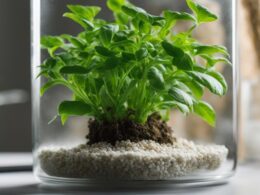
4. Place the cutting in a well-draining soil mix.
Prepare a well-draining soil mix suitable for plumeria cuttings. A mix of perlite, sand, and peat moss or coconut coir works well. Fill a pot or container with the soil mix and gently insert the cut end of the plumeria cutting into the soil, ensuring it is stable.
5. Keep the cutting in a warm, protected spot with indirect light.
Find a warm location for the cutting, ideally around 75°F (24°C), with indirect sunlight. Avoid exposing the cutting to direct sunlight, as this can cause excessive heat and drying. A protected area, such as a greenhouse or a covered patio, is suitable for rooting plumeria cuttings.
6. Do not water the cutting until new leaves appear.
It is important not to water the cutting until new leaves emerge. Watering too soon can lead to rot or fungal infections. Instead, mist the leaves occasionally to maintain a humid environment around the cutting. Once new leaves indicate that root development has occurred, start watering lightly, ensuring the soil is evenly moist but not waterlogged.
7. Once rooted, acclimate the plant to sunlight gradually.
When the cutting has successfully rooted, it is important to acclimate it gradually to outdoor conditions with direct sunlight. Start by exposing the plant to a few hours of morning sun each day and gradually increase the duration over a week or two. This will prevent sunburn and shock to the newly established roots.
8. Plant the rooted cutting in a sunny spot in your garden or a large container.
Once the rooted cutting has acclimated to sunlight, it can be planted in a sunny spot in your garden or transferred to a larger container. Ensure the soil is well-draining and provide regular water and fertilization for optimal growth. Enjoy your newly rooted plumeria plant!
Tips for Successful Plumeria Cuttings.
Tips for Successful Plumeria Cuttings
When it comes to propagating plumeria from cuttings, following a few tips can greatly increase your chances of success. Whether you’re an experienced gardener or just starting out, these tips will help you achieve successful cutting propagation and ensure the health and growth of your plumeria plants.
1. Use a rooting hormone
To promote root development, consider using a rooting hormone when taking plumeria cuttings. This hormone stimulates root growth and increases the chances of successful rooting. Simply dip the cut end of the cutting into the rooting hormone before planting it in the soil.
2. Provide a well-draining soil mix
Plumeria cuttings thrive in well-draining soil. Choose a soil mix that allows excess water to flow through easily, preventing the roots from sitting in water and potentially rotting. You can create a suitable mix by combining equal parts of potting soil, perlite, and sand.
3. Monitor moisture levels
While it’s important to keep the soil slightly moist during the rooting process, be sure to avoid overwatering the cuttings. Too much water can lead to root rot and hinder the development of healthy roots. Check the moisture levels regularly and adjust your watering schedule accordingly.
“Using a rooting hormone and providing well-draining soil are key factors in successful plumeria cutting propagation.” – Gardening Expert
By following these tips, you’ll be well on your way to successfully propagating plumeria from cuttings. Remember to use a rooting hormone, provide well-draining soil, and monitor moisture levels. With a little patience and care, you’ll soon enjoy the beauty and fragrance of fully rooted plumeria plants in your garden.
Common Mistakes to Avoid When Propagating Plumeria Cuttings
Propagating plumeria cuttings can be a rewarding experience, but it’s important to be aware of common mistakes that can hinder your success. By avoiding these errors, you can increase your chances of successfully rooting and growing new plumeria plants.
1. Taking cuttings at the wrong time
Timing is critical when it comes to taking plumeria cuttings. Avoid taking cuttings late in the growing season or during dormancy, as the plants are less likely to root successfully during these periods. The best time to take plumeria cuttings is in the spring and summer when the plants are actively growing and have a higher chance of rooting successfully.
2. Overwatering the cuttings
Overwatering is one of the most common mistakes when propagating plumeria cuttings. Excessive moisture can lead to root rot and ultimately, the failure of the cutting to establish roots. It’s important to maintain a balance and keep the soil on the dry side, allowing it to dry out between watering sessions. This helps prevent rot and encourages the development of healthy roots.
3. Using dull or unsterilized tools
When taking plumeria cuttings, it’s crucial to use sharp and sterilized tools. Dull or unsterilized tools can introduce diseases to the cuttings, increasing the risk of rot and failure. Ensure that your tools are clean and sharp before making any cuts to promote healthy propagation.
4. Neglecting light and airflow
Proper lighting and airflow are essential for the successful rooting of plumeria cuttings. Insufficient light can hinder root development, while poor airflow can lead to fungal growth and rot. Place your cuttings in a warm and well-ventilated area with indirect light to provide them with the ideal conditions for healthy root growth.
By avoiding these common mistakes, you can improve your chances of successfully propagating plumeria cuttings. Remember to take cuttings at the right time, avoid overwatering, use sterilized tools, and provide adequate light and airflow. With proper care and attention, you’ll be able to enjoy a beautiful collection of plumeria plants in no time.
Are Summer Months the Best Time for Pruning Plumeria Cuttings as well?
Pruning drift roses in the summer is essential for promoting healthy growth and abundant blooms. As for plumeria cuttings, summer months are also the best time for pruning. Trimming in the warmer months allows the plants to heal quickly and encourages new growth, leading to a vibrant and lush appearance.
Conclusion
In conclusion, propagating plumeria from cuttings is a rewarding and accessible method of expanding your collection of these beautiful plants. By following the right techniques and timing, you can successfully root plumeria cuttings and enjoy their beauty and fragrance in your garden.
Remember to choose a healthy branch from the mother plant and make clean cuts at the base. Removing flower stalks and most leaves from the cutting will redirect energy towards root growth. Provide the cuttings with a well-draining soil mix and keep them in a warm, protected spot with indirect light. Monitor the cuttings regularly and adjust care as needed.
With proper care and attention, your plumeria cuttings will root and grow into vibrant plants that will bring joy and color to your outdoor space. So go ahead and give plumeria propagation a try – you won’t be disappointed with the results!
FAQ
When is the best time to take plumeria cuttings?
The best time to take plumeria cuttings is in the spring and summer when the plants are actively growing.
What are the benefits of propagating plumeria from cuttings?
Propagating plumeria from cuttings allows you to expand your collection without purchasing new plants, ensures the new plants will have the same characteristics as the parent plant, and is a relatively easy and cost-effective method of propagation.
What factors should I consider for successful plumeria cuttings?
Factors to consider for successful plumeria cuttings include choosing the right time of the year, using sharp and sterilized tools, making clean cuts, removing leaves and flower stalks, providing a well-draining soil mix, and maintaining a warm and humid environment.
How do I root plumeria cuttings?
Follow these steps to root plumeria cuttings: select a healthy branch, make a clean cut at the base, dip the cut end into powdered sulfur, remove flower stalks and most leaves, place the cutting in a well-draining soil mix, keep it in a warm and protected spot with indirect light, and do not water until new leaves appear.
What are some tips for successful plumeria cuttings?
Some tips for successful plumeria cuttings include using a rooting hormone, keeping the soil on the dry side, maintaining a warm and humid environment, avoiding overwatering, choosing a well-draining soil mix, monitoring the cuttings regularly, and acclimating the rooted cuttings to sunlight gradually.
What are common mistakes to avoid when propagating plumeria cuttings?
Common mistakes to avoid when propagating plumeria cuttings include taking cuttings at the wrong time of the year, overwatering the cuttings, using dull or unsterilized tools, not providing enough light or airflow, not acclimating the rooted cuttings to sunlight gradually, and planting them in unsuitable soil or containers.
What should I keep in mind when propagating plumeria cuttings?
When propagating plumeria cuttings, remember to choose a healthy branch, make clean cuts, remove flower stalks and most leaves, provide a suitable soil mix and environment, and monitor the cuttings regularly for signs of rooting and growth.