

Choose a raised bed by how you will reach it, what you will grow and where excess water will go. An attractive frame is only part of the design. The bed also needs suitable materials, enough rooting space and a structure that can carry wet soil safely.
1. A simple open-bottom timber bed
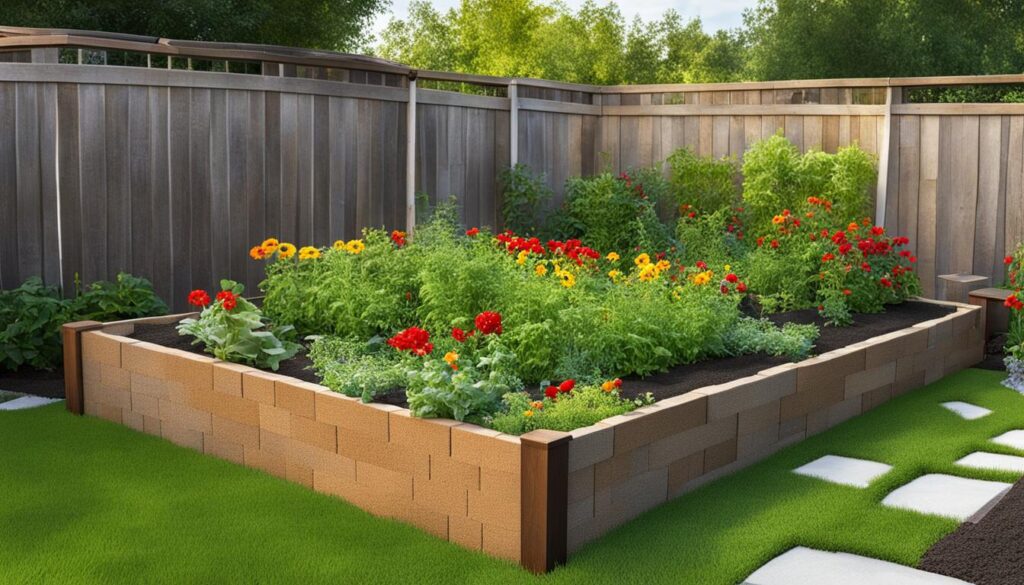
A rectangular frame over suitable ground is a practical starting point. Choose garden-appropriate timber with a known treatment history and plan corner connections that can hold the soil load. Keep the width within your comfortable reach from the available sides.
Do not assume old painted furniture or unidentified fence boards are suitable for an edible garden. If you cannot establish their materials and previous use, select a known alternative.
2. A masonry or manufactured metal bed
Stone, brick, suitable concrete blocks and purpose-made metal kits offer different appearances and maintenance needs. The University of Maryland raised-bed guide discusses common enclosure choices.
Follow the structural requirements for the chosen height. Tall stacks of loose blocks, unsupported panels and sharp exposed metal edges need attention before filling. Do not rely on decorative adhesive alone where a load-bearing connection is required.
3. An elevated planter for easier access
An elevated planter has a bottom and stands on legs or a support. It is different from an open-bottom raised bed. Check the manufacturer’s filled-weight capacity, drainage and rooting depth for your crops.
Choose height and knee clearance for the person using it. Not every raised bed eliminates bending, and a deep frame on the ground is not automatically accessible from a wheelchair. Test reach and path width before committing to a layout.

4. A narrow bed with a trellis
A securely anchored trellis can support suitable climbing crops without using all the ground area. Place it so shade and harvesting access work for the rest of the bed. Account for wind and the weight of mature plants; a lightweight decorative panel may not be enough.
Keep access to the back of the trellis where needed. A bed against a wall should be narrow enough to work from its accessible side.
5. A bed with removable covers
Hoops can support insect mesh or season-extension covers. Choose coverings for a specific purpose and secure them against wind. Monitor ventilation and temperature; a covered bed can overheat.
Keep hoops removable or positioned so they do not prevent picking and weeding. Plant supports, covers and irrigation should be planned together rather than competing for the same attachment points.
6. A purpose-built reservoir planter
A self-watering planter stores water below the growing medium and uses a designed connection to supply moisture. It needs an overflow and a suitable growing mix. Drip irrigation is another way to deliver water, but a drip line alone does not create a reservoir planter.
Follow the kit or tested design rather than sealing the bottom of an ordinary bed. Roots still need an appropriate balance of water and air.
7. A tiered bed for a compact display
Two or more planting levels can create a focal point for flowers or herbs. Arrange each level so you can reach it without stepping on the soil, and consider how taller plants will shade the lower tier. A tiered display offers different planting positions; it does not guarantee more crop yield from the same footprint.
Use a purpose-made kit or a properly designed structure for the filled load. Each retaining wall and connection must support wet soil, and overflow needs a safe route. Do not improvise tall unsupported rings of sheet metal or assume adding another tier is structurally harmless. Protect exposed edges and preserve access for watering and maintenance.
8. A raised bed beside a bench
A bench beside a planted bed creates somewhere to rest and enjoy flowers. It can also make a small garden feel more usable. Plan the seat height, comfortable reach and a clear path before fixing the layout; a tall bed does not automatically provide accessible gardening.
An attached bench adds the weight and movement of seated people to the structure. Use a design intended for both the seating and soil loads, or keep a separately supported bench alongside the bed. Do not simply sit on a decorative retaining edge that was never designed as a seat. Leave enough room for pruning, drainage and cleaning behind the seating.
Check the site before filling
- Confirm sunlight and access to water.
- Remove or manage existing vegetation and check the soil below an open-bottom bed.
- Plan where overflow and drainage will go.
- Check load limits before placing a filled bed on a deck, balcony or other structure.
- Choose a soil or growing mix suited to the type of bed and crops.
Minnesota Extension’s raised-bed guidance covers access and construction considerations. Avoid filling the base with unknown discarded materials merely to reduce soil cost.
Once the bed is in use, follow our raised-bed weed-control guide for maintenance. Choose a design you can comfortably care for throughout the season.