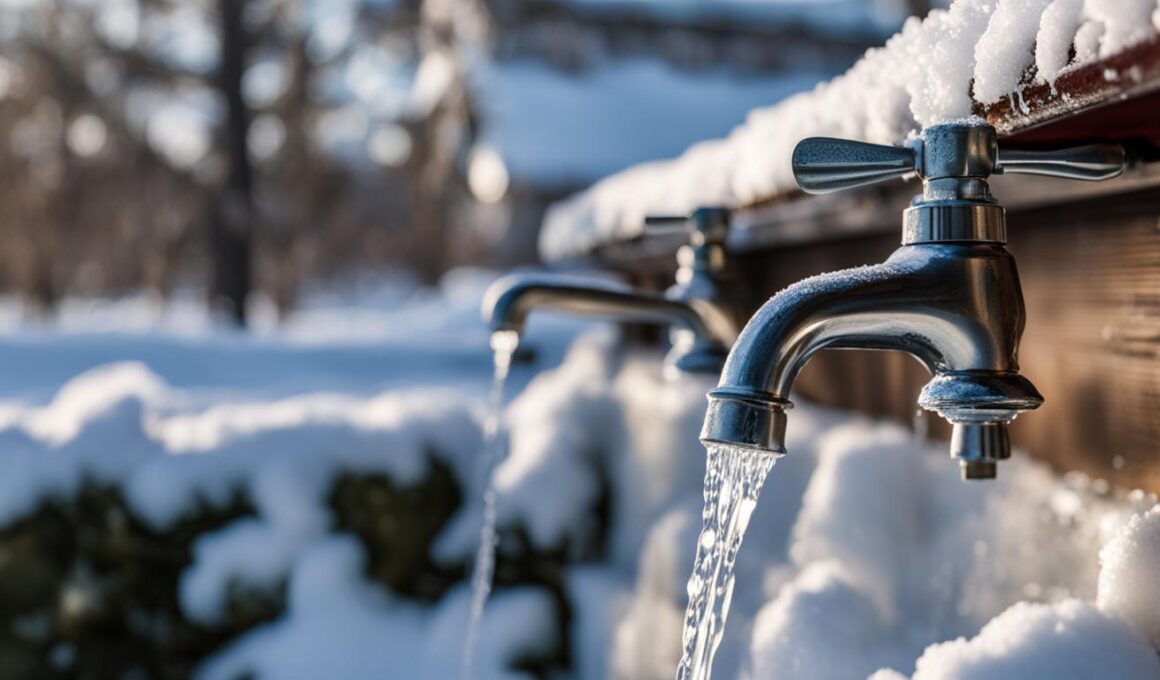
Winterizing your outdoor faucet is crucial to prevent freezing and costly damage. Even without a shut-off valve, you can still protect your outdoor faucets from the winter chill. In this easy guide, we will provide you with step-by-step instructions on how to winterize your outdoor faucet without a shut-off valve.
Post Summary
- Winterizing your outdoor faucet is essential to prevent freezing and damage.
- You can protect your outdoor faucet even without a shut-off valve.
- Follow our step-by-step instructions for effective winterization.
- Prioritize safety and gather the necessary tools and materials.
- Consider professional assistance for advanced issues or upgrades.
When to Winterize Outdoor Faucets
Knowing when to winterize your outdoor faucet is crucial to prevent freezing and potential damage. The timing will depend on your local weather conditions and the forecasted low temperatures. In colder climates, it is advisable to start winterizing your outdoor faucet in the fall before freezing temperatures set in. However, if you live in a milder climate and still need to use the water outlet, you may choose to wait until freezing weather is imminent.
It is recommended to winterize your outdoor faucet when the forecasted low temperatures are expected to fall below 35 degrees Fahrenheit (1.7 degrees Celsius). These lower temperatures increase the risk of freezing and can cause severe damage to your plumbing system. By winterizing before the freezing weather arrives, you can ensure that your outdoor faucet and pipes are properly protected.
Keep in mind that it’s always better to be proactive in winterizing your outdoor faucet, rather than waiting until it’s too late and facing expensive repairs or replacements. Taking the necessary precautions and staying aware of the weather forecast will help you determine the best time to winterize your outdoor faucet without a shut-off valve.
When to Winterize Outdoor Faucets
| Weather Condition | Time to Winterize |
|---|---|
| Forecasted low temperatures below 35°F (1.7°C) | Before freezing weather is imminent |
| Freezing weather is imminent | As soon as possible |
| Milder climate with occasional freezing temperatures | Before first frost of the season |
Safety Considerations
When winterizing your outdoor faucet, it is important to prioritize safety. By taking certain precautions, you can ensure that your winterization process goes smoothly and avoid any potential hazards. Here are some safety considerations to keep in mind:
Accessing Water Supply Lines
When accessing the water supply lines in your basement or crawl space, be aware that these areas may have low ceilings and limited range of movement. Take caution to avoid hitting your head or getting trapped in tight spaces. It is recommended to wear a protective hard hat and knee pads to prevent injuries.
Home Maintenance
Before winterizing your outdoor faucet, use a flashlight to check for any peripheral home maintenance issues. Look for any plumbing leaks, as well as moldy or rotting wood around the faucet area. If you discover any problems, it is best to address them before proceeding with the winterization process to prevent further damage.
Animal Hazards
During the winter months, animals may seek shelter near your outdoor faucet. Before starting the winterization process, inspect the area for signs of animal activity, such as nests or droppings. Take appropriate measures to deter animals and ensure their safety as well as yours.
By following these safety considerations, you can minimize the risk of accidents and ensure a successful winterization process for your outdoor faucet.

| Safety Considerations | Description |
|---|---|
| Accessing Water Supply Lines | Take caution when accessing water supply lines in basements or crawl spaces that have low ceilings and limited range of movement. Wear protective gear and avoid injuries. |
| Home Maintenance | Check for plumbing leaks, moldy or rotting wood, and other potential issues before winterizing your outdoor faucet. Address these problems to prevent further damage. |
| Animal Hazards | Inspect the area around the outdoor faucet for signs of animal activity. Take appropriate measures to deter animals and ensure their safety as well as yours. |
Tools and Materials Needed
Before you start the process of winterizing your outdoor faucet without a shut-off valve, it’s important to gather the necessary tools and materials. Having these items on hand will ensure that you can complete the task efficiently and effectively. Here is a list of what you’ll need:
| Tool | Description |
|---|---|
| Adjustable wrench | A versatile tool that allows you to easily tighten or loosen bolts and nuts. It will come in handy for various steps in the winterization process. |
| Tongue and groove pliers | Also known as channel-lock pliers, these are used for gripping and turning objects of different sizes. They will be useful for disconnecting hoses and manipulating components during winterization. |
| Work gloves | Protective gloves are essential to keep your hands safe during the winterization process. Opt for non-slip-grip gloves to ensure a firm hold on tools and prevent accidents. |
| Flashlight | A reliable flashlight is essential for inspecting your outdoor faucet and its surrounding areas. Use it to check for any leaks, damage, or potential hazards. |
| Faucet cover | An outdoor faucet cover provides insulation and protection against extreme cold temperatures. Look for a cover that is designed to seal tightly around the faucet to prevent any air or moisture from getting through. |
Make sure you have all these tools and materials ready before you begin the winterization process. Having everything at your disposal will make the task much easier and allow you to finish it without any interruptions or delays.
Step-by-Step Instructions
Follow these step-by-step instructions to winterize your outdoor faucet without a shut-off valve:
- Shut off the water supply: Locate the valve that controls the water supply to your outdoor faucet. Turn it off to prevent any water from flowing into the faucet during the winter months. This will help protect against freezing and potential damage.
- Disconnect any hoses: If you have any hoses attached to the outdoor faucet, remove them. Hoses can hold water and freeze, leading to damage to both the hose and the faucet. Make sure to drain any remaining water from the hoses before storing them for the winter.
- Drain the faucet: Open the outdoor faucet to allow any remaining water to drain out. This can be done by turning the faucet handle to the “on” position and letting the water flow out. Be sure to drain any water from both the hot and cold sides of the faucet.
- Install a faucet cover: To provide insulation and protection against extreme cold temperatures, install an outdoor faucet cover. These covers are designed to fit snugly over the faucet and prevent cold air from reaching the pipes. Choose a cover that is specifically designed for winter use and ensure it is securely attached.
By following these simple steps, you can effectively winterize your outdoor faucet without a shut-off valve. Taking the time to protect your outdoor faucet from freezing temperatures will help prevent costly repairs and ensure the longevity of your plumbing system.

Expert Tip:
If you’re unable to locate the shut-off valve for your outdoor faucet, consider hiring a professional plumber to assist you. They have the knowledge and experience to properly winterize your faucet and can also provide recommendations for upgrading to a freeze-proof faucet or adding a shut-off valve for future convenience.
When to Call a Professional
If you encounter more advanced issues or need to upgrade to a freeze-proof faucet or add a shut-off valve, it is recommended to seek the expertise of a professional plumber. While winterizing an outdoor faucet is typically a simple DIY task, certain situations may require the skills and knowledge of a professional. They can ensure that your outdoor faucet is properly winterized and protected, minimizing the risk of any damage or complications.
Advanced issues may include complex plumbing systems, intricate valve configurations, or hidden leaks that require specialized tools and expertise to diagnose and repair. Attempting to tackle these issues without the proper knowledge and equipment can potentially worsen the problem and lead to costly repairs.
If you are considering upgrading to a freeze-proof faucet or adding a shut-off valve, a professional plumber can provide guidance and installation services. They will ensure that the new equipment is installed correctly and in compliance with local plumbing codes. Additionally, they can offer recommendations based on your specific needs and budget, helping you make an informed decision.
Recommended Products for Winterization
When it comes to winterizing your outdoor faucet without a shut-off valve, there are a few key products that can enhance your efforts and provide added protection against freezing temperatures. Consider investing in a frost-free faucet, which is specially designed to prevent freezing and eliminate the need for a shut-off valve. These faucets are equipped with a long stem that extends into the warm interior of your home, preventing water from freezing in the exposed outdoor portion.
In addition to a frost-free faucet, installing an outdoor faucet cover can further safeguard your outdoor plumbing. These covers are designed to provide insulation and protect against extreme cold. There are two main types of faucet covers you can choose from: soft sock covers and hard shell covers. Soft sock covers are made from a durable fabric material and easily slip over the faucet, while hard shell covers are made from rigid plastic and provide maximum protection. Whichever type you choose, make sure the cover fits securely and tightly around the faucet to prevent any air or moisture from seeping in.
To help you select the right products for winterizing your outdoor faucet, refer to the table below for our top recommendations:
Recommended Products for Winterization
| Product | Description | Price |
|---|---|---|
| Frost-Free Faucet | Avoid freezing with a frost-free faucet that eliminates the need for a shut-off valve. | $50 |
| Soft Sock Faucet Cover | Durable fabric cover that slips over the faucet for insulation and protection. | $10 |
| Hard Shell Faucet Cover | Rigid plastic cover that provides maximum protection against extreme cold. | $15 |
By investing in these recommended products, you can ensure that your outdoor faucet is well-protected and prepared for the winter season. Remember to follow the step-by-step instructions outlined earlier in this guide to properly winterize your outdoor faucet without a shut-off valve.
Conclusion
Winterizing your outdoor faucet without a shut-off valve is a crucial step in protecting your plumbing from freezing temperatures. By following these simple winterization tips, you can ensure that your pipes remain intact throughout the winter season.
Protecting your pipes from freezing is not only important for preventing costly damage but also for maintaining the functionality of your outdoor faucet. By taking these cost-effective precautions, you can avoid the inconvenience of burst pipes and the need for expensive repairs.
Remember to shut off the water supply, disconnect hoses, drain the faucet, and install a faucet cover to provide insulation and protect against extreme cold. Additionally, consider upgrading to a freeze-proof faucet or adding a shut-off valve for added peace of mind.
Whether you live in a colder climate or a mild one, winterizing your outdoor faucet is a task that should not be overlooked. By following these winterization tips, you can safeguard your plumbing and enjoy a worry-free winter season.
FAQ
When is the best time to winterize outdoor faucets?
It is advisable to winterize in the fall before freezing temperatures set in. However, if you live in a mild climate and need to use the water outlet, you may choose to wait until freezing weather is imminent. Winterize when low temperatures are forecasted to fall below 35 degrees Fahrenheit (1.7 degrees Celsius).
What safety considerations should I keep in mind when winterizing outdoor faucets?
Take caution when accessing water supply lines in basements or crawl spaces. Use a flashlight to check for peripheral home maintenance issues, such as plumbing leaks, moldy or rotting wood, and potential animal hazards seeking shelter.
What tools and materials do I need to winterize an outdoor faucet without a shut-off valve?
You will need an adjustable wrench, tongue and groove pliers, non-slip-grip work gloves, flashlight, bucket, and an outdoor faucet winter cover.
What are the step-by-step instructions for winterizing an outdoor faucet without a shut-off valve?
1. Shut off the water supply by locating the valve and turning it off. 2. Disconnect any hoses attached to the faucet and drain all the water from them. 3. Drain the faucet by opening it to allow any remaining water to drain out. 4. Install an outdoor faucet cover that seals tightly around the faucet for insulation and protection against extreme cold.
When should I call a professional plumber for winterizing an outdoor faucet?
If you encounter more advanced issues or need to upgrade to a freeze-proof faucet or add a shut-off valve, it is recommended to seek expert assistance. A professional plumber can ensure that your outdoor faucet is properly winterized and protected.
Are there any recommended products for winterizing outdoor faucets?
Consider installing a frost-free faucet for better winterization. Additionally, using outdoor faucet covers can provide added protection and insulation. Look for soft sock or hard shell covers for optimal winterization.
Why is winterizing an outdoor faucet important?
Winterizing outdoor faucets is crucial to prevent costly damage from freezing temperatures. By taking these simple precautions, you can protect your plumbing and ensure that your pipes remain intact throughout the winter season.
Is Sevin Spray Effective for Winterizing Outdoor Faucets Without Shut Off Valve?
Yes, Sevin spray is effective for winterizing outdoor faucets without a shut off valve. It creates a protective barrier against cold temperatures and prevents freezing. The frequency of use depends on the severity of the weather, but it’s recommended to apply it at the beginning and end of winter.