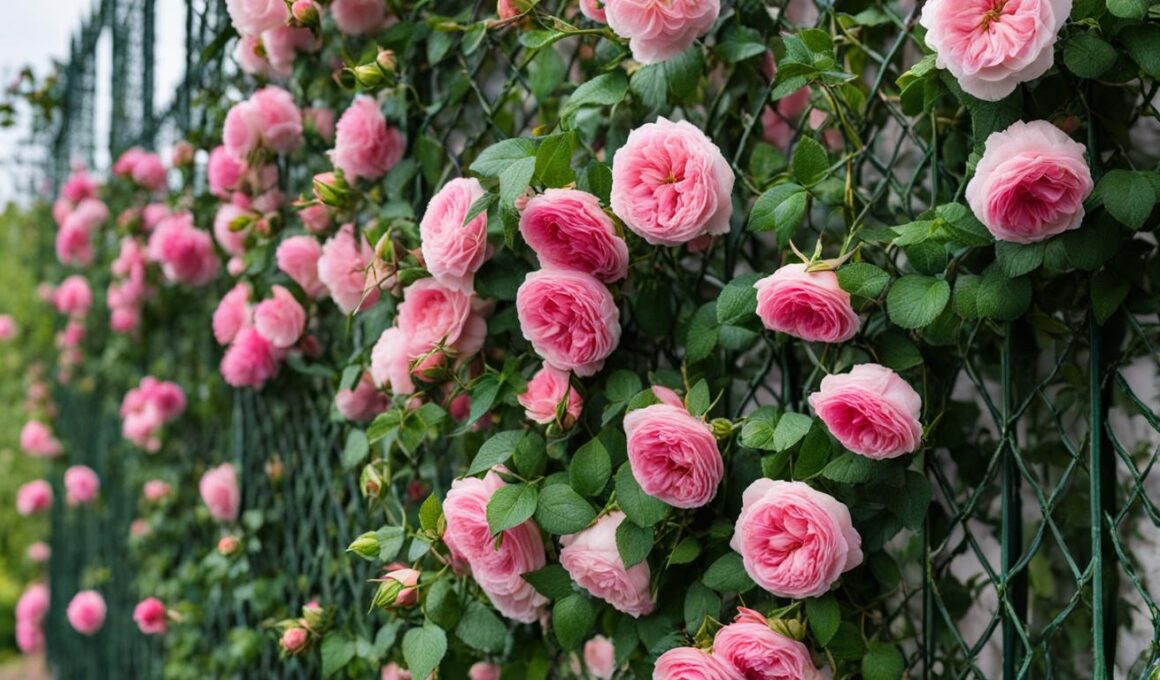
Training climbing roses is crucial for achieving even coverage and directing the growth of your roses. By properly training and tying-in the rose stems to a support structure, you can ensure the roses stay secure and prevent breakage. This training method allows climbers or ramblers to reach eye level, creating a beautiful floral feature in your garden.
Post Summary
- Training climbing roses is essential for even coverage and growth direction.
- Tying-in the rose stems to a support structure keeps them secure.
- A well-trained climbing rose can become a striking focal point in your garden.
- Consider using strong garden twine or Flexi-Tie for tying-in.
- Regular pruning and maintenance are necessary for the health and longevity of climbing roses.
How to Tie-in a Climbing or Rambling Rose
Tying-in a climbing or rambling rose is an essential step in training these beautiful plants and ensuring their growth is supported and guided. To tie-in your climbing or rambling rose, you will need strong garden twine or Flexi-Tie, which will provide the necessary support without damaging the stems.
When tying-in the rose stems, it is important to do so loosely to allow for growth and flexibility. This will prevent any unnecessary strain on the stems and minimize the risk of breakage. As the rose grows, you may need to adjust the ties to ensure they are not too tight or restrictive.
The aim of tying-in your climbing or rambling rose is to create good, even coverage across your support structure. This will help fill in any gaps and create a stunning visual display when the rose is in full bloom. Take care to tie the stems to the support structure, such as a trellis or wall, in a way that allows the plant to grow in a natural and aesthetically pleasing manner.
The Benefits of Straining Wires
Straining wires offer a more flexible and customizable approach to training climbing roses. You can easily adjust the height and spacing of the wires to suit the needs of your rose. Additionally, if you have multiple climbing roses growing on the same wall or fence, the wires allow you to create an organized grid system for each rose to climb on.
On the other hand, a trellis provides a more decorative element to your wall or fence. It can add visual interest and serve as a focal point in your garden. Trellises also offer a sturdier support system for larger climbing roses that may require more stability.
Overall, both straining wires and trellises are effective methods for training climbing or rambling roses up a wall or fence. Whichever option you choose, be sure to regularly tie-in the stems and provide the necessary support to ensure the roses grow evenly and beautifully.
How to Train a Climbing or Rambling Rose Up the Front of a House or Doorway
Training a climbing or rambling rose up the front of a house or doorway can add a touch of beauty and elegance to your outdoor space. There are a few methods you can use to train your rose, and two popular options are a trellis or straining wires.
If you choose to use a trellis, attach it securely to the wall or doorway. Position the trellis vertically, ensuring it is straight and stable. As your rose grows, gently coax the stems to grow upward and fan them out to create even coverage. Use garden twine or Flexi-Tie to tie the stems to the trellis, securing them in place. This method allows the rose to climb and intertwine beautifully with the trellis, creating a stunning visual display.
Alternatively, you can use straining wires to train your rose. Attach the wires horizontally at intervals of 12-18 inches along the wall or doorway. This provides a sturdy support structure for the rose to climb. Similar to the trellis method, fan out the stems and tie them to the wires using garden twine or Flexi-Tie. This will encourage the rose to grow upward and cover the entire front of the house or doorway.
| Trellis Method | Straining Wires Method |
|---|---|
| Vertical trellis attached to the wall or doorway | Horizontal wires attached at intervals along the wall or doorway |
| Coax stems to grow upward and fan them out | Fan out stems and tie them to the wires |
| Tie stems to the trellis for support | Tie stems to the wires using garden twine or Flexi-Tie |
| Allows the rose to climb and intertwine with the trellis | Encourages the rose to grow upward and cover the front of the house or doorway |
When choosing a rose for training up the front of a house or doorway, consider the color of the rose in relation to the front door. A contrasting color can create a striking visual impact, while a complementary color can provide a harmonious and inviting entrance. Whichever method and rose you choose, proper training and regular maintenance will ensure a beautiful display that enhances the aesthetic charm of your home.
Training a rose up an obelisk or pillar can create an elegant focal point in your garden. The spiral training method allows the rose stems to gradually wind their way up the structure, producing a stunning display of blooms. To train a rose up an obelisk or pillar, follow these simple steps:
Step 1: Selecting the Obelisk or Pillar
Choose a sturdy obelisk or pillar that can support the weight of the rose. The structure should be tall enough to allow the rose to reach its full height. Avoid using materials that may rot or deteriorate over time.
Step 2: Spiral Training
Start by tying the lowest stem of the rose to the base of the obelisk or pillar using a gardening tie. As the rose grows, guide the stems in a spiral pattern around the structure, securing them at regular intervals. This spiral training encourages even growth and allows the flowers to cascade down the structure.
“Spiral training creates a visually captivating effect as the rose stems wind their way up the obelisk or pillar, showcasing the beauty of the blooms from every angle.”
Step 3: Regular Maintenance
Regularly inspect and maintain the tied-in stems to ensure they are not constricting the growth of the rose. Prune any dead or crossing stems to maintain a healthy and well-shaped plant. Additionally, water the rose regularly and provide appropriate fertilizer to promote vigorous growth and abundant flowering.
| Benefits of Training a Rose Up an Obelisk or Pillar | Considerations |
|---|---|
|
|
How to Train a Rose Up and Over an Arch
To create a stunning focal point in your garden, you can train a rose up and over an arch. This technique involves using two roses, one on either side of the arch, and training them upwards and over the top to meet at the center point. Tying-in the stems as the roses grow will ensure they stay secure and in the desired position.
When selecting the roses for this training method, choose varieties that have flexible stems and are suitable for arching. Climbing roses and certain rambling rose varieties are excellent choices.
Begin by planting the roses on either side of the arch, ensuring they are well-spaced and have adequate room to grow. As the roses start to grow, gently guide the stems towards the arch and secure them with garden twine or Flexi-Tie. It’s important to tie-in the stems loosely to allow for growth and flexibility.
As the roses reach the top of the arch, continue to train and tie-in the stems to create even coverage. The aim is for the two roses to meet at the center point of the arch, creating a beautiful display of blooms overhead.
Tips for Training a Rose Up and Over an Arch:
- Choose roses with flexible stems suitable for arching
- Plant the roses on either side of the arch, ensuring adequate spacing
- Guide the stems towards the arch and secure them with garden twine or Flexi-Tie
- Tie-in the stems loosely to allow for growth and flexibility
- Continue to train and tie-in the stems as the roses grow towards the top of the arch
- Aim for the two roses to meet at the center point of the arch for a stunning display
With proper training and care, your roses will create a magnificent and romantic archway in your garden. Enjoy the beauty and fragrance they bring as they gracefully climb and bloom.
How to Train a Rose Up and Over a Pergola
Training a rose up and over a pergola can create a stunning and romantic focal point in your garden. By following the right techniques, you can ensure that the rose grows in an upright manner along the pergola’s uprights while creating a beautiful canopy of blooms above. Here’s how you can train a rose up and over a pergola:
Uprights Training:
The first step in training a rose up and over a pergola is to focus on the uprights. The rose stems should be trained to grow in a spiral around the pergola’s vertical supports. As the canes grow, tie them securely to the uprights using garden twine or Flexi-Tie, making sure to leave some room for growth. This method will encourage the stems to grow upward and create a strong framework for the rose.
Canopy Training:
To create a beautiful canopy of blooms above the pergola, select one of the uprights to be the main stem. Train this stem to grow vertically and secure it to the cross beams of the pergola using garden twine. As the rose grows, select the strongest and most promising side shoots to tie-in horizontally along the cross beams. This will create a lush canopy of flowers above the pergola, providing shade and beauty.
| Uprights Training | Canopy Training |
|---|---|
| – Train rose stems in a spiral around the vertical supports of the pergola | – Select one upright as the main stem and train it vertically |
| – Secure the stems to the uprights using garden twine or Flexi-Tie | – Tie-in strong side shoots horizontally along the cross beams |
| – Leave room for growth and adjust the ties as necessary | – This will create a beautiful canopy of blooms above the pergola |
Regular pruning is essential to maintain the size and shape of the rose and to remove any dead or diseased wood. By following these training techniques and providing proper care, you can enjoy a breathtaking display of roses cascading up and over your pergola, creating an enchanting and romantic atmosphere in your outdoor space.
How to Plant a Bare Root Shrub Rose
Planting a bare root shrub rose is the best start you can give to this beautiful flowering plant. Follow these proper planting techniques to ensure your rose gets off to a strong and healthy start.
Step 1: Dig a hole that is deep enough to accommodate the roots and wide enough to allow for easy spreading of the roots. The hole should be approximately 18 inches wide and 18 inches deep.
Step 2: Place the rose in the hole, making sure the graft union (the swollen area where the rose was grafted onto the rootstock) is level with or slightly above the soil surface. This ensures that the rose doesn’t sink too deep into the ground and helps prevent rot.
Step 3: Backfill the hole with soil, gently firming it around the roots. Ensure that there are no air pockets around the roots, as this can lead to drying out or rotting. Water the rose thoroughly after planting to settle the soil and provide the necessary moisture for root establishment.
By following these proper planting techniques, you are giving your bare root shrub rose the best start possible. This will help promote healthy growth and ensure that your rose thrives in your garden for years to come.
Pruning Tips for Climbing Roses
Pruning climbing roses is an essential part of their care and maintenance. Regular pruning helps maintain the health of the plants and promotes vigorous growth, resulting in abundant blooms. Here are some pruning tips to keep your climbing roses looking their best.
Annual Spring Pruning
It is recommended to prune climbing roses in early spring, just as new growth begins. Start by removing any dead, damaged, or diseased canes. These canes can attract pests and diseases, so it’s important to get rid of them. Use sharp, clean pruning shears to make clean cuts at a 45-degree angle, about ¼ inch above an outward-facing bud.
Next, focus on trimming back the secondary canes. These are the smaller, thinner canes that grow from the main canes. Prune them back by about one-third of their length. This stimulates the growth of new flowering shoots and encourages the rose to produce more blooms.
Deadheading Spent Blooms
Deadheading is the process of removing spent blooms from the rose plant. This not only keeps the plant looking tidy but also encourages the production of new blooms. After a climbing rose has finished flowering, locate the first set of five leaflets below the spent bloom. Make a clean cut just above these leaflets. This will redirect the plant’s energy into producing more flowers.
Training New Growth
As climbing roses grow, it’s important to train the new growth to the desired shape and direction. This can be done by tying the stems to a support structure, such as a trellis or wires. Use soft garden twine or Flexi-Tie to loosely secure the stems, allowing room for growth and flexibility. As the new shoots emerge, gently guide them in the desired direction and tie them to the support structure.
Remember to regularly inspect your climbing roses throughout the growing season and remove any dead or damaged canes promptly. This will help prevent the spread of diseases and ensure the health and vitality of your roses. With proper pruning and care, your climbing roses will reward you with a stunning display of beautiful blooms year after year.
Conclusion
Training climbing roses takes time and dedication, but the results are truly breathtaking. By following the proper techniques outlined in this article, you can transform your garden into a stunning display of natural beauty. Remember to regularly prune and maintain your climbing roses to ensure their health and longevity.
Climbing roses not only add a touch of elegance to your outdoor space, but they also provide a focal point and a vibrant splash of color. With their ability to reach eye level and cover walls, fences, arches, and pergolas, they create a picturesque ambiance that is hard to replicate with any other flower.
By caring for your climbing roses and training them to grow in the desired direction, you can unleash the full potential of your garden. Take the time to tie-in the stems, encourage side shoots, and create even coverage for a truly stunning effect. With their stunning blooms and captivating fragrance, climbing roses are sure to be the envy of your neighbors.
So, make the commitment to train and care for your climbing roses. Your hard work will be rewarded with a garden that exudes beauty and charm, and a place where you can relax and enjoy the splendor of nature.
Can the same training techniques be applied to both climbing roses and lithops splitting?
When it comes to training climbing roses and lithops splitting, the techniques may vary. Climbing roses require support structures and proper pruning, while lithops splitting involves careful watering and soil management. Witness the magic of living stones as you learn the distinct training methods for each plant.
FAQ
Why is training climbing roses important?
Training climbing roses is essential for achieving even coverage and directing the growth of the roses.
What can I use to tie-in climbing or rambling roses?
You can use strong garden twine or Flexi-Tie to tie-in the rose stems to a support structure.
How should I train a climbing or rambling rose up a wall or fence?
It is recommended to set up straining wires or use a trellis. The straining wires should be placed 2ft from the ground and repeated every 12-18 inches up the wall or fence.
How can I train a climbing or rambling rose up the front of a house or doorway?
It is best to use a trellis or straining wires. The support should be placed horizontally at intervals of 12-18 inches.
What is the best way to train a rose up an obelisk or pillar?
The stems should be trained in a spiral around the structure, and regular pruning is necessary to keep the growth within bounds.
How do I train a rose up and over an arch?
Two roses should be trained on either side of the arch, upwards and over the top, with the aim of creating even coverage at the center point of the arch.
How do I train a rose up and over a pergola?
The uprights of the pergola should be trained with spiral training, and the canopy above is created by training a rose up one of the uprights and then tying-in shoots to the cross beams.
What is the proper planting technique for a bare root shrub rose?
Dig a hole that is deep enough to accommodate the roots and wide enough to allow for easy spreading of the roots. Place the rose in the hole, making sure the graft union is at the appropriate level. Backfill the hole with soil, gently firming it around the roots. Water the rose thoroughly after planting.
How should I prune climbing roses?
Annual springtime pruning should involve removing dead, damaged, and diseased canes. Trimming back secondary canes is also necessary to stimulate new flowering shoots. Deadheading spent blooms is recommended to maintain a compact shape and encourage new blooms.


