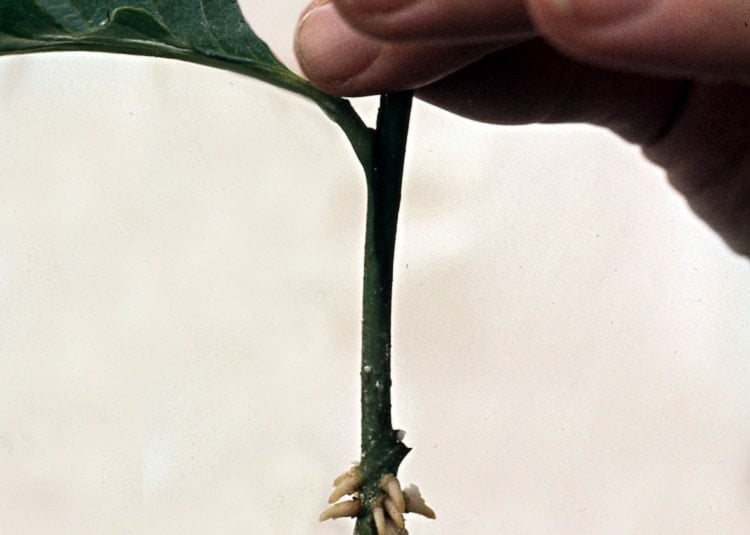
Growing plants from cuttings means rooting a piece of an existing plant to produce a new one. It can preserve the parent plant’s characteristics, but success depends on the species, type of cutting and growing conditions. A branch from any plant will not necessarily root, and native plants are not automatically easy to propagate this way.
Choose the right kind of cutting
Stem cuttings are the focus here. Leaf and root cuttings are separate methods used for particular plants, so a picture of root cuttings is not a guide to preparing a woody stem.
- Softwood: young, flexible growth, often taken in spring or early summer.
- Greenwood: somewhat firmer growth later in the growing season.
- Semi-ripe or semi-hardwood: partly matured shoots, commonly used for selected shrubs in summer or early autumn.
- Hardwood: mature shoots of suitable woody plants, usually taken during dormancy.
These categories describe the plant material, not four interchangeable recipes. Hydrangea, rosemary, pelargonium and many other garden plants can be propagated from cuttings, but the most useful timing and technique differ. Begin with an identified plant and a species-specific recommendation.
1. Prepare before cutting
Set out clean pots, labels, a sharp cutting tool and the appropriate rooting medium before collecting shoots. Choose a healthy parent plant and obtain the owner’s permission. Avoid taking material with unexplained wilting, spots or obvious pest damage.
Collect during a cool part of the day and keep the material from drying while you work. If you are comparing methods, label each pot with the plant, date and treatment; otherwise a tray of similar stems quickly becomes difficult to interpret.
2. Select and trim a suitable shoot
For an ordinary nodal softwood cutting, choose a non-flowering shoot and make the basal cut just below a node. Remove lower leaves that would be buried, while retaining useful upper foliage. Length varies by species; four inches is not a minimum that every cutting must meet.
The RHS softwood-cutting guide explains preparation and humidity management. Do not strip all the leaves from a leafy cutting or judge it dead solely because one leaf yellows.
3. Keep the original orientation
Plant the basal end downward. For leafless hardwood pieces, keep track of top and bottom while cutting them. The RHS hardwood method uses a sloping top cut and straight basal cut; that convention is different from the earlier advice to mark the bottom with a mandatory 30-degree cut.
Hardwood propagation often takes months and can involve a sheltered outdoor bed or deep container. Do not expect every dormant twig to follow the short timetable of a soft herbaceous cutting.
4. Decide whether wounding or rooting hormone is appropriate
Scraping bark is not a compulsory step. Some difficult woody plants benefit from a specific wounding technique, but unnecessary injury can damage a tender cutting. Follow instructions for the plant rather than scraping every stem.
If using rooting hormone, choose a product appropriate to the plant and cutting type, and follow its label. Put a small amount into a separate clean container instead of dipping potentially contaminated material into the main supply. More hormone is not automatically better.
5. Root in a moist, airy medium
Use a clean, free-draining propagation medium and a container with drainage holes. Make a planting hole first, insert the prepared base and gently firm the medium. Water to settle it, then let excess water drain. Ordinary heavy garden soil and constant flooding are poor substitutes for a suitable rooting environment.
For leafy cuttings that need extra humidity, a supported clear cover can reduce moisture loss. Keep it from pressing on the foliage, provide ventilation and use bright indirect light. Direct sun can overheat a covered pot. Check regularly for drying, fallen leaves and rot.
6. Check for roots without repeated disturbance
Some cuttings root in weeks; others take much longer. Fresh leaves alone do not prove a strong root system, because a cutting can use stored reserves. Look for root development and sustained growth, disturbing the plant as little as possible.
When roots are sufficiently developed, move the plant carefully into an appropriate potting mix. Increase ventilation gradually if it was under a cover. Do not dig it up repeatedly to check progress or plant it straight into harsh outdoor conditions simply because two weeks have passed.
7. Use water propagation selectively
Water rooting is practical for some plants, including several familiar houseplants, but it is not a general method for every herb or woody shrub. Keep submerged nodes free of leaves, use a clean container and refresh the water regularly. Provide light without baking the vessel in strong sun.
University of Missouri’s propagation guide identifies plants and methods that work at home. A plant that roots in water still needs care when moved to potting mix. Pot it once roots are developed enough to handle, using a small draining container, and monitor moisture during the transition.
8. Grow on and acclimatize
Keep a newly potted cutting in suitable light, not in darkness for several days. Its leaves still need light. Protect it from abrupt changes in humidity, wind and sun while it establishes in the new medium.
Before garden planting, gradually introduce outdoor conditions and check that weather suits the species. Tender plants may need protected growing space until the appropriate season. Potting up and hardening off are part of propagation, not optional steps after the first roots appear.
If the cutting fails
A soft, dark, rotting base suggests a different problem from a dry, shriveled shoot. Review drainage, moisture loss, cleanliness, temperature and the suitability of the original material. Discard rotting material rather than leaving it among healthy cuttings. Try a small labeled batch first, then adjust one part of the method at a time.