If you’re looking for a rewarding, practical, and safe DIY project, why not try growing Kennebec potatoes in your own backyard?
It’s a fun, simple task that you’ll be able to enjoy with your family and it doesn’t require a lot of space.
The Kennebec potato, known for its versatility in cooking and resistance to diseases, is an excellent choice for your first backyard crop.
With a little bit of effort and attention to detail, you’ll have a bountiful harvest of your own homegrown spuds.
This article will guide you through the entire process – from selecting the ideal planting site and quality seed potatoes to preparing the soil and the actual planting.
We’ll also provide tips on watering, fertilizing, and managing pests and diseases.
Lastly, we’ll help you recognize when it’s time to harvest your potatoes, and we’ll share some tricks on how to store your bounty.
Let’s dig in!
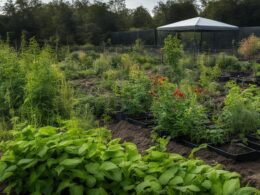
Choosing the Ideal Planting Site
You’ll want to give careful thought to where you plant your Kennebec potatoes, as the right spot can make a world of difference to your harvest.
Your home garden should be carefully selected and prepared to give your potatoes the best chance to thrive. When you plant Kennebec potatoes, ensure the site is well-drained, as waterlogged soil can lead to rot and disease.
Choose a spot with full sun, as potatoes need at least six hours of sunlight per day to grow properly. Avoid planting in a location where potatoes or other nightshade family plants, like tomatoes and peppers, have been grown in the past two years. This will help prevent disease and guarantee a healthier crop.
Remember to check the soil’s pH level. Kennebec potatoes prefer slightly acidic soil with a pH level between 5.0 and 7.0. You can easily test the pH level with a home soil test kit.
Take time to prepare the soil properly, too. It should be loose, rich in organic matter, and free of rocks and debris that could hinder the growth of your potatoes.
With these safety measures in place, your Kennebec potatoes are set to yield a bountiful harvest.
Selecting Quality Seed Potatoes
Choosing the right seed stock’s crucial for achieving a bountiful harvest. When it comes to growing kennebec potatoes, you’ll need to start by selecting quality seed potatoes. Don’t worry, it’s not as complicated as it might sound. Here’s what you need to do:
- Firstly, look for certified kennebec seed potatoes. This guarantees that they’re disease-free and safe for planting. Remember, safety first!
- You can find them in local garden stores or reputable online shops.
- Make sure they’re firm, have no cuts, bruises, or signs of rot.
- Secondly, inspect the eyes. These are the small indentations from where the new plant will sprout.
- The more eyes a potato has, the more shoots it’ll produce.
- But, too many shoots can lead to smaller potatoes, so aim for seed potatoes with 2-3 eyes each.
Armed with this knowledge, you’re now ready to select the best kennebec seed potatoes for your backyard garden.
As you can see, the process requires a bit of attention and discernment, but it’s all worth it when you finally dig up those plump, tasty kennebec potatoes. So, go ahead, and make your selection with confidence, knowing that you’re one step closer to a successful harvest.
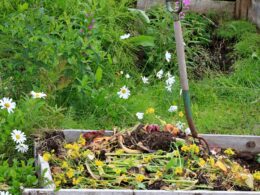
Preparing the Soil for Planting
Now that you’ve got the right seeds in hand, it’s time to turn that patch of earth into a nurturing cradle for your soon-to-be-planted treasures. Preparing the soil for planting is a crucial step to ensure your Kennebec potatoes will thrive.
Before you get started, you’ll want to assess the soil quality. Kennebec potatoes prefer a slightly acidic, well-drained soil. It’s worth getting a soil test to determine the pH and nutrient levels. Ideal pH is between 5.0 and 7.0.
Consider this table as a guide:
| Soil Type | pH Level | Nutrient Level |
|---|---|---|
| Ideal for Kennebec potatoes | 5.0 – 7.0 | High |
| Slightly Suitable | 7.0 – 7.5 | Medium |
| Not Suitable | Above 7.5 | Low |
If your soil pH is too high, use sulfur to lower it. If it’s too low, use lime to raise it. Also, enrich the soil with organic matter or compost to improve drainage and supply nutrients.
As you can see, the process of preparing the soil for planting is more than just digging a hole. It’s about creating the perfect environment for your potatoes to grow and flourish. Remember, a healthy soil leads to a healthy crop.
Planting Process for Potatoes
Ready to plunge those precious spuds into their new home? It’s a thrilling moment, knowing you’re about to start a journey that culminates in a bountiful harvest.
The planting process for potatoes is simple, but it requires care and attention. Start by digging a trench about 4 to 5 inches deep in the prepared soil. This depth provides the developing tubers protection from sunlight that can cause them to turn green and become toxic.
Space your kennebec potatoes about 12 inches apart in the trench, eyes facing upward. This spacing ensures each plant has enough room to grow and produce a good yield. Cover the potatoes with soil, leaving about 1 inch of soil above the surface. This helps protect the tubers from pests and prevents them from being exposed to sunlight.
Water your newly planted potatoes generously, but make sure you don’t flood the trench. The soil should be moist, but not waterlogged. This is the start of how to grow kennebec potatoes in your backyard.
Don’t forget to mark your rows! This helps you remember where you’ve planted, ensuring you won’t accidentally dig up your future harvest when weeding or planting other crops. It’s all about safety and success in your potato growing journey!
Watering and Fertilizing Guidance
Once you’ve settled your spuds into their new home, it’s imperative to follow a meticulous watering and fertilizing routine to ensure your kennebec potatoes grow healthy and strong.
Here’s a simple table to guide you:
| Stage of Growth | Watering Frequency | Fertilizer Requirement |
|---|---|---|
| Early Growth | Water daily, keeping the soil moist but not waterlogged | Apply a balanced fertilizer (10-10-10) once when planting |
| Mid Growth | Water every 2-3 days, depending on the weather | Apply a high potassium fertilizer after the first month |
| Late Growth | Reduce to once a week | No more fertilizer needed to avoid disease |
For watering, the rule of thumb is to water the potatoes enough to keep the soil moist but not waterlogged. Overwatering can lead to rot and other diseases. When it comes to fertilizing, start with a balanced fertilizer and then switch to a high potassium one after the first month. This helps in tuber formation and growth.
Remember, every plant in your backyard deserves care and attention. With the right watering and fertilizing routine, your kennebec potatoes will thrive. So, follow this guide diligently and anticipate a bountiful harvest.
Pest and Disease Management
Despite your best efforts in watering and fertilizing, unwanted guests like pests and diseases can still swoop in, threatening to devastate the spud haven you’ve worked hard to cultivate. But fear not, with careful vigilance and proactive measures, you can keep your plants healthy and protect the potatoes.
Start by regularly inspecting your plants for signs of pests or disease. Colorado potato beetles, for example, are notorious for causing havoc in potato patches. These little pests are striped and hard to miss. If you spot them, act swiftly. Handpick them off and drop them into a bucket of soapy water.
Similarly, look out for diseases like blight, characterized by black or brown patches on leaves. If identified, remove affected leaves immediately to prevent spread. Fungicides can also be used as a preventive measure.
To further protect the potatoes, consider using a natural pest deterrent like neem oil or introducing beneficial insects, such as ladybugs, which naturally control harmful pests.
Remember, prevention is always better than cure. Keep your garden clean, rotate your crops, and don’t ignore small problems. With these steps, you can maintain a thriving, pest-free potato patch.
Recognizing the Harvesting Time
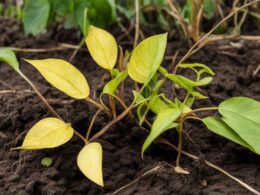
Knowing when to harvest is a crucial step in the potato growing process that requires a keen eye and a bit of patience. Harvesting Kennebec potatoes can be a bit tricky, as they don’t give off obvious signs like some other crops. However, there are certain indicators you can look for to know when your potatoes are ready.
- Plant’s Growth Cycle: When the plant’s foliage begins to yellow and die back, it’s often a good sign that your potatoes are ready for harvesting. This usually occurs about 10 weeks after planting, depending on the weather and soil conditions.
- Size of the Potato: By carefully digging around the base of the plant, you can check the size of the potatoes. They should be at least the size of a small egg before you start harvesting.
Always remember, safety is paramount when harvesting. Use a garden fork to carefully lift the potatoes, being careful not to pierce them. Damaged potatoes won’t store well and should be used immediately.
So, keep these signs in mind, be patient, and soon you’ll be enjoying a bountiful harvest of home-grown Kennebec potatoes.
Harvesting Techniques and Tips
Harvesting your spuds requires a bit of finesse and tact, so here are some useful techniques and tips to keep in mind.
Begin by choosing an overcast, dry day to dig up the potatoes. The cool weather reduces the risk of the potatoes turning green from exposure to sunlight. Use a garden fork or a spade, but be careful not to pierce or bruise the potatoes as this can lead to rot.
Start digging at the outer edges of your plant. Gently lift the plant and remove the potatoes. Be mindful not to pull too hard, you don’t want to damage the tubers.
After you dig up the potatoes, don’t wash them right away. Let them dry in a dark and cool place for a few days to cure. This will help toughen up their skin and extend their storage life.
With these harvesting techniques and tips, you’ll be able to maximize your Kennebec potato yield while ensuring you don’t injure yourself or damage your crop. It may seem like a delicate process, but with time and patience, you’ll become a pro at harvesting your backyard spuds.
Storing Your Homegrown Spuds
After all that hard work, it’s essential to store those homegrown spuds properly, ensuring they stay fresh and tasty for as long as possible. Your freshly harvested kennebec potatoes are a treasure, and you won’t want to waste a single one.
So, how do you keep them safe and sound until they’re ready for the dinner table? First, you need to cure your potatoes. Do this by leaving them in a dark, well-ventilated area with a temperature of about 45-60 degrees Fahrenheit for about two weeks. This process allows the skin to toughen up and can significantly extend the storage life of your potatoes.
Next, find a cool, dark, and humid place to store your homegrown spuds. A cellar or a basement is ideal, but a cool closet will do in a pinch. The optimal storage temperature for kennebec potatoes is around 40 degrees Fahrenheit. Be sure to check your potatoes regularly for any signs of decay and remove any bad apples immediately to prevent the spread of rot.
Remember, proper storage is just as vital as a successful harvest. With these tips, you can enjoy your homegrown kennebec potatoes for months to come.
Some Frequently Asked Questions On Growing Kennebec Potatoes In Your Backyard
What are the unique characteristics of Kennebec potatoes compared to other potato varieties?
Kennebec potatoes, compared to other varieties, are known for their high yield and disease resistance. They’re versatile, perfect for baking, frying, and mashing. Plus, they store well, ensuring you’ve got spuds for months.
Are Kennebec potatoes suitable for all climates, or do they need a specific temperature range to grow?
Kennebec potatoes aren’t picky about climate. They’ll grow in most temperatures, but they do best in cooler conditions. So, it’s crucial to avoid extreme heat, ensuring your potatoes stay healthy and safe.
How long does it typically take for Kennebec potatoes to reach full maturity?
Kennebec potatoes typically take about 70 to 90 days to reach full maturity. It’s crucial to keep an eye on them, ensuring they’re not exposed to freezing temperatures or overly wet conditions for their safety.
Can Kennebec potatoes be grown organically and if so, what organic fertilizers are recommended?
Absolutely, you can grow kennebec potatoes organically. For fertilizers, consider using composted manure or seaweed. Both are organic, rich in nutrients, and safe for your backyard garden, promising a healthy potato harvest.
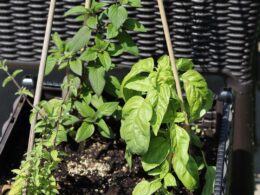
Can I grow Kennebec potatoes in containers or raised beds instead of in-ground?
Absolutely, you can grow Kennebec potatoes in containers or raised beds. It’s a safe, space-efficient method. Just ensure they’ve got good soil, plenty of sun, and consistent watering. It’s as simple as that!
How do I grow Kennebec potatoes in my backyard?
To grow Kennebec potatoes in your backyard, start by obtaining Kennebec seed potatoes or seed pieces. Choose a sunny location in your backyard with well-drained, sandy soil. Plant the seed pieces in the spring, after the last frost. Dig a trench or individual holes for the potatoes, spacing them about 12 inches apart. Place the seed pieces in the holes with the eyes facing up, cover with soil, and water the plants regularly. Hill the soil around the plants as they grow to promote tuber development. Harvest the potatoes when they are mature and ready to harvest.
What are the requirements for growing Kennebec potatoes?
Kennebec potatoes require a sunny location with well-drained, sandy soil. They should be planted in the spring after the last frost. The soil should be enriched with organic matter and have a pH level between 5.8 and 6.5. Adequate watering and hilling of the soil are also important for the healthy growth of Kennebec potato plants.
What are some growing tips for Kennebec potatoes?
Here are some growing tips for Kennebec potatoes: – Choose disease-free seed potatoes or seed pieces. – Cut the seed potatoes into pieces, making sure each piece has at least one or two eyes. – Plant the seed pieces in well-drained, sandy soil. – Provide regular watering, especially during dry periods. – Hill the soil around the plants as they grow to promote tuber development. – Monitor for pests and diseases and take appropriate measures to control them. – Harvest the potatoes when they are mature and ready to harvest. – Store the harvested potatoes in a cool, dark place to prevent sprouting or spoilage.
What are the characteristics of Kennebec potatoes?
Kennebec potatoes are a type of all-purpose potato with a white flesh and brown skin. They are known for their excellent taste and texture. Kennebec potatoes grow well in various growing conditions and are resistant to certain diseases, including late blight.
When should I plant Kennebec potatoes?
Kennebec potatoes should be planted in the spring, after the last frost. This is usually when the soil has warmed up and the weather is consistently mild. Planting too early can expose the plants to frost damage, while planting too late may result in a shorter growing season and lower yield.
How do I plant Kennebec potato seed pieces?
To plant Kennebec potato seed pieces, dig a trench or individual holes in your prepared soil. Space the seed pieces about 12 inches apart. Place the seed pieces in the holes with the eyes facing up. Cover the seed pieces with soil and water the plants regularly. As the plants grow, you can hill the soil around them to promote tuber development.
How long does it take for Kennebec potatoes to grow?
The growing season for Kennebec potatoes is approximately 80-100 days. However, the exact time may vary depending on the growing conditions and the specific variety of Kennebec potatoes being grown. You can start harvesting new potatoes after around 60 days, but for full-sized potatoes, it may take the full growing season.
How do I know when my Kennebec potatoes are ready to harvest?
Kennebec potatoes are ready to harvest when the plant’s foliage turns yellow and dies back. This usually occurs around 80-100 days after planting, but the exact timing may vary. You can gently dig around the plants to check the size and maturity of the tubers. Mature potatoes will have developed a firm skin and can be easily lifted from the ground.
How do I store harvested Kennebec potatoes?
To store harvested Kennebec potatoes, choose a cool, dark, and well-ventilated storage area. Avoid storing them near fruits or vegetables that produce ethylene gas, as this can cause the potatoes to sprout or spoil faster. Remove any damaged or diseased potatoes before storing. Place the potatoes in a container or bag that allows for air circulation and store them in a single layer. Check the potatoes regularly for signs of sprouting or spoilage and discard any affected potatoes.
Can I grow Kennebec potatoes in containers or pots?
Yes, you can grow Kennebec potatoes in containers or pots. Choose a container with good drainage and a large enough size to accommodate the growth of the potato plant and tubers. Fill the container with a well-draining potting mix. Plant the seed pieces in the container, ensuring they are covered with soil. Place the container in a sunny location and water the plants regularly. As the plants grow, you can add more soil or mulch to the container to encourage tuber development. Harvest the potatoes when they are mature and ready to harvest.
Conclusion
You’ve done it! You’ve successfully grown your own Kennebec potatoes.
With careful site selection, quality seeds, and diligent care, you’ve nurtured a bountiful yield.
You’ve fought off pests, harvested at the right time, and now you know the proper techniques for storage.
Now, it’s time to enjoy the fruits of your labor. Whether for a summer BBQ or warm stew in winter, these spuds will surely add a homegrown touch to your meals.