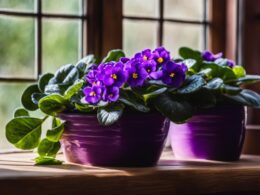
Start a mini herb garden with two or three herbs you actually cook with, separate pots with drainage holes, and the brightest suitable growing space you can provide. A small collection is easier to water and harvest than a crowded planter. A kitchen location is convenient, but enough light matters more than proximity to the stove.

Choose the growing spot before buying plants
Observe your proposed shelf or windowsill at different times of day. Nearby buildings, trees and curtains affect the light reaching leaves. A sunny window can work, but its direction alone does not guarantee sufficient light throughout the year. Leave space for the mature foliage rather than fitting pots tightly against the glass.
If daylight is inadequate, plan a grow light and timer. Follow the fixture’s distance and operating instructions, adjusting its position as the plants grow. Maryland Extension’s indoor herb guidance explains the need for strong light and supplemental lighting in winter. Protect the plants from cold glass, drafts and hot air from heating vents.
Gather a small, practical set of supplies
Use containers with working drainage holes, saucers or a waterproof tray, a potting mix intended for containers, labels and a watering can. Choose pot sizes for the roots and expected growth of each herb. Mini describes the size of the collection; it does not mean every plant can live indefinitely in a tiny decorative cup.
Terracotta is one option, not a requirement. If using a decorative outer pot without holes, keep the plant in a draining inner pot that can be lifted out for watering. A saucer catches runoff but does not prevent root problems when water is left standing in it. Empty collected water after the pot has drained.

Select herbs for the conditions you have
Start with healthy plants labeled for culinary use. Consider chives, thyme, oregano, mint or parsley according to the available light and root space. Keep different herbs in separate pots initially so you can adjust moisture individually. A vigorous mint plant can quickly crowd a small mixed container.
Basil needs a warm, bright position and is not a solution for a dim winter shelf. Rosemary can also be challenging indoors; do not assume every supermarket herb will thrive in the same spot. Choose fewer plants you can support well, then expand after observing a few weeks of growth. Penn State’s indoor herb guide discusses container drainage and differences in watering needs, including keeping basil from drying out completely.
Pot up and establish a routine
Set each plant at an appropriate depth in its new pot, gently filling around the roots without compacting the mix tightly. Water, let excess drain, and label the herb. Keep enough space between pots to inspect leaves and turn the containers without breaking stems.
Check the potting mix before watering. Its condition, the herb, pot size, light and temperature matter more than a fixed daily schedule. Winter does not automatically mean more water: slower growth can reduce demand even when indoor air feels dry. For that seasonal problem, use the separate winter indoor herb care guide.

Harvest lightly and adjust the setup
Allow plants to establish before taking large harvests. Snip modest amounts for cooking while leaving healthy growth to support recovery. Check for pests when you water and isolate a plant with suspicious damage before placing it back among the others.
Plan to repot, replace short-lived herbs or move suitable plants outdoors seasonally as needed. Keep a note of which plants produce useful harvests in your actual conditions. The reward can be fresh flavor close at hand, but savings depend on the cost of plants, supplies and lighting; an indoor garden is not a guaranteed replacement for every herb you buy.