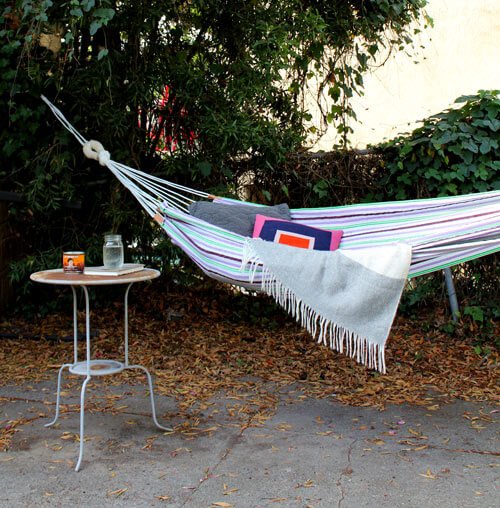
If you own a garden or a backyard, it would be a pity not to take advantage of that space to install a hammock in which you can spend countless lazy summer afternoons. While you could easily buy a hammock, you can also fashion one yourself. Today, we’ve gathered 3 DIY hammock ideas that you can try. We’ll present you with the instructions, so all you have to do to build your own hammock is follow them.
3 DIY Hammock Ideas to Try at Home
1. Beach Towel DIY Hammock
If you have an old beach towel lying around, this would be a perfect opportunity to use it. Here are all the materials you need for this DIY:
- A beach towel made of cotton (or a blanket)
- Pins
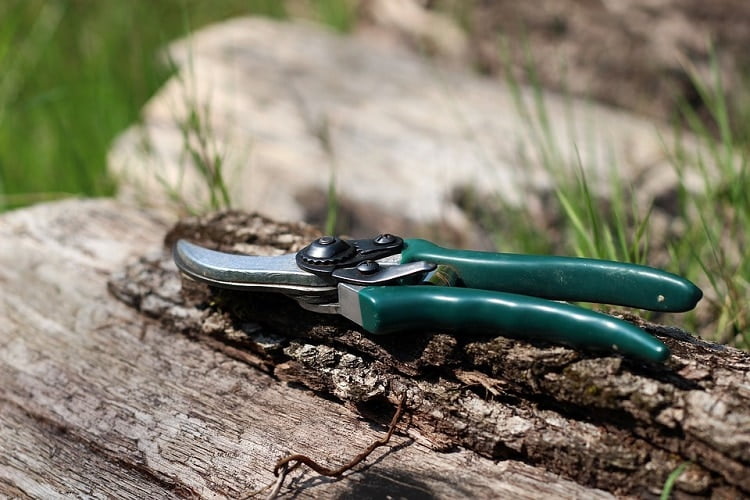
- A pair of scissors
- A 1 inch leather/nylon/canvas strapping
- A sturdy piece of rope
- 4″ x 40″ heavyweight cotton muslin
- Cotton twine
- Zip-ties
- Sewing machine
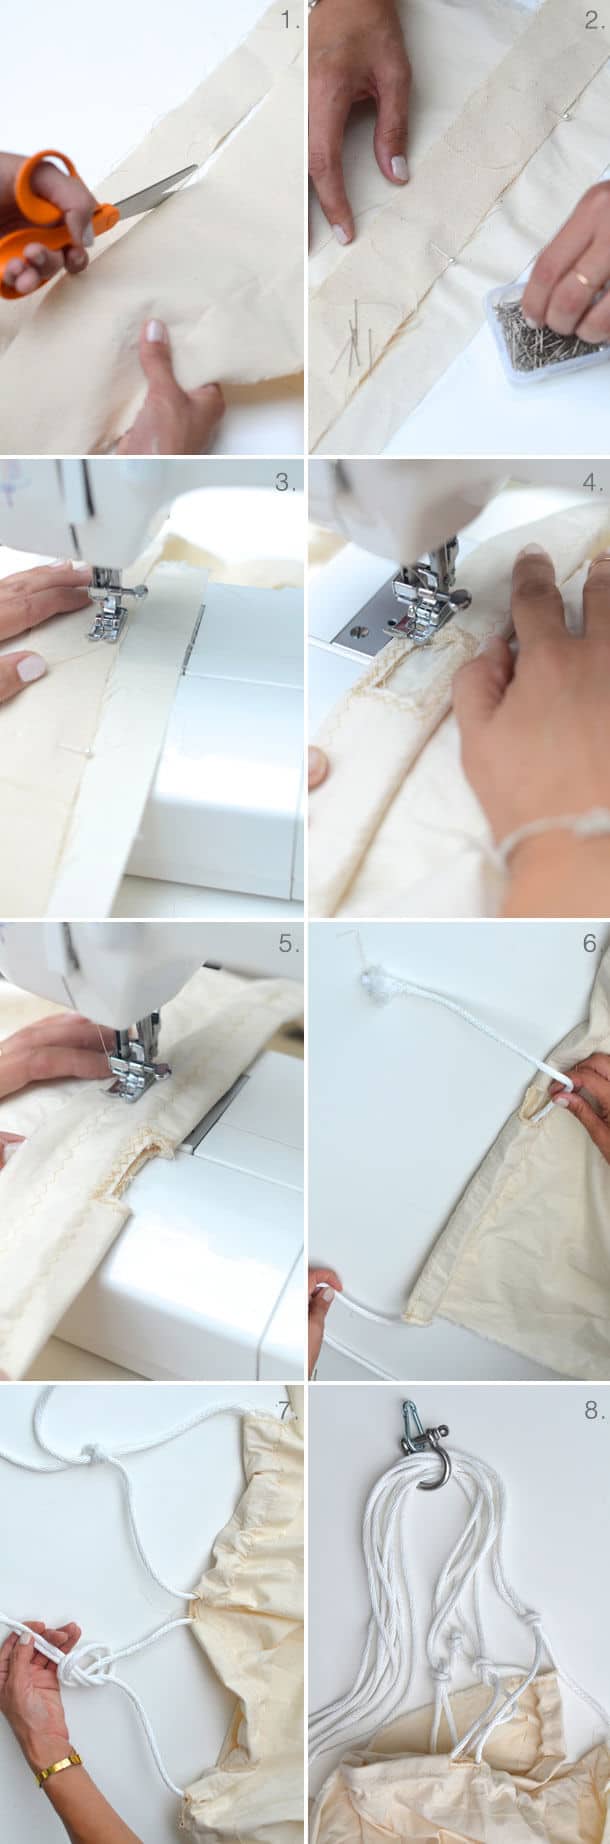
Now that you’ve gathered all the materials required, it’s time to start making this DIY hammock. The first thing you have to do is lay out the towel and cut a 42″ x 80″ piece out of it. Then, fold 1” of fabric on both long sides of the towel. This will create a 40″ x 80″ rectangle. Use the sewing machine to sew up both sides.
Take the muslin canvas and cut two strips of 2” each. Place one of them flush with the top part of the hammock. Pin the canvas to the fabric. This will create a hem. Do the same to the bottom edge. Then, take the strapping and cut it into pieces of 6” each. You need 18 strips for this project, 9 for each side of the hammock.
Fold each strapping so as to create a loop of 3” and use pins to attach each loop to the hem of the hammock, on both sides. Make sure the straps are placed at even intervals of about 5.25”. Now, it’s time to take the hammock to the sewing machine. Place it with the front side up into the machine. Then, make sure the needle is over the lower left corner of the first strapping. Sew each strapping at a time in the shape of a box with an “X” inside of it. This will ensure the sturdiness of the straps. Do the exact same thing to all of the other straps.
Once you’re done, cut the piece of rope into 18 pieces of 8 feet each. Place each piece through one of the loops and fold it, so that the pieces become 4 feet long. Use the loose ends of the strands to form a huge loop that you tie into a knot 30” away from the hammock.
Once you’ve removed the loose ends, it’s advisable to wrap another piece of rope around the large loop. Then, add some cotton twine to the loop as well. Your goal is to end up with a thick and solid loop that can support the weight of the hammock. Create a similar loop on the other side, and you’re done with the hammock. Now, all there’s left for you to do is hang it.
2. Airy Ethereal DIY Hammock
The next DIY hammock we’ve prepared for you today not only feels extremely lightweight, but also looks ethereal and romantic, which makes it the perfect summer hammock. Here are the materials you need in order to build it:
- 5’ of muslin with a 44” wide bolt
- An all-purpose clothesline of 1/4″ x 100′
- Two 1/4″ spring links
- Two 3/8″ anchor shackles
- White thread
- A pair of scissors
- Tape measure
- Pins
- Two 5′ chains
- Sewing machine
Take the muslin canvas and cut a 1.5″ x 44″ piece out of it. Then, lay it on a flat surface and pin it along the edges to form a 2” hem. Sew the edges to make sure they’re sturdy. Next, using the tape measure, mark three different spots on the canvas, 11” from each other. At each mark, cut a rectangle of 1” and sew its edges. Fold the piece of canvas so that it’s half the length it used to be, and sew its edge to make a loop through which the rope is going to go.
Cut the rope into 4 pieces of 8 feet each. Take one of the pieces and put it through the loop. Take it out through the first square on the edge. Then, the second piece of rope will go from the first square to the second, the third one from the second to the third, and so on. Once you’re done with this, tie the ends of the piece of rope. Then, gather them and tie them into a bow line knot around the shackle.
Repeat these exact same steps on the other end of the canvas. If you want to put a twist on your DIY hammock, you can add other things to it, such as fringes, lace, or even paint. The final step involves taking the spring links and connecting the chains to the shackles, then suspending the hammock.
3. Classic DIY Hammock
If you’re into the classic design of a hammock, you’ll be happy to know that you can recreate it at home. All you need are the following materials:
- 1000’ of hammock rope
- 100’ sailing rope (in order to make the design more interesting, choose a rope in a contrasting color)
- 5’ long and 1” wide bar or dowel
- Measuring tape
- Masking tape
- A pair of scissors
- 2 wall hooks
- Epoxy (optional)
The first step of this DIY involves you mounting the wall hooks 7’ up on the wall. Then, take the bar or dowel and place it in between the hooks. Next, select 17 pieces of hammock rope and 4 pieces of sailing rope, each measuring 24’. If you want to avoid the rope from fraying, tape its end and cut the section with the tape in half.
Then, fold every piece of rope in half, place it over the dowel, and pull it back to form a cow hitch. Next, you’re going to have to weave the ropes. This can be difficult for people who have never done this before, but all you need to do is learn how to do an alternating square knot.
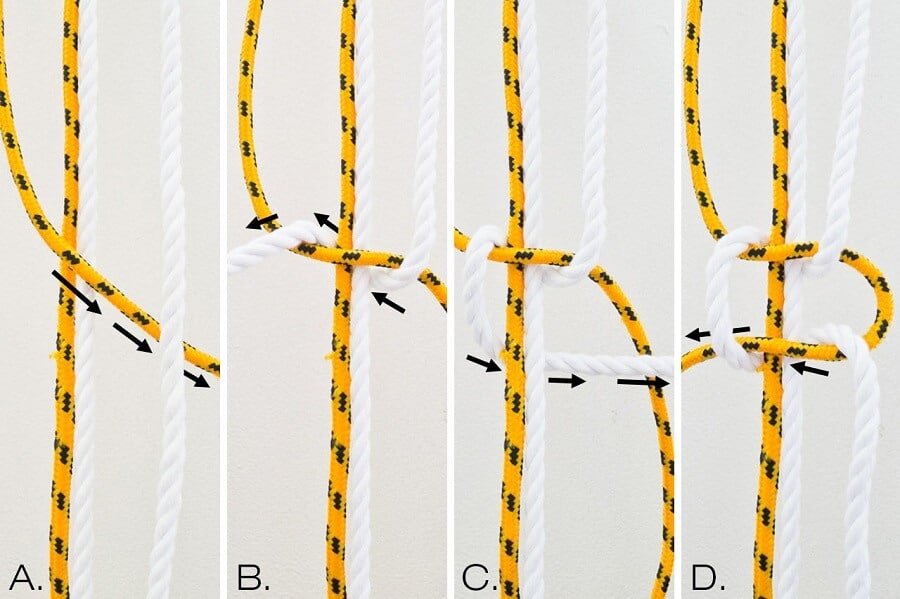
The image above presents the steps you have to go through to do one. First, for image A, you cross the left yellow cord over the two cords in the center and under the right one. For image B, you put the right white cord behind the cords in the center, through the hole, and finally over the cord on the left. In image C, you have to put the left white cord behind the cords in the center, then over the one on the right. Finally, in the last image, you have to cross the right yellow cord over the cords in the center, through the hole, and behind the cord on the left. In order to strengthen the knot, pull the taut.
The rest of the pattern becomes easier once you’re done with this step. Beginning in the middle of the ropes, tie one of the legs of every looped cord to the one next to it. For that, just a square knot will suffice. Do a whole row of these knots. Then, begin the alternating square knots in the middle of the ropes, taking two legs from each two different cords sitting next to each other. Measure 6” down from where the first knots you’ve made are, and tie an alternating square knot using the 4 legs. Again, do an entire row of these.
Once you’re done with this row, go down another 6” and make sure the cords in the center are twice-removed from the knot that’s above them. After doing an entire row like this, go back to the alternating square knots and then the twice-removed knots and keep alternating these two until the hammock is done. This can sound and look complicated, but once you do it once, it will get easier. Don’t be concerned if at the end of the hammock, you notice one or two cords that aren’t tied. Just take them and wrap them through one of the knotted cords next to them.
You have to leave about 1’ of rope unknotted at the very end of the hammock, so that you can do a simple square knot, similar to the one at the beginning. Finally, create the last loops that are going to mirror the first ones you’ve made.
Now, you can take the bar down and take the loops off of it. If you want to prevent the ends from fraying, add some epoxy on them. In terms of how you’re going to mount the hammock, you have several options. We recommend using a chain that you draw through the loops on each end of the hammock, and that you secure to some trees.

Summing Everything Up
Summer is the season of cool garden DIY projects. We hope at least one of these DIY hammock ideas have convinced you to use your skill and creativity to create your own hammock. As long as you follow the instructions above, each of these DIY hammock ideas can be completed, more or less easily.