Having your own DIY backyard bowling alley is a great idea, isn’t it? And it’s not that hard to craft it yourself either. Today we are going to look over a step by step guide on how to build your own bowling alley for the backyard. Naturally, you can adapt it for the indoors as well, but it’s much more fun outside, especially if you plan on hosting barbecue parties. Moreover, you will find some valuable suggestions for customizing it at the end as well.
DIY Backyard Bowling Alley – Step by Step
What You Need:
Materials
- 4’ x 8’ ¾” Plywood;
- 2 x 6 Deck Board;
- Deck Screws;
- Laminate Flooring;
- Rope;
- Strings;
- Rubber Mat;
- Eye Hook;
- Lighting;
Tools
- Spirit Level;
- Measuring Tape;
- Drill;
- Table Saw.
How to Do It
Step 1. Plan
Before getting down to building your own DIY backyard bowling alley, it’s important to have a good plan. Sketch down the size of your backyard, the size you want for the alley and where you are going to put it. It’s a good way to avoid any surprises and see in the end that your bowling set doesn’t fit in there. Note down any sizes or issues that you may encounter.
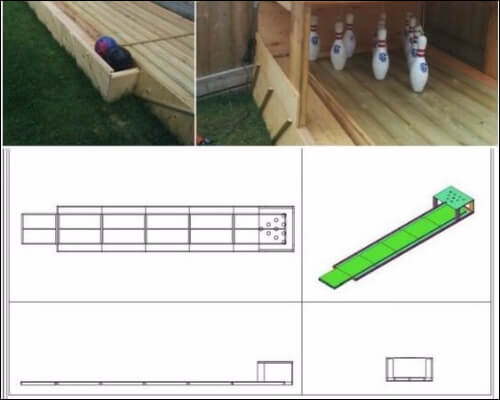
Step 2. Make the Base
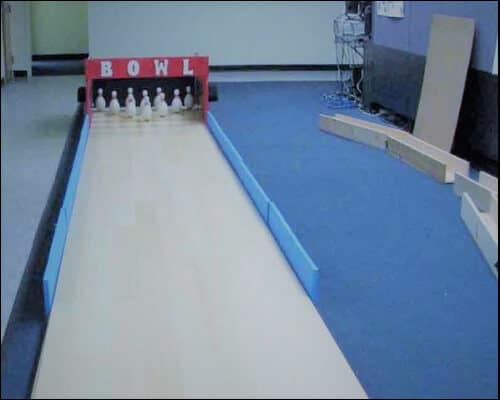
The base for this great project should be made of 2×4 panels, as well as plywood. Strengthen the central alley, but also leave some pockets on the sides. The pockets will be used for keeping the bowling balls when you’re playing, so make sure they are big enough. Screw in the panels and the plywood together. Include in the base a vertical square with a cover, which will be the place where the pins would stay.
Step 3. Use Boards for the Floor
Now you need to strengthen up the floor. For this, you should use some wooden boards. Think about the fact that they will have to support your weight countless times. Moreover, if you have kids, they might jump up and down on it, which is why you should choose sturdy boards.
Step 4. Level the Boards
Another important thing to keep in mind is to level the boards. If you notice they have many splinters, it would be a good idea to sand them as well.
Step 5. Use Some Wood Stain
Though this is not a compulsory step for your DIY backyard bowling alley, it would be good to use some wood stain to protect the materials. Especially since you’ll be keeping it outdoors, it needs some protection from the rain, wind, and sun. Alternatively, you can even use some paint if you want it to be more colorful. Choosing crazy colors like bright yellow, green, or red, will attract children even more, especially if you include some other DIY backyard games.
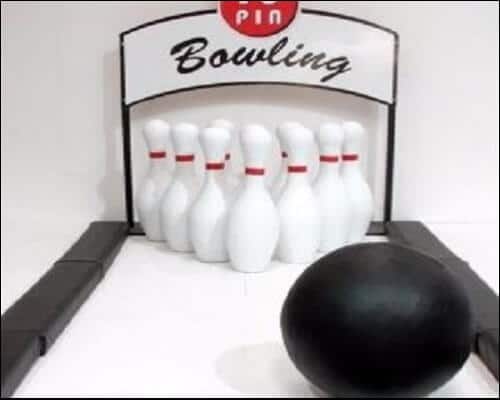
Step 6. Get Some Bowling Pins
Here, you can either craft them yourself or buy a set. It would take longer if you decide to make them yourself, and such a set is not that expensive. Ideally, they should be made of wood, which means you need to shape pieces of wood until they reach the typical round form.
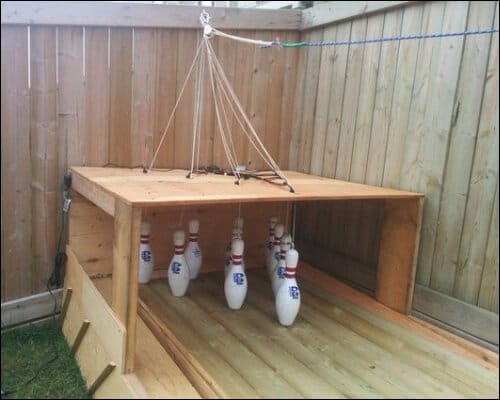
Step 7. Create a Pulley System
This is a very useful step since nobody wants to walk over there after every game and pick up the pins. Take the drill and create some holes on top of each of your pins. Then, thread some string through them. Take all the strings together and tie them to a long rope. The latter should reach the place where you’d be standing. This pulley system will allow you to simply pull the rope and have all the pins back up. Once again, make sure that the longer rope reaches the end of your alley, otherwise, it’s useless.
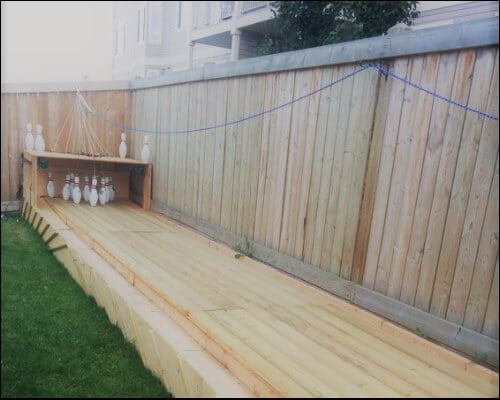
Step 8. Add Some Lights
Another optional step for this DIY backyard bowling alley is to add some lights. Maybe you want to play bowling at night too, or you just want to add something special to your game. String lights are a great idea, but they might not offer as much light as you need. This is yet another opportunity to add some color to your game if you choose colored lights.
Step 9. Get Creative
Naturally, you can always work with your own ideas for this project. You can adjust the pins, use crazy colors, change the materials and the shape, etc. The most important thing is that you have fun while you’re playing it.
Tips for a DIY Backyard Bowling Alley
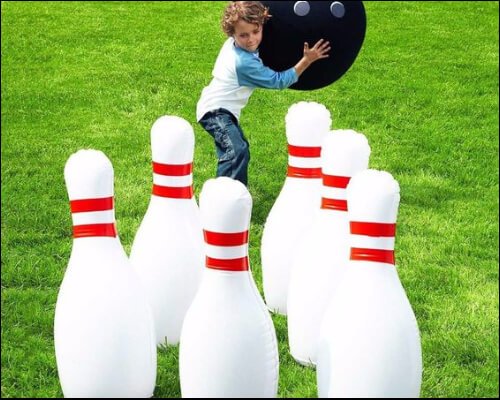
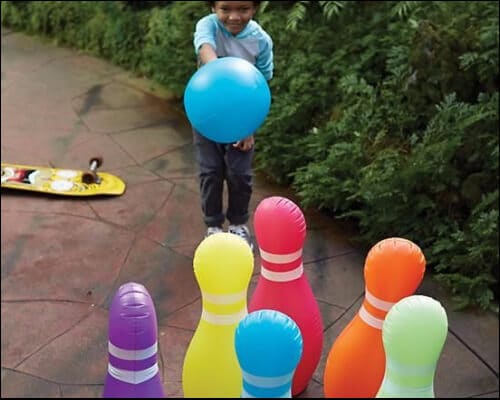
1. Go for Oversized Pins or Balls
Of course, you won’t be playing the same type of bowling, but chances are it will be much more fun like this. Oversized bowling pins will be taken down much faster and the overall aspect will be more ridiculous. If you choose to do so, you can use Styrofoam elements or simply sponge ones. This also adds to the safety of the game.
2. Use Other Materials
The wood can be replaced with plastic or metal if you want the set to be more resistant. However, this might imply a different process of building the alley, so it’s good to consider that beforehand. Moreover, pay attention to slippery areas. Plastic can become slippery if it gets wet, and so do certain kinds of metals. Naturally, a metal structure is sturdier than a wooden one, but not everybody wants to invest as much time and effort for this DIY project.
3. Add Plants
Since you’re in the backyard anyway, why not add some plants to your DIY backyard bowling alley? One good idea is to use window boxes as planters on the sides of the alley. Not only they will look nice, but they will also offer some extra space for your plants. Succulents or colorful flowers are great options for embellishing the area.
4. Add an Outdoor Darts Game
Remember the part where you had to build a vertical square with a cover? You can also use that part for a flexible dartboard. Get a regular darts game (you can find it in any store that has games) and hang it from a nail placed on the square. When you’re playing bowling, you can remove it from the nail or simply place it on top of the wooden square.
5. Make a Cover for the Alley
If you have some leftover fabric, it’s a good idea to make a cover for your DIY backyard bowling alley. It’s okay if you don’t have only one type of material. You can sew together different parts and it’s even better since the final cover will be more colorful and thus, much more interesting. This will also protect your bowling alley and keep it away from rain, sun, or wind.
6. Use Tire Ottomans
For those of you who are loyal fans to DIY projects, we have another great idea for you. Instead of using chairs that take up plenty of space, you can use some tire ottomans you can craft yourself. Your guests can rest their feet on them, but in case you have many people over, they should use them as chairs as well. For doing your own tire ottoman, you only need to get some wooden round base and some string to wrap everything.
7. Multifunctional Base
The base of the bowling alley, which you already built, can be used for other games as well. For example, you can create a huge DIY domino game and use it on the wooden board. However, if you plan on making huge domino patterns, it’s probably better to use the lawn for this.
8. Involve Your Children
If you have children, it’s a great idea to let them decorate the bowling alley. One of the suggestions we have is to paint it completely white and then let kids draw on it. If you trust them, you can let them use paint, but make sure it’s not toxic. Alternatively, they can use some colored chalk and color it as they wish. Anyway, this would be a great activity for a children’s party or a birthday.
9. Add Wheels to It
A DIY backyard bowling alley can become portable if you add some small wheels to it. This isn’t hard to do, and it’s a step you can follow any time after you built the main structure. However, the wheels may not work that well on the lawn, which is why this is a good idea only if you have a concrete surface to place it on. At the same time, this allows you to play the game indoors as well.
10. Choose Pins of Different Sizes
Our last tip for having a cool DIY backyard bowling alley is to have different pin sets of various sizes. As such, you will be able to adapt the game for different age ranges. Naturally, smaller sets will be kept for children, while larger ones can be used by adults.
Conclusion
As you can see, it’s not hard to have your own DIY backyard bowling alley. You just need to get the right materials and tools. Luckily, there are plenty of creative ideas which you can use for this DIY project. We included 10 creative suggestions above as well, just in case you want to make your backyard more appealing.
Image source: 1