Love to garden but short on time? Discover these game-changing tips to make gardening easier and more efficient.
Are you tired of struggling with heavy pots, dealing with invasive plants, or trying to decipher rain gauge readings? We’ve got you covered with these expert tips that will streamline your gardening routine. From specialized tools to clever techniques, these strategies will make gardening a breeze.
Post Summary
- Use a no-stick shovel with silicone spray to make shoveling easier.
- Protect flower bulbs from critter damage by using poultry netting.
- Create a portable potting surface with a plywood shelf for convenient gardening.
- Keep a scrapbook of plant data to stay organized and track important information.
- Help root-bound plants by gently teasing out the roots for improved health.
Use a No-Stick Shovel
A no-stick shovel is a must-have tool for making shoveling easier and more efficient. Whether you’re dealing with wet snow or mucky soil, a no-stick shovel will save you time and effort. The secret to its effectiveness lies in applying a silicone or Teflon-based lubricant spray to the shovel. This simple step creates a slippery surface that prevents sticky substances from clinging to the shovel.
By coating the shovel with a no-stick spray, you’ll be able to effortlessly scoop up and remove the material, without it getting stuck or caked onto the blade. It’s important to note that you may need to reapply the spray occasionally to maintain its effectiveness, especially if you’re dealing with particularly stubborn or sticky substances.
The Benefits of a No-Stick Shovel
A no-stick shovel offers several advantages over traditional shovels. Firstly, it reduces the physical strain on your body by making shoveling easier. The slippery surface allows you to move materials more smoothly, requiring less force and minimizing the risk of strain or injury. Secondly, it saves you time and effort by eliminating the need for frequent cleanings and scraping during shoveling. With a no-stick shovel, you can work faster and more efficiently, getting the job done in less time.
Using a no-stick shovel has been a game-changer for me. It used to be such a hassle to shovel wet, heavy snow, but now it just slides right off the blade. I can shovel my entire driveway without stopping to clean off the shovel once. It’s made my winter mornings so much easier!
Investing in a no-stick shovel and applying a silicone or Teflon-based spray is a small yet impactful change that can make a big difference in your gardening routine. By making shoveling easier and more efficient, you’ll spend less time and energy on this task and have more time to enjoy your garden.
Protect Flower Bulbs with Poultry Netting
To protect your precious flower bulbs from hungry critters, use poultry netting as a barrier. Simply stake the netting over the bed where you’ve planted your bulbs. This will deter animals from reaching the bulbs and snacking on them. Poultry netting is an effective and affordable solution to prevent critter damage in your garden.

In addition to protecting your bulbs from animals, the poultry netting also has another advantage. You can choose to remove the netting in the spring when the plants start to grow, or you can leave it in place and allow the plants to grow through the holes in the netting. This way, you don’t have to worry about removing and replacing the netting every year. It’s a convenient and efficient solution for long-term bulb protection.
By using poultry netting to protect your flower bulbs, you can ensure that they have the best chance of blooming and thriving. This simple and inexpensive method will give you peace of mind and allow you to enjoy the beautiful flowers in your garden without worrying about critters ruining your hard work.
Control Invasive Plants with a Container
Gardeners often face the challenge of dealing with invasive plants that can quickly spread and take over their gardens. One effective method to control the spread of these plants is by using the container method. By creating a barrier around the plant using a plastic container, you can prevent the roots from spreading and keep the invasive plant in check.
The container method involves cutting out the bottom of a plastic container and placing it around the plant. If necessary, you can drive the container into the soil to secure it in place. This barrier effectively prevents the underground rhizomes of invasive plants, such as gooseneck loosestrife, from spreading and taking over the garden. However, it’s important to note that this technique is not suitable for plants that spread above ground.
Why Use the Container Method?
The container method is a practical solution for controlling invasive plants because it allows you to create a physical barrier without harming the plant or using chemicals. It’s a low-cost and environmentally friendly approach that can be easily implemented in your garden.
By containing the roots of invasive plants, you can prevent them from encroaching on other areas of your garden and competing with other plants for resources. This method not only helps maintain the aesthetic appeal of your garden but also preserves the health and diversity of your plants.
Comparing the Container Method with Other Control Techniques
| Control Technique | Advantages | Disadvantages |
|---|---|---|
| Chemical Herbicides | – Can be effective in killing invasive plants – Provides quick results |
– May harm other desirable plants – Can have negative environmental impacts – Requires careful application to avoid contamination |
| Digging Out | – Removes invasive plants entirely – Can be effective for small infestations |
– Labor-intensive – May leave behind rhizome fragments, leading to regrowth – Potentially disturbs soil and surrounding plants |
“The container method is a practical and environmentally friendly approach to control invasive plants. It provides a physical barrier that prevents the spread of their roots, preserving the health and diversity of your garden.” – Gardening Expert
By using the container method, you can effectively control the spread of invasive plants in your garden and maintain its overall health and beauty. Remember to choose the appropriate plants for container gardening and regularly monitor your garden for any signs of invasive plants. With these proactive measures, you can enjoy a thriving garden while keeping invasive species at bay.
Create a Portable Potting Surface
Gardening becomes more convenient when you have a portable potting surface. With a simple DIY project using a plywood shelf, you can easily transform any wheelbarrow into a stable surface for potting plants. This allows you to take your potting station wherever you go in your garden.
To create a portable potting surface, start by cutting a piece of plywood to fit the back end of your wheelbarrow. Make sure to measure carefully and cut the plywood to the appropriate size and shape. Next, attach wood cleats to the sides of the plywood shelf to prevent it from slipping off the wheelbarrow.
Once you have assembled your potting surface, simply place it on top of the wheelbarrow and secure it in place. Now you have a stable and convenient area for potting plants. Whether you’re transplanting seedlings or repotting flowers, this portable potting surface will make the process easier and more efficient.

Tips for Using a Portable Potting Surface:
- Ensure the plywood shelf sits securely on the wheelbarrow, and the wood cleats prevent it from sliding.
- Keep your potting tools and supplies organized nearby for easy access.
- Consider using a lightweight potting mix to reduce the overall weight and make the wheelbarrow easier to maneuver.
- When not in use, store your portable potting surface in a dry and secure location to protect it from weather damage.
Keep a Scrapbook of Plant Data
If you’re serious about gardening, keeping a scrapbook of plant data is a smart and efficient way to stay organized and keep track of your plants. This simple practice allows you to store important information about each plant, making it easier to reference and manage your garden.
Creating a scrapbook is easy. Start by purchasing a cheap photo album with clear sleeves. This will serve as the perfect storage solution for plant tags, sticks, and other relevant materials. Use the sleeves to keep track of important details such as purchase dates, special care instructions, and the location of each plant in your yard. You can also include photos of your plants for added visual reference.
By having all this information in one place, you’ll never have to rely on your memory or search through stacks of papers to find what you need. Whether you’re planning future additions to your garden, consulting care instructions, or troubleshooting issues, your scrapbook will be a valuable resource. Plus, it’s a fun and creative way to document your gardening journey!
Benefits of Keeping a Scrapbook of Plant Data
There are several benefits to keeping a scrapbook of plant data. Here are a few reasons why you should consider implementing this organization method:
- Easy reference: With all your plant information in one place, you can quickly access the details you need, saving time and effort.
- Improved plant care: By keeping track of care instructions and plant-specific needs, you can provide the best possible care for your plants, leading to healthier and more beautiful gardens.
- Identification and troubleshooting: If you encounter any issues with your plants, having a record of their characteristics and history can help you identify problems and find appropriate solutions.
- Planning and design: A scrapbook allows you to visualize your garden’s layout, track plant growth and performance, and make informed decisions about future additions or modifications.
Keeping a scrapbook of plant data is like having a personal gardening encyclopedia at your fingertips. It’s a practical and enjoyable way to stay organized and make the most of your gardening experience.
Summary and Final Thoughts
Keeping a scrapbook of plant data is an essential practice for any dedicated gardener. By storing plant tags, care instructions, and other relevant information, you’ll have a comprehensive record of your garden that can enhance your gardening knowledge and improve your overall gardening experience. Not only does it help you stay organized and informed, but it also allows you to track the growth and development of your plants over time.
So start your gardening scrapbook today and enjoy the benefits of better organization, enhanced plant care, and the ability to reference all your garden’s details in one convenient place. Happy gardening!
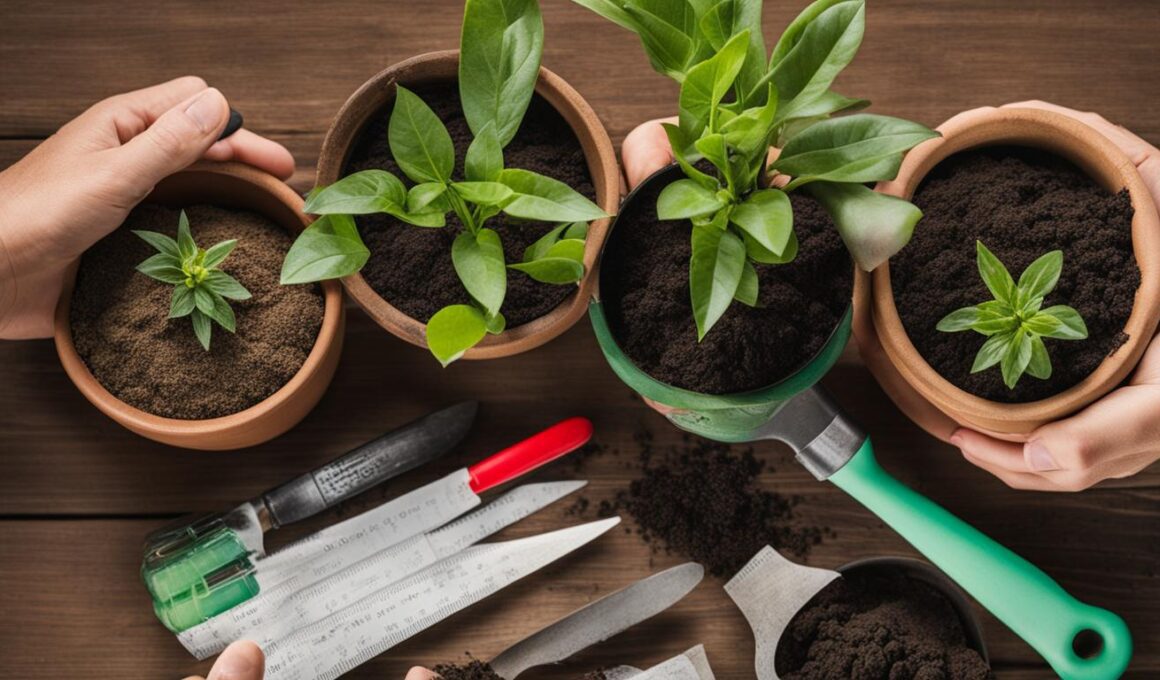
Help Root-Bound Plants
If you’ve recently purchased potted plants or shrubs, there’s a chance they may be root-bound. Root-bound plants occur when the roots have become tightly packed and form circles within the pot. This can limit the plant’s ability to access water and nutrients, leading to stunted growth and poor health. To improve the well-being of root-bound plants, it’s essential to tease out their roots before planting them in your garden.
To help loosen the root system, gently tease out the roots with your fingers. This process involves separating the tangled roots and coaxing them outward. For more stubborn root systems, you can make vertical cuts in the root ball using a sharp knife. This technique allows the roots to spread and establish more easily in the soil, improving the overall health and vitality of the plant.
After planting, it’s crucial to water the plant frequently, ensuring the roots receive the necessary hydration. This will further help the plant overcome root binding and encourage healthy growth. By taking the time to address root-bound plants, you can promote their well-being and enjoy thriving, beautiful additions to your garden.

Lighten Heavy Pots with Foam Packing Peanuts
If you’ve ever struggled with moving heavy pots in your garden, here’s a simple solution for you: foam packing peanuts. These lightweight and easily available materials can significantly reduce the weight of your pots without compromising drainage. By incorporating foam packing peanuts into your potting process, you’ll not only make your gardening tasks easier but also improve the overall health of your plants.
To lighten heavy pots, start by filling the bottom half of the pot with foam packing peanuts. This will create a lightweight base that won’t put unnecessary strain on your back or arms when you need to move the pot. Ensure that the peanuts are packed tightly to provide adequate support for the soil and plants.
Pro Tip: Place a round piece of landscape fabric between the soil and the foam packing peanuts to keep them separated. This will prevent the soil from settling into the peanuts and ensure proper drainage.
Using foam packing peanuts in your pots not only reduces weight but also improves pot drainage. The air pockets within the peanuts allow excess water to flow freely through the soil, preventing waterlogged roots and potential root rot. Additionally, the lightweight nature of the peanuts makes it easier for the soil to retain moisture without becoming overly saturated.
Comparative Table: Lightweight Potting Materials
| Potting Material | Weight Benefit | Drainage Efficiency |
|---|---|---|
| Foam Packing Peanuts | Significantly reduces pot weight | Allows for excellent drainage |
| Traditional Potting Soil | No weight reduction | Drainage dependent on soil composition |
| Vermiculite | Provides moderate weight reduction | Improves soil aeration and water retention |
| Perlite | Offers minimal weight reduction | Enhances soil drainage |
As seen in the comparative table above, foam packing peanuts outperform other potting materials in terms of weight reduction and drainage efficiency. They are a cost-effective and easily accessible option for lightening heavy pots without compromising plant health.
So, give foam packing peanuts a try in your garden and experience the convenience of lighter pots. Not only will you make your gardening tasks easier but you’ll also create a more favorable environment for your plants to thrive.
Prune Roses for Blight-Free Plants
Pruning roses is a crucial task for maintaining healthy, disease-free plants. By regularly pruning your roses, you can prevent black spot blight and improve the overall health and appearance of your rose bushes. The key to successful rose pruning is keeping the center of the plant open, allowing for better airflow and sunlight penetration.
When pruning roses, start by removing any dead or diseased branches. Make clean cuts at a 45-degree angle, just above an outward-facing bud or leaf node. This will encourage new growth and prevent the spread of diseases. Additionally, remove any branches that cross or rub against each other, as this can create wounds and invite pests and diseases.
To promote an open shape, selectively remove older wood, thinning out the branches to create space in the center of the plant. This will allow sunlight to reach the inner foliage and help keep the leaves dry, reducing the risk of black spot blight and other fungal infections. Remember to use clean and sharp pruning shears to avoid damaging the plant.
| Benefits of Pruning Roses | Steps for Pruning Roses |
|---|---|
|
|
Regular pruning throughout the year, especially during the dormant season and after the first bloom, will help maintain the health and vigor of your rose plants. Remember to clean your pruning tools between cuts to prevent the spread of diseases. By following these pruning techniques, you can enjoy blight-free roses and a thriving garden.

Use Dyed Water for Easy-Read Rain Gauge
Measuring rainfall is an essential part of monitoring your garden’s water needs. However, it can be challenging to accurately read the water level in a rain gauge, especially if the gauge is transparent or the water is clear. Luckily, there is a simple solution to this problem. By adding a dash of food coloring to the bottom of the gauge before emptying it, you can ensure easy and precise water level readings. When it rains, the food coloring will mix with the water, making the water level more visible and accurate.
Why should you use dyed water in your rain gauge?
“Using dyed water in your rain gauge is a game-changer when it comes to accurately measuring rainfall. It eliminates the guesswork and allows you to quickly and easily determine the amount of precipitation your garden has received.” – Gardening Expert
Not only does dyed water make it easier to read the water level, but it also provides a visual contrast that helps you distinguish between the water and the gauge’s markings. This simple technique saves you time and eliminates the need for squinting or straining your eyes to determine the water level accurately.
Implementing this method is easy. Before placing your rain gauge outside, add a few drops of food coloring to the bottom of the gauge. You can choose any color you like, but it’s recommended to use a bright or contrasting color for better visibility. When it rains, the water will mix with the food coloring, creating a vibrant color that stands out against the transparent gauge. This allows you to get a quick and accurate reading of the water level without any confusion.
| Advantages of Using Dyed Water in a Rain Gauge | Disadvantages of Using Dyed Water in a Rain Gauge |
|---|---|
|
|
Using dyed water in your rain gauge is a simple yet effective technique for accurate and easy water level measurements. Give it a try and make monitoring rainfall a breeze!
Conclusion
Implementing these efficient gardening tips and time-saving techniques can make your gardening experience much more enjoyable and effortless. By using specialized tools like no-stick shovels and pruning shears, you can simplify various gardening tasks. Additionally, protecting flower bulbs with poultry netting and controlling invasive plants with containers will help prevent damage and maintain control over your garden.
Keeping a scrapbook of plant data and helping root-bound plants improve organization and overall plant health. Lightening heavy pots with foam packing peanuts and pruning roses to prevent blight further enhance the efficiency of your gardening routine. And let’s not forget the easy-read rain gauge trick, using dyed water for accurate measurements without straining your eyes.
With these time-saving strategies at your disposal, you’ll have more free time to relax and enjoy the beauty of your garden. Start implementing these tips today and watch as your gardening tasks become easier and more efficient, allowing you to fully immerse yourself in the joy of gardening.
How Can I Make Gardening More Enjoyable and Safe for My Kids?
Teach your kids gardening joy by involving them in age-appropriate tasks and providing child-sized tools. Create a safe environment by removing any sharp objects and using natural pesticides. Encourage their interest by growing fun, colorful plants and allowing them to get their hands dirty.
FAQ
What is a no-stick shovel?
A no-stick shovel is a shovel that has been coated with a silicone or Teflon-based lubricant spray to make it easier to shovel sticky substances like wet snow or mucky soil.
How can poultry netting protect flower bulbs?
By staking poultry netting over the flower bed, it deters critters from snacking on the freshly planted flower bulbs. The netting can be removed in spring or left in place for plants to grow through the holes.
How can a container method help control invasive plants?
To keep plants with underground rhizomes contained, a plastic container can be placed around the plant. This prevents the roots from spreading and helps control the invasive plant.
How can I create a portable potting surface?
You can create a portable potting surface by cutting a piece of plywood to fit the back end of your wheelbarrow. Attach wood cleats to the sides to prevent slipping and you’ll have a stable surface for potting plants wherever you take your wheelbarrow.
How can I keep track of my plants?
You can create a scrapbook of plant data using a cheap photo album. Store plant tags and sticks in the album, and add additional details like purchase dates, care instructions, and the location of each plant in your yard.
How can I help root-bound plants?
Before planting, gently tease out the roots of root-bound plants by coaxing them outward with your fingers. If the roots are stubborn, make vertical cuts in the root ball with a sharp knife.
Can I lighten heavy pots?
Yes, you can lighten heavy pots by filling the bottom half with foam packing peanuts. This reduces the weight without sacrificing drainage. Place landscape fabric between the soil and the foam to keep them separated.
Why is pruning roses important?
Pruning roses helps prevent diseases like black spot blight by keeping the plant’s center open. This allows sunlight to reach the foliage, keeping the plant dry and less prone to fungal infections.
How can I make my rain gauge easier to read?
Adding a dash of food coloring to the bottom of your rain gauge allows the water level to be more visible and accurate. When it rains, the coloring mixes with the water, making it easier to measure rainfall amounts.