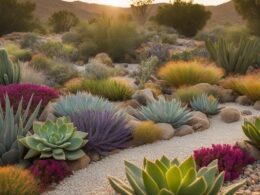
Design a xeriscape garden around your climate, the way you use the yard and plants with compatible water needs. It does not have to be a gravel-covered desert garden, and it does not mean newly planted vegetation never needs watering. The aim is to use water thoughtfully while creating a landscape you can maintain.
Begin with a measured plan and a realistic first area to change. Converting one troublesome bed well is often easier to manage than removing an entire lawn before you know what will replace it.

1. Map the existing yard
Draw the property boundaries, buildings, paths, utilities, established trees and outdoor spaces you use. Mark sun and shade at different times of day. Note where water collects after rain, where soil dries quickly and which areas are difficult to reach with a hose.
Write down the functions you want to keep: a play area, seating, accessible paths, food growing, screening or habitat. These uses determine the layout. Do not remove a useful patch of lawn just because a xeriscape photograph has none.

Keep existing healthy trees in the plan and account for their root zones. Changing irrigation or soil level around them can affect plants that were not part of the intended conversion. Seek professional advice when substantial grading, drainage or mature-tree work is involved.
2. Group plants by water and site needs
Create areas of plants that can receive similar watering rather than scattering thirsty plants among dry-adapted ones. Also match light and soil conditions; two plants described as drought-tolerant may still need very different drainage or exposure.

Use regional extension or native-plant resources to build a shortlist. Native status and drought tolerance are not the same: a locally native wetland plant may need moisture your dry bed cannot provide. Likewise, a plant pictured in an Arizona garden may be unsuitable for a humid or cold region.
For each candidate, record mature height and width, light, drainage, hardiness and establishment needs. Draw it at mature spread on the plan. Leave access for weeding, irrigation inspection and pruning rather than filling every gap with another nursery pot.
3. Prepare soil for the plants you selected

Assess drainage and obtain a soil test when amendments or nutrient problems are uncertain. Do not add compost or manure to every planting area by default. Plants adapted to lean, sharply drained soil may not benefit from the same preparation as a vegetable bed.
Resolve persistent drainage problems before planting. Do not direct roof runoff toward foundations, neighboring land or a location that cannot absorb it safely. Rain gardens and rainwater collection need a design appropriate to the site and applicable local requirements; they are not interchangeable with simply digging a low spot.
4. Plan irrigation before planting

Decide how each planting area will be watered during establishment and after roots expand. Make the controls and watering points accessible. Check that the system reaches the intended root area without continually wetting paths or unrelated beds.
Adjust watering to soil, plant condition, rainfall and season. An automatic timer still needs review, and a drip system still needs inspection for blocked or damaged emitters. Keep any higher-water-use area separate enough that meeting its needs does not overwater the rest of the landscape.
The Denver Water xeriscape principles connect planning, appropriate plants, practical turf, soil preparation, irrigation, mulch and maintenance. They are a design framework; local plant lists and watering rules still need local interpretation.
5. Choose surfaces and mulch deliberately
Provide stable walking surfaces where people actually travel. Compare heat, drainage and upkeep before choosing large areas of stone or paving. Permeable materials need a suitable base and maintenance; the product name alone does not guarantee infiltration.
Select mulch for the planting and keep it away from trunks and crowns as appropriate. In a habitat area, leave some suitable unmulched ground where it serves nesting insects. For that additional goal, see the separate pollinator xeriscape design guide.
6. Install in stages and keep an establishment record
Prepare one manageable area, install its watering provision and plant at an appropriate local time. Keep labels and take photographs. Check moisture around new root balls rather than assuming surrounding dry soil proves a drought-adapted transplant needs no water.
Review survival, weeds, irrigation use and maintenance time through the seasons. Replace a repeated poor performer with a better site match instead of repeatedly increasing water for the whole bed. Water savings depend on the previous landscape, weather and management; there is no honest universal percentage or property-value guarantee.