Are you tired of your old, worn-out patio? Do you want to create a new outdoor space that is both attractive and functional? Cementing a patio may seem like a daunting task, but with the right tools and preparation, it can be a fun and rewarding DIY project.
Before you begin, it’s important to plan and prepare the area. This includes measuring the space, clearing away any debris or obstacles, and creating a solid base for your concrete.
By following these steps and taking necessary safety precautions, you can ensure that your new patio will provide years of enjoyment for you and your loved ones.
So roll up your sleeves and let’s get started!
Plan and Prepare the Area
Now, you gotta plan and prep the spot where you want to enjoy outdoor gatherings with your loved ones.
Measuring space is essential as it’ll determine the amount of materials needed for the project. You don’t want to be caught short halfway through the job. Make sure to measure everything twice to avoid any mistakes.
Choosing design is also crucial before starting your patio cementing project. Decide on what shape and size you want for your patio, keeping in mind how much space you have available. A basic rectangular or square shape is always a safe bet if you’re unsure about what design suits your area best.
Once you’ve picked out a design, mark it out with stakes and string so that when it comes time to lay down the cement, there won’t be any confusion.
Before pouring any concrete, make sure the area is clear of any debris such as stones or grass that could affect its stability once set. Also ensure that there are no underground pipes or wires running beneath where you plan on pouring cement; this can cause serious problems later on if not taken care of beforehand.
With proper planning and preparation, your patio cementing project will run smoothly without any hiccups along the way!
Mix and Pour the Concrete
Mixing and pouring the concrete is where the magic happens, turning your outdoor space into a solid foundation for all your future gatherings. Before starting, make sure you have all the necessary tools and equipment ready to go.
Begin by determining the appropriate amount of water needed to achieve the desired concrete consistency. Too much water can weaken the final product, while too little can make it difficult to work with. Next, add dry cement mix and any other desired additives such as sand or gravel into a mixer. Mix everything together until it is evenly distributed.
Slowly pour in water while continuing to mix until you reach the desired consistency. A good rule of thumb is that once mixed, if you scoop up some of the mixture with a shovel and turn it over, it should hold its shape without crumbling apart.
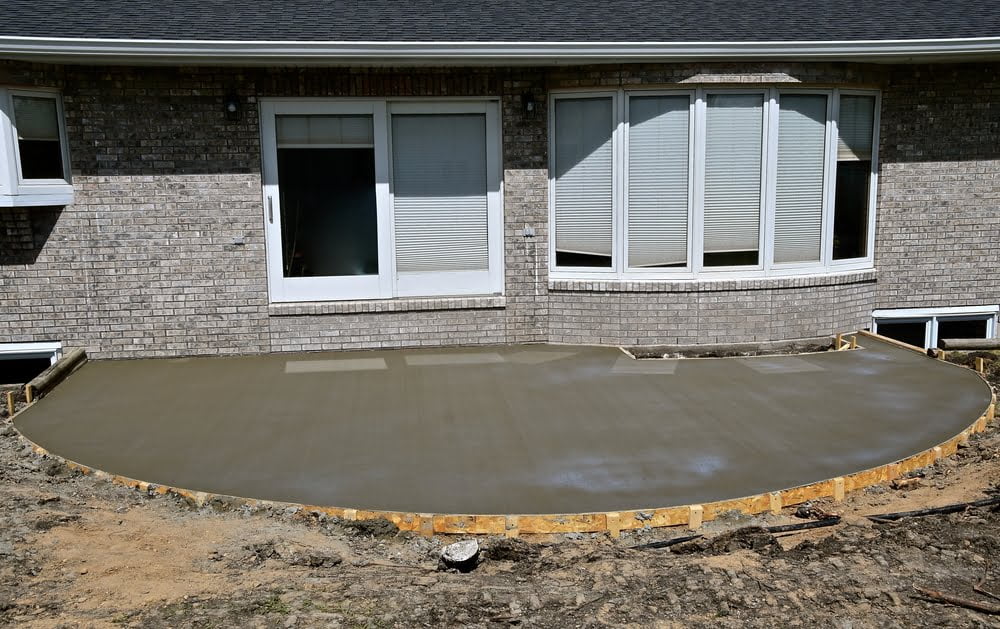
Now that your concrete mix is ready, it’s time to pour it onto your patio area. Here are three essential techniques for achieving a smooth finish: first, use a screed board or 2×4 piece of wood to level off the surface by dragging it across in back-and-forth motions; secondly, use a float tool (a flat trowel) to smooth out any bumps or ridges; finally, use an edger tool around the edges of your patio area for a clean finished look.
Remember not to step on or disturb your newly poured concrete surface until it has completely dried!
Finishing the Surface
Smooth the surface with a trowel to remove any bumps or ridges.
Then, add texture with a broom by dragging it across the wet concrete in long strokes.
Finally, apply a sealer to protect the surface from weather damage and UV rays.
Smooth the Surface with a Trowel
Using the trowel, you’ll easily glide over the freshly poured surface to create a sleek and polished finish.
Start by ensuring that your trowel is clean and free of any debris. Next, dip the trowel into water so that it’s slightly damp but not dripping wet. This will help to prevent the concrete from sticking to the trowel.
When using trowel techniques, it’s important to work quickly and efficiently before the concrete sets. Begin at one end of the patio and use sweeping motions with the trowel to smooth out any bumps or ridges in the surface. As you move along, be sure to overlap each pass slightly for a consistent finish.
Choosing materials like high-quality cement and a sturdy metal trowel can also make a big difference in achieving a flawless result.
Now that your surface is smooth, it’s time to add texture with a broom!
Add Texture with a Broom
Ready for some extra flair? Let’s grab a broom and add some texture to our freshly poured surface! Using a patterned broom, you can create unique designs that will give your patio a touch of personality. Different types of brooms will give you different textures, so choose the one that suits your vision best.
To add texture with a broom, start by waiting until the concrete has hardened slightly but is still damp. Then, holding the broom at an angle, drag it across the surface in long strokes. You can change up the direction or angle of your strokes to create different patterns and textures.
Keep in mind that too much pressure may leave unwanted marks on your cement, so be gentle with your movements. Once you’re done adding texture with the broom, move onto sealing your patio to protect its newly textured surface.
Apply a Sealer to Protect the Surface
Now that you’ve added texture to your patio surface with a broom, it’s time to protect it from the elements. Applying a sealer is an important step in maintaining the longevity and appearance of your patio.
Here are four things to keep in mind when applying a sealer:
- Choose the right type of sealer for your patio material. There are several types of sealers available, including acrylic, polyurethane, and epoxy. Each has its own benefits and drawbacks, so be sure to do some research before making a decision.
- Apply the sealer evenly using a brush or sprayer. Be sure to work in small sections at a time to avoid any streaks or uneven coverage.
- Allow ample drying time before walking on or placing furniture on the newly sealed surface.
- It’s important to reseal your patio over time to maintain its protection against weathering and wear.
By taking these steps, you can ensure that your patio will stay looking great for years to come. With proper sealing, you can enjoy all the benefits of having an outdoor living space without worrying about damage caused by sun, rain, or snow.
Next up: curing and maintenance!
Curing and Maintenance
After you’ve finished laying down the foundation for your outdoor oasis, it’s important to take proper care of it during its curing process and beyond. One of the most crucial aspects of cementing a patio is properly curing it.
Curing techniques vary depending on the type of cement used, but generally involve keeping the surface moist for several days after pouring. During this time, be sure to keep foot traffic and heavy objects off the surface to allow adequate time for curing. This will ensure long term durability and prevent cracks from forming in your new patio. Additionally, avoid exposing the surface to extreme temperatures or direct sunlight during this time as it can cause uneven drying and cracking.
Once your patio is fully cured, regular maintenance is essential to keeping it looking great for years to come. Sweep away any debris that may accumulate on top of the surface regularly and use a pressure washer occasionally to remove stains or build-up.
With proper care and attention, your newly cemented patio will provide a beautiful space for entertaining guests or relaxing outdoors with family and friends!
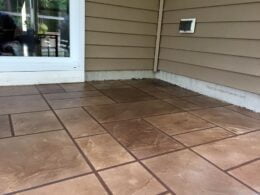
Can Patio Tiles be a Suitable Alternative to Cement for Patio Construction?
When considering patio construction, it’s essential to explore alternative options such as patio tiles. These tiles can provide a more versatile and aesthetically pleasing option compared to traditional cement. If you are interested in exploring this option further, you may want to look into an install patio tiles tutorial to learn more about the process.
Enjoy Your New Outdoor Space!
You can finally relax and enjoy your beautiful new outdoor space! After all the hard work of cementing your patio, it’s time to sit back and enjoy the fruits of your labor.
Here are some tips to help you make the most out of your new outdoor living area:
- Invest in comfortable outdoor furniture: Make sure you have plenty of seating options for yourself and any guests. Outdoor chairs, sofas, and tables will allow you to entertain family and friends comfortably.
- Consider lighting options: Installing lighting around your patio will create a cozy atmosphere at night. String lights or lanterns can provide just enough light while still being relaxing.
- Plan an evening party: Invite some friends over for dinner alfresco on your newly cemented patio. This is a great way to show off all of your hard work!
- Relax with a good book: Whether in the morning or after a long day at work, grab a book and take advantage of this serene spot.
Now that you have completed your backyard project, get ready to start enjoying it! Spend quality time with loved ones or simply unwind by yourself with a good book. The possibilities are endless when it comes to how you want to use this new space. Congratulations on completing such an impressive task!
Conclusion
Congratulations! You’ve successfully completed your patio cementing project.
Now, it’s time to sit back and enjoy your new outdoor space.
Remember to take care of your newly cemented patio by regularly cleaning it and avoiding any heavy objects or machinery on it.
With proper maintenance, your patio will last for years to come and provide a great gathering spot for family and friends.
So go ahead, invite some loved ones over, fire up the grill, and enjoy the fruits of your hard work!