Most people would agree that garlic makes everything taste better, right? It’s one of those things that doesn’t cost a lot at the grocery store but is so much more delicious when grown at home. You just can’t beat the flavor you get from something you grew in your backyard or right on your kitchen windowsill! Knowing how to grow garlic is a great skill to have. We’re going to walk you through the steps so you can start growing your own!
It’s recommended to grow garlic in containers over the winter when you aren’t able to do so outside. However, you can grow it in containers year-round. Just keep in mind that it takes about 8-9 months for garlic to grow adequately indoors. So you may want to plant several pots and stagger it so you have garlic year-round.
How to Grow Garlic in a Container
The Container
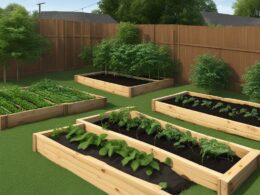
When learning how to grow garlic, selecting the proper container is very important. Your pot should be a minimum of 6 inches deep and wide enough for there to be at least 6 inches between the cloves. This means something relatively deep and wide is best so that you have room for the roots to grow freely. Smart Pots 5-Gallon Smart Pots work really well for this. They have excellent drainage and are a good size to plant multiple cloves at once. Another option is to just use a 5-gallon bucket and drill holes in the bottom for drainage.
Whatever you choose, make sure there’s excellent drainage. A glossy pot will do better than a terracotta pot. Terracotta pots tend to dry things out quicker since they are made of clay. You can certainly use one of these, you’ll just need to water your garlic more often.
Soil
Having a properly balanced soil is really important for planting garlic in pots. The garlic needs to have plenty of organic nutrients so it can thrive. The soil needs to have a good balance of not being too dry, but also not holding in too much moisture which would cause the roots to rot.
Doing an even distribution of peat, potting mix or compost, perlite, and just a bit of builder’s sand will help you achieve this balance. Your garlic will love this mix! Mix equal parts of these materials together.
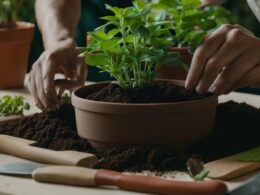
Planting the Garlic
Add the planting mix to your container. Fill it about half way full. Insert garlic bulbs into the mixture, making sure the pointed end is facing up.
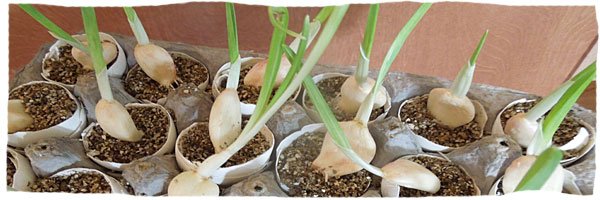
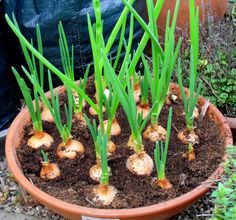
Once your garlic bulbs are inserted into the soil, fill the pot with the rest of your soil mixture and make sure the soil is pressed firmly around the bulbs. Make sure the soil is thoroughly damp. Use a good soaking hose or watering can to evenly water the bulbs. Cover them with a thick layer of organic mulch and let them grow for a good 8-9 months. You’ll see the garlic shoots come up through the mulch in the springtime and soon they’ll turn into garlic scapes. You can use these in salads, stir-frys, or as a seasoning in your favorite dishes. They provide a great, mild flavor.
You’ll love having freshly grown garlic right at your fingertips. No more last-minute trips to the grocery store because you forgot the garlic! Homegrown garlic tends to have a much stronger flavor due to the freshness of it. So we recommend making sure you cut back on how much you typically use until you gauge how much you need. If you feel like the more garlic the better, then go for it! It’s always best to heir on the side of less and then add more.
Image Source: 1, 2