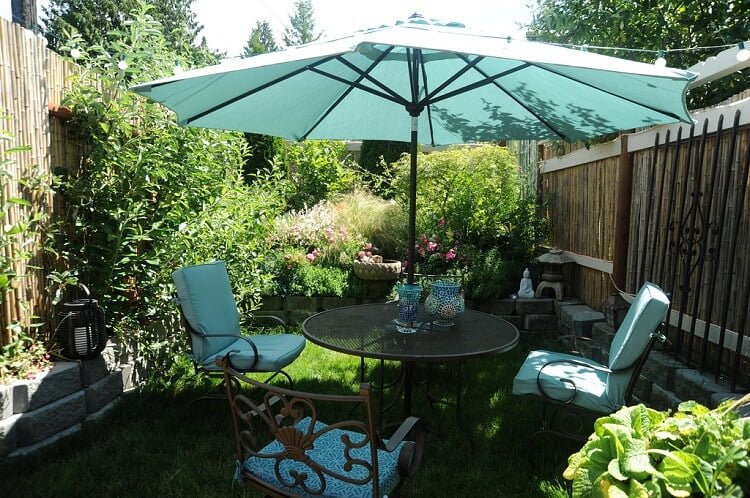
Who doesn’t love to have a beautiful patio? And it’s even more beautiful if you include in it some things you did by yourself. So, today we are going to have a look at a couple of suggestions for a DIY patio umbrella stand. Therefore, the following ideas are not difficult to follow, but you need a little patience and time for them.
Even though we all love to get tanned during summer, it is important to keep in mind that the sun can cause us serious harm. So, when the sun is at its strongest, between 11 am and 3 pm in the summer months, we should make sure that we find a shady spot. This could be under a tree, umbrella, or parasol, or simply by staying indoors. That is exactly why we researched a little the market of patio umbrella stands. With this intention, we want to give you four easy-to-make alternatives to pricey products out there.
How to Get a DIY Patio Umbrella Stand
Therefore, let’s skip to our four options for DIY patio umbrella stands. Prepare yourself with patience and let’s get it started!
1. Paint Bucket Umbrella Stand
If you’ve just finished refurbishing your home, then most likely you have a paint bucket left around. As such, here’s what you need for this great DIY project:
- Paint bucket (preferably a 5 gallon one);
- Large flower pot;
- Instant set concrete;
- Potting soil;
- Flowers;
- Umbrella;
- PVC for the umbrella.
Now, let’s see what are the steps we’ll have to follow:
Step 1 – Set Up the Bucket
For starters, consider getting yourself some extra help. You must fix the PVC right in the middle of the paint bucket. After you placed it there, pour the quick-set concrete around it. You can add as much concrete as you want. However, it’s not necessary to fill it all the way up since it will be stable enough with less. Finally, wait for it to dry.
Step 2 – Get the Flower Pot Ready
There are plenty of flower pots readily available. However, it depends on what material you choose, but it should be sturdy enough. A plastic one will do for a couple of years, but a ceramic one, for instance, may not resist to the weight of the concrete.
Step 3 – Place the Bucket in the Pot
Now it’s time to place the bucket with concrete into the pot. Pay attention, since this might be quite a hard job to do since the bucket is heavy. Alternatively, you can place the bucket into the pot right from the start. In this way, you don’t need to lift the bucket up afterward.
Step 4 – Fill the Pot with Soil
Then, get the potting soil ready. Fill up the flower pot with enough soil. Once again, you don’t need to fill it up completely.
Step 5 – Add the Flowers
Finally, this is perhaps the most exciting part of the project. You simply need to add your favorite flowers. Choose your favorite colors or some that match your umbrella. Finally, you can enjoy your DIY patio umbrella stand on any sunny or rainy day. Add some wood patio covers and you’re set.
2. Half Barrel Flower Pot Stand
Even though it may sound like the first suggestion, it is somewhat different. As such, here is what you need for our second DIY patio umbrella stand project:
- A real or a resin half barrel;
- Quick dry concrete or a cement block that already has a hole in the center;
- PVC pipe;
- Spray paint;
- Stones or pebbles;
- Soil;
- Flowers;
- Drill;
Okay, now that you have everything you need, let’s see what we have to do:
Step 1 – Get the Half Barrel Ready
First, the main thing you need to do with the half barrel is to drill some holes into its bottom. For this purpose, use the drill you already prepared. This is meant to help the drainage inside this DIY patio umbrella stand.
Step 2 – Add the Concrete
Thankfully, here you have two options. First, you should fix the PVC in the middle of the half barrel and pour concrete around. This step is the same as the one from the previous DIY patio umbrella stand suggestion. Then, you should wait for it to dry (choosing a quick set of concrete will help you a lot here).
Secondly, the other option is to use a block of cement that already has a hole in it. Maybe you can find some prefabricated ones in the stores or you can do it yourself if you also need some for other purposes around the house.
Step 3 – Set the PVC
After the concrete hardens, it’s time to test the stability. Try and see whether the PVC moves around or is stable enough. Now is the time to decorate the PVC if you want. Use the spray paint or any other decorations you want.
Step 4 – Add Soil, Stones, and Pebbles
If before you had to fill up the flower pot with soil around the umbrella stand, here you only need to place the soil above the concrete. In case you used a cement block, then you should get more soil since you need to fill up around it as well. When you’re done, place stones and pebbles above. Not only do they have a decorative purpose, but they also add more stability to the entire stand. The best thing is to choose stones and pebbles in various colors.
Step 5 – Plant Flowers
Now, take the flower seeds or the flowers that are already grown and put them into the soil. Make sure you choose a variety that doesn’t need too much care. Of course, you can use some other patio decorating ideas if you wish.
Step 6 – Secure the Umbrella
If you live in a windy area or if you want to use a tilting umbrella, you need to secure it in place. For this purpose, you should drill a hole in the PVC and use a screw to fix it. Thankfully, it’s not that complicated and this DIY patio umbrella stand suggestion will come out nicely if you use your creativity.
Here you can see a clip showing the procedure step by step:
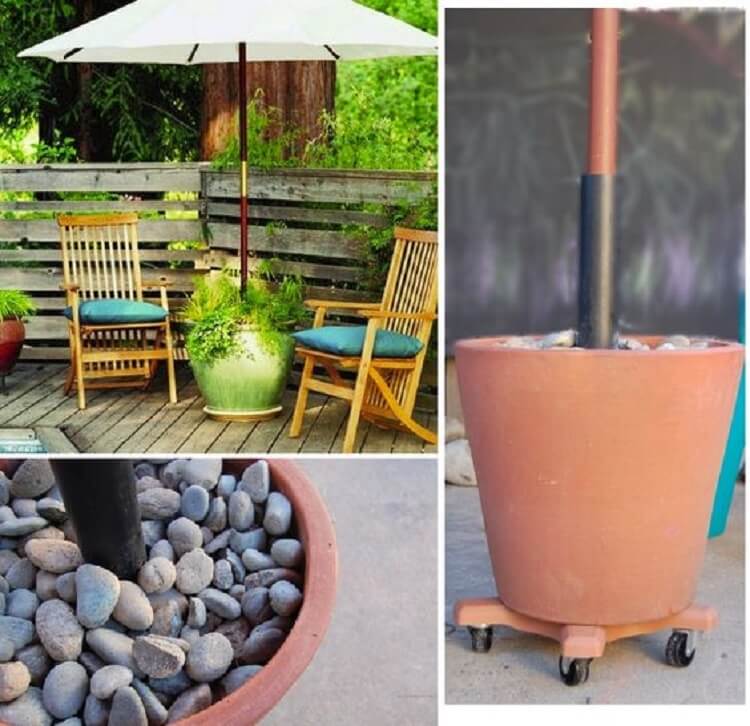
3. Rolling Patio Umbrella Stand
The previous suggestions are great. However, they have one main disadvantage: it’s extremely hard to move them around if you decide to make some changes to your patio. As such, we present you with another useful DIY patio umbrella stand, namely a rolling one. Here’s what you need for it:
- A large (flower) pot;
- PVC pipe;
- A bag of cement;
- Potting soil or dirt;
- River rocks;
- Plants;
- Rolling plant stand.
Finally, let’s see what steps we’ll have to follow in order to achieve that wonderful result!
Step 1 – Set Up the Pot
Just like with the previous DIY patio umbrella stand suggestions, you need to set up the pot first. The steps you need to follow are the same: place the PVC pipe in the pot and pour concrete around it. Make sure that the pot is resistant enough to support the weight of the concrete.
Step 2 – Add Soil
After you placed the concrete in the rolling pot stand, now you will be able to move it anywhere. You only need to add soil on top of it and place there the plants you want. It is preferable to choose colorful flowers, but a good idea is to use river rocks as well. The more varied they are, the better.
Step 3 – Add the Umbrella
Place the umbrella in the PVC pipe. Just like with the previous project, if the PVC pipe is a little large for the umbrella, use a screw to fix it.
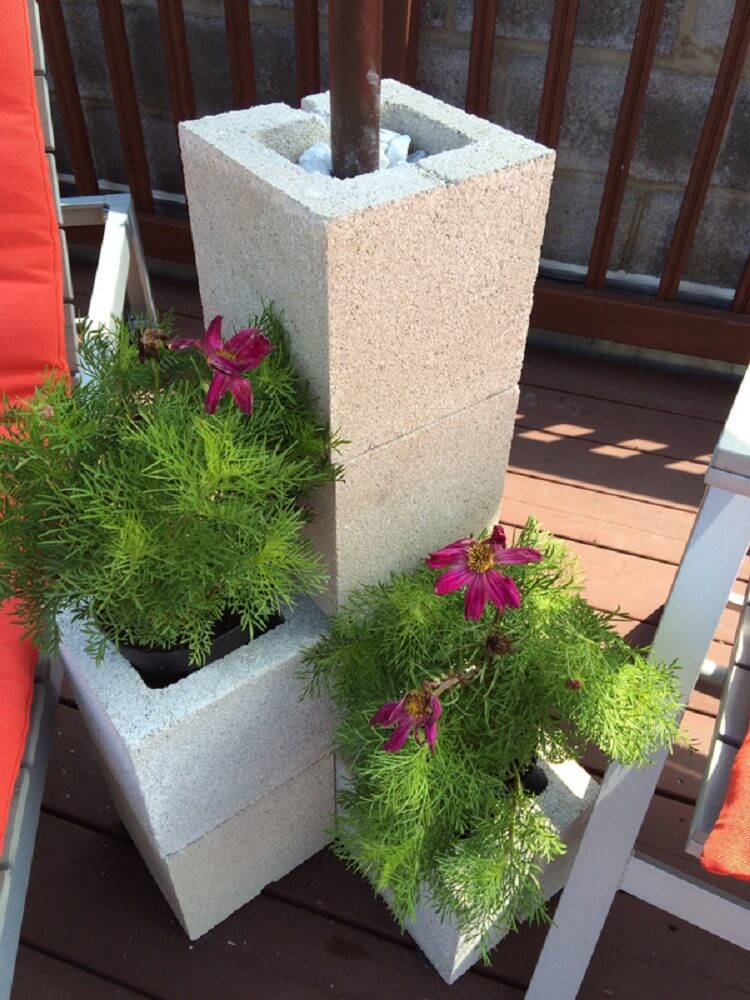
4. Cinder Blocks Patio Umbrella Stand
Our last DIY patio umbrella stand idea is one that uses cinder blocks. Here’s what you need to get:
- Cinder blocks;
- Marble stones;
- PVC pipe.
However, the steps are not that difficult as the final result can sound. So, just follow these steps, and your success is guaranteed.
Step 1 – Set Up the Cinder Blocks
The number of cinder blocks you need depends on what design you have in mind. One idea is to use 2 full cinder blocks that have 2 holes and 3 with just one hole. You can alternate their arrangement in a small tower so that you can have extra holes placed around the tower. If you don’t want to go complicated, simply make up a tower of the blocks and that’s it.
The height of the cinder block tower also depends on how tall your umbrella is. If you don’t need that much stability, you can go for a shorter tower.
Step 2 – Place the PVC Pipe
For better stability, it’s a good idea to place the PVC pipe in the cinder block tower now. If you plan to remove the umbrella later and move it somewhere else, then you should probably do it later. Moreover, you can choose from a huge array of patio umbrellas to replace an old one.
Step 3 – Use Marble Stones
Fill up the cinder blocks around the PVC pipe with the marble rocks you have. The more you can add, the better. This will make the DIY patio umbrella stand even more stable. Alternatively, you can use regular stones which you can paint yourself if you’re feeling creative.
Step 4 – Add Plants
If you have holes in the cinder blocks that remained empty, you can plant flowers in them. Simply add some potting soil and seeds or transplant flowers from different pots. In this case, you should also consider some drainage systems. It’s not good for plants if the water pools around them whenever it’s raining outside.
Final Thoughts
Finally, these 4 DIY patio umbrella stand suggestions are easy to make. Many people choose to go for them because they are not satisfied with the stands they find on the market. Especially if you live in a windy area, the commercial ones may not be stable enough for your purposes. Not to mention that the prices are not always fair!
Because of stability, many of these ideas rely on concrete poured around the PVC pipe holding the umbrella. This is the best idea if you want it to resist for years in a row. Moreover, you can hide the concrete under a layer of soil and flowers, if you want it to look better. In the end, you can hide the support altogether under a table if you want it.
So, tell us everything about your experience assembling these DIY patio umbrella stands in the comments section. Was it that hard as you thought in the beginning? How is the final result? You can even show everyone some photos. Also, feel free to ask all your further questions. We are here for you and all your creative projects!