Are you tired of tracking in dirt and mud each time you walk into your house? Even if you remember to take your shoes off before you go inside, you may not have anywhere to put them. If you are looking for ideas to keep your shoes outside, look no further than a shoe mat. A shoe mat is similar to an outdoor rug. It is designed to trap dirt, as well as provide a place to keep your shoes. For those times when you must walk through the house with your shoes on, a shoe mat provides a place for you to wipe your feet.
Unfortunately, shoe mats can also be expensive. The price depends on the size you get, but most shoe mats cost $20 or more. Because shoe mats can be rather expensive, you may be interested in making your own. In this article, I’ll be going over the best DIY shoe mat options to consider trying. They are very easy to make and add beauty to your porch. Let’s get started.
Top 4 DIY Shoe Mat Ideas
1. How to Make a Personalized Shoe Mat
This first shoe mat looks very similar to shoe mats you would buy at stores. The secret to making shoe mats like this one is using stencils. Stencils are what allow you to write messages on your doormats. In this DIY project, you can make your own stencil by printing our your message and taping it onto contact paper. What’s nice about this shoe mat is that you can create any message you’d like, as well as choose any font you want. Popular messages for doormats include “Welcome” and “Come In”. If you have pets, a shoe mat that says “Wipe Your Paws” would be cute. Have fun making your own message to put on your homemade shoe mat.
Supplies Needed:
- Blank Door Mat
- Black Paint
- Contact Paper
- X-Acto Knife
- Sharpie
- Foam Brush
Step 1: Choose Your Font and Cut It Out
To begin, find a font that you like and print out your own personalized message. Choose a font that is large enough so that you can read it on the shoe mat. Also, make sure you choose a font that is easy to cut out. If it is too fancy, it may be difficult to cut it. Next, tape your printed message on top of your contact paper, and using your knife, cut all the way through. This message will be your own customized stencil.
Step 2: Attach the Contact Paper
Next, separate your contact paper and place it on top of the shoe mat in the area that you want your message to be. Because the contact paper may not stick well to the shoe mat, you may need to use pins to hold it in place.
Step 3: Begin Painting
Once your contact paper is on, it is time to start painting. Dip your paintbrush into the paint and gently press it into the bristles of the shoe mat. Be careful when painting because it is easy for the stencil to move. If the stencil moves, your entire message will mess up, so be extremely gentle. If you want, you can stick a few more pins onto the contact paper before you continue on. Take your time when painting your shoe mat.
Step 4: Remove the Stencil and Pins
After you have finished painting your shoe mat, gently remove the stencil and pins. Let the mat dry before using it. Once it is dry, put it on your front porch to add beauty and to trap dirt outside.
2. How to Make a DIY Rope Shoe Mat
Image Source: Easy Peasy Creative
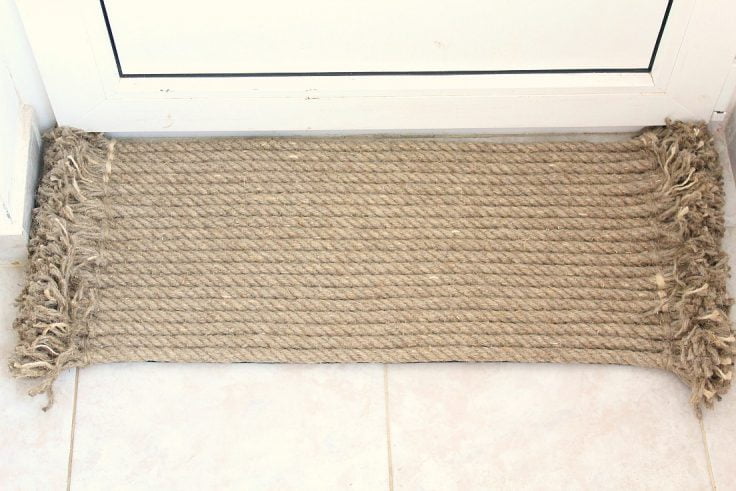
This next DIY shoe mat is made of rope. Rope adds a rustic and natural look to your home which is why a shoe mat made of rope is a great idea. While this shoe mat may look difficult to make, it is actually very easy. Similar to the previous shoe mat idea, you’ll need to purchase a doormat in order to make this. The rope will then get glued onto the doormat. Unlike the previous shoe mat, the bottom mat will not be seen. It is simply there to help make the mat sturdy and prevent it from moving.
Supplies Needed:
- Natural fiber rope
- Outdoor Mat
- Fast dry construction adhesive fit for outdoor projects
- Caulking gun
- Sharp razor blade cutter
Step 1: Cut the Rope
Begin making your homemade rope shoe mat by cutting the rope pieces the same size. How many rope pieces you’ll need depends on how large you want your shoe mat to be. Measure them up to the length of the mat and then add 2-3 inches extra to each end for the fringe.
Step 2: Add the Adhesive to the Mat
Next, spread the adhesive in rows on the mat and immediately laying your rope directly on top of the glue. Push the pieces as close together as possible. If possible, try to find an adhesive that dries quickly so that the rope quickly secures to the mat. Also, make sure the adhesive is rated for outdoor projects.
Step 2: Make Your Fringe
Once you have finished gluing on the rope, you’ll need to make your fringes. To do this, cut some more rope that is as long as the length of your shoe mat. Next, begin weaving in the rope around the ends of the rope that is glued to the mat. This will help prevent the fringes from fraying. Afterward, unwind and fray each end piece.
3. How to Make a Wooden Shoe Mat
Image Source: The Merry Thought
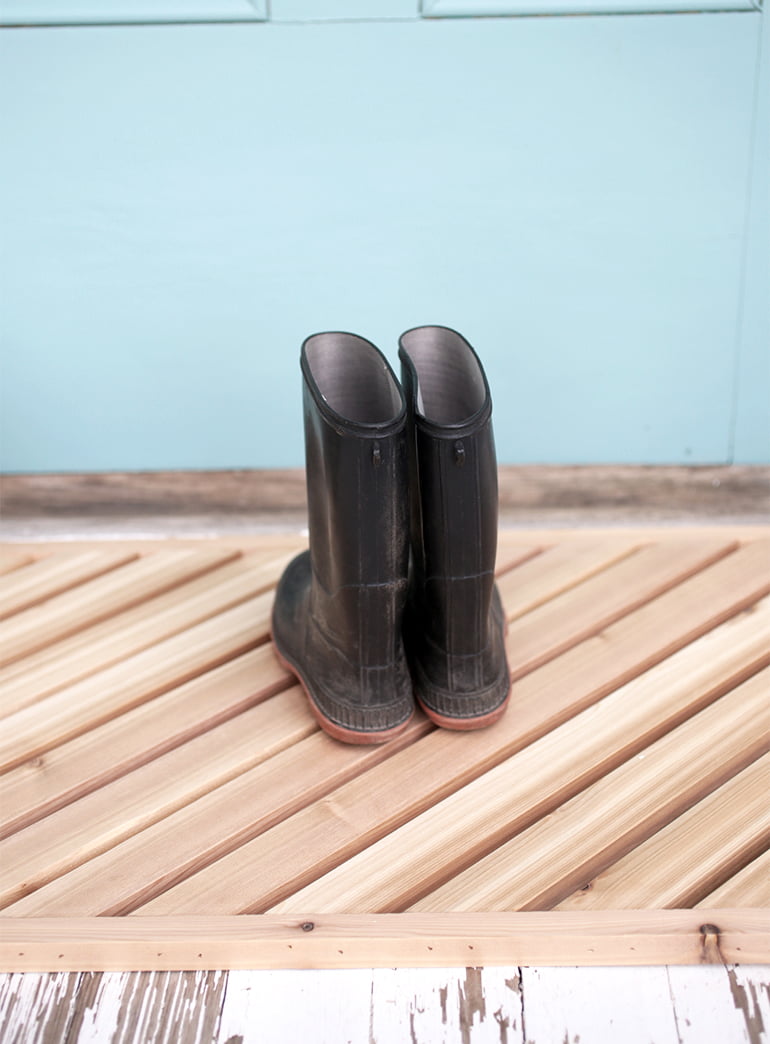
This next shoe mat is very unique. Instead of being made of a soft material such as ropes or a store-bought mat, this one is made of wood. While it may look difficult to make, it only requires 3 steps. This shoe mat is perfect for storing shoes in a stylish way.
Supplies Needed:
- two – 1×4 cedar boards
- table saw
- miter box
- nail gun (or hammer and nails)
- wood glue
- sandpaper
- paint or stain (optional)
Step 1: Cut the Wood
Using the table saw, cut the 1×4’s in half. Measure and mark how long your frame will be. Using the miter box, cut 45-degree angles on each end of the frame pieces.
Step 2: Make the Frame and Add the Slats
Next, glue and nail the frame together. Cut the board at a 45-degree angle, place the angle piece tight against the side, and mark the other end where you need to cut. Cut another 45-degree angle. Glue and nail the piece inside the frame. Repeat the step until the frame is filled with the wooden slats.
Step 3: Sand the Boards and Add Paint/Stain (optional)
When you are all finishes, sand the edges and in between the boards. If you want, you can paint or stain this shoe mat. If you plan on leaving your shoe mat out year-round, stain or paint will help protect it from becoming weathered.
4. How to Make a Braided Shoe Mat
Image Source: Instructables
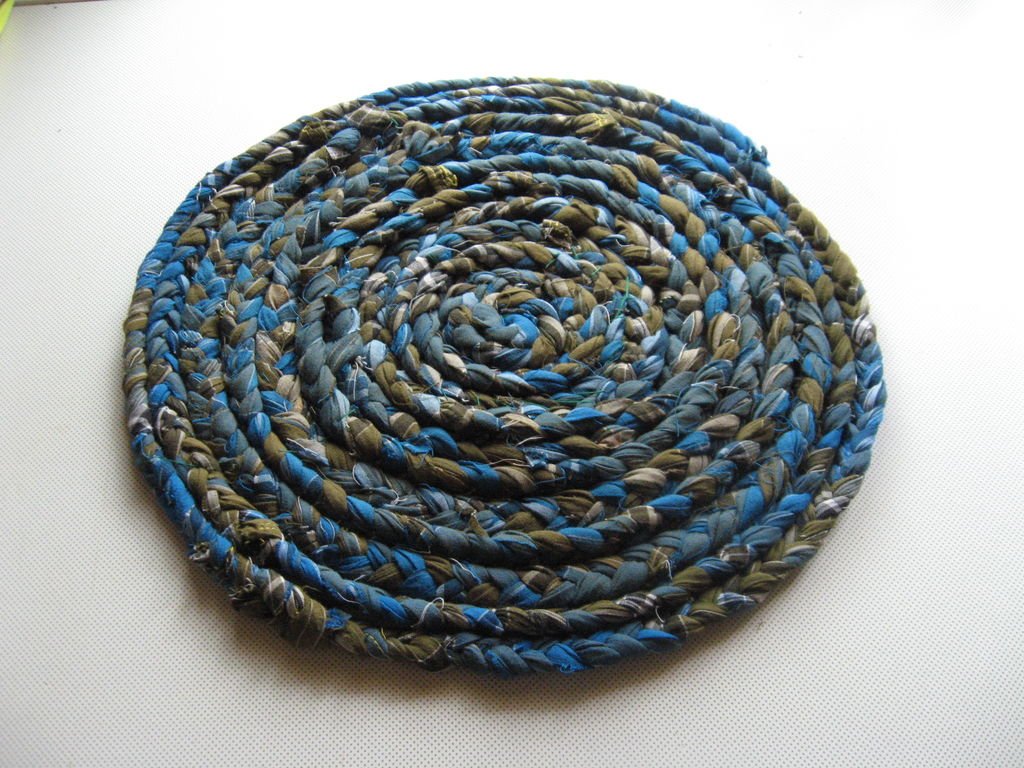
Do you happen to have some old clothing that you don’t need anymore? Instead of tossing them, make a shoe mat instead. This shoe mat is made from old T-shirts. You can easily make your own by following the instructions below.
Step 1: Cutting the T-shirt
Cut 3-inch wide strips from your shirt. You should be able to cut about 12 strips that are 6-feet long each.
Step 2: Tie the Strips Together
Take 3 strips in hand and tie them together at one end. Insert all three tied end of strips in a door or window grill. This will help keep your strips in place as you braid them.
Step 3: Begin Braiding the Strips Together
Next, tightly braid the three strips of cloth starting from the tied end. You can add more strips in the braid once the strips you are using end. After using all 12 strips, you will have a 20-foot long braided length of cord.
Step 4: Trim the Ends
Trim the excess length of the strip at the end. Using a needle and thread, stitch the ends of all three strips in the braid together. Cut the ends tied on the window grill or door (whichever one you used) and sew those ends together too.
Step 5: Roll the Cord Into a Circle
Starting from one end, begin rolling the braided coil in circles to form the mat. Using a needle with dark colored yarn, stitch the roll continuously with an adjacent circle while rolling. Once you completed rolling the entire braided cord, stitch the end of the mat.
Final Thoughts
I hope this article has inspired you to start making your own shoe mat as your next project. A shoe mat helps prevent dirt from coming into your home. It can either be used as a place to wipe your feet or to store your shoes. There are many different ways to create a shoe mat of your own. In this article, I went over four of the best DIY shoe mat ideas to try. I hope you were inspired by these four shoe mat ideas. So what are you waiting for? Go start making your homemade shoe mat! Have fun!


