As spring slowly approaches, so does the gardening season. Gardening is such a relaxing chore, and the result is that you will have a bountiful harvest. In order for your garden to be successful this year, there are many steps you must take. One step to consider doing is plant grafting. If you are new to grafting plants, you may be wondering what it is and how it is done. If so, you have come to the right place. In this article, you’ll learn everything you need to know about plant grafting. Let’s begin.
What Does Plant Grafting Mean?
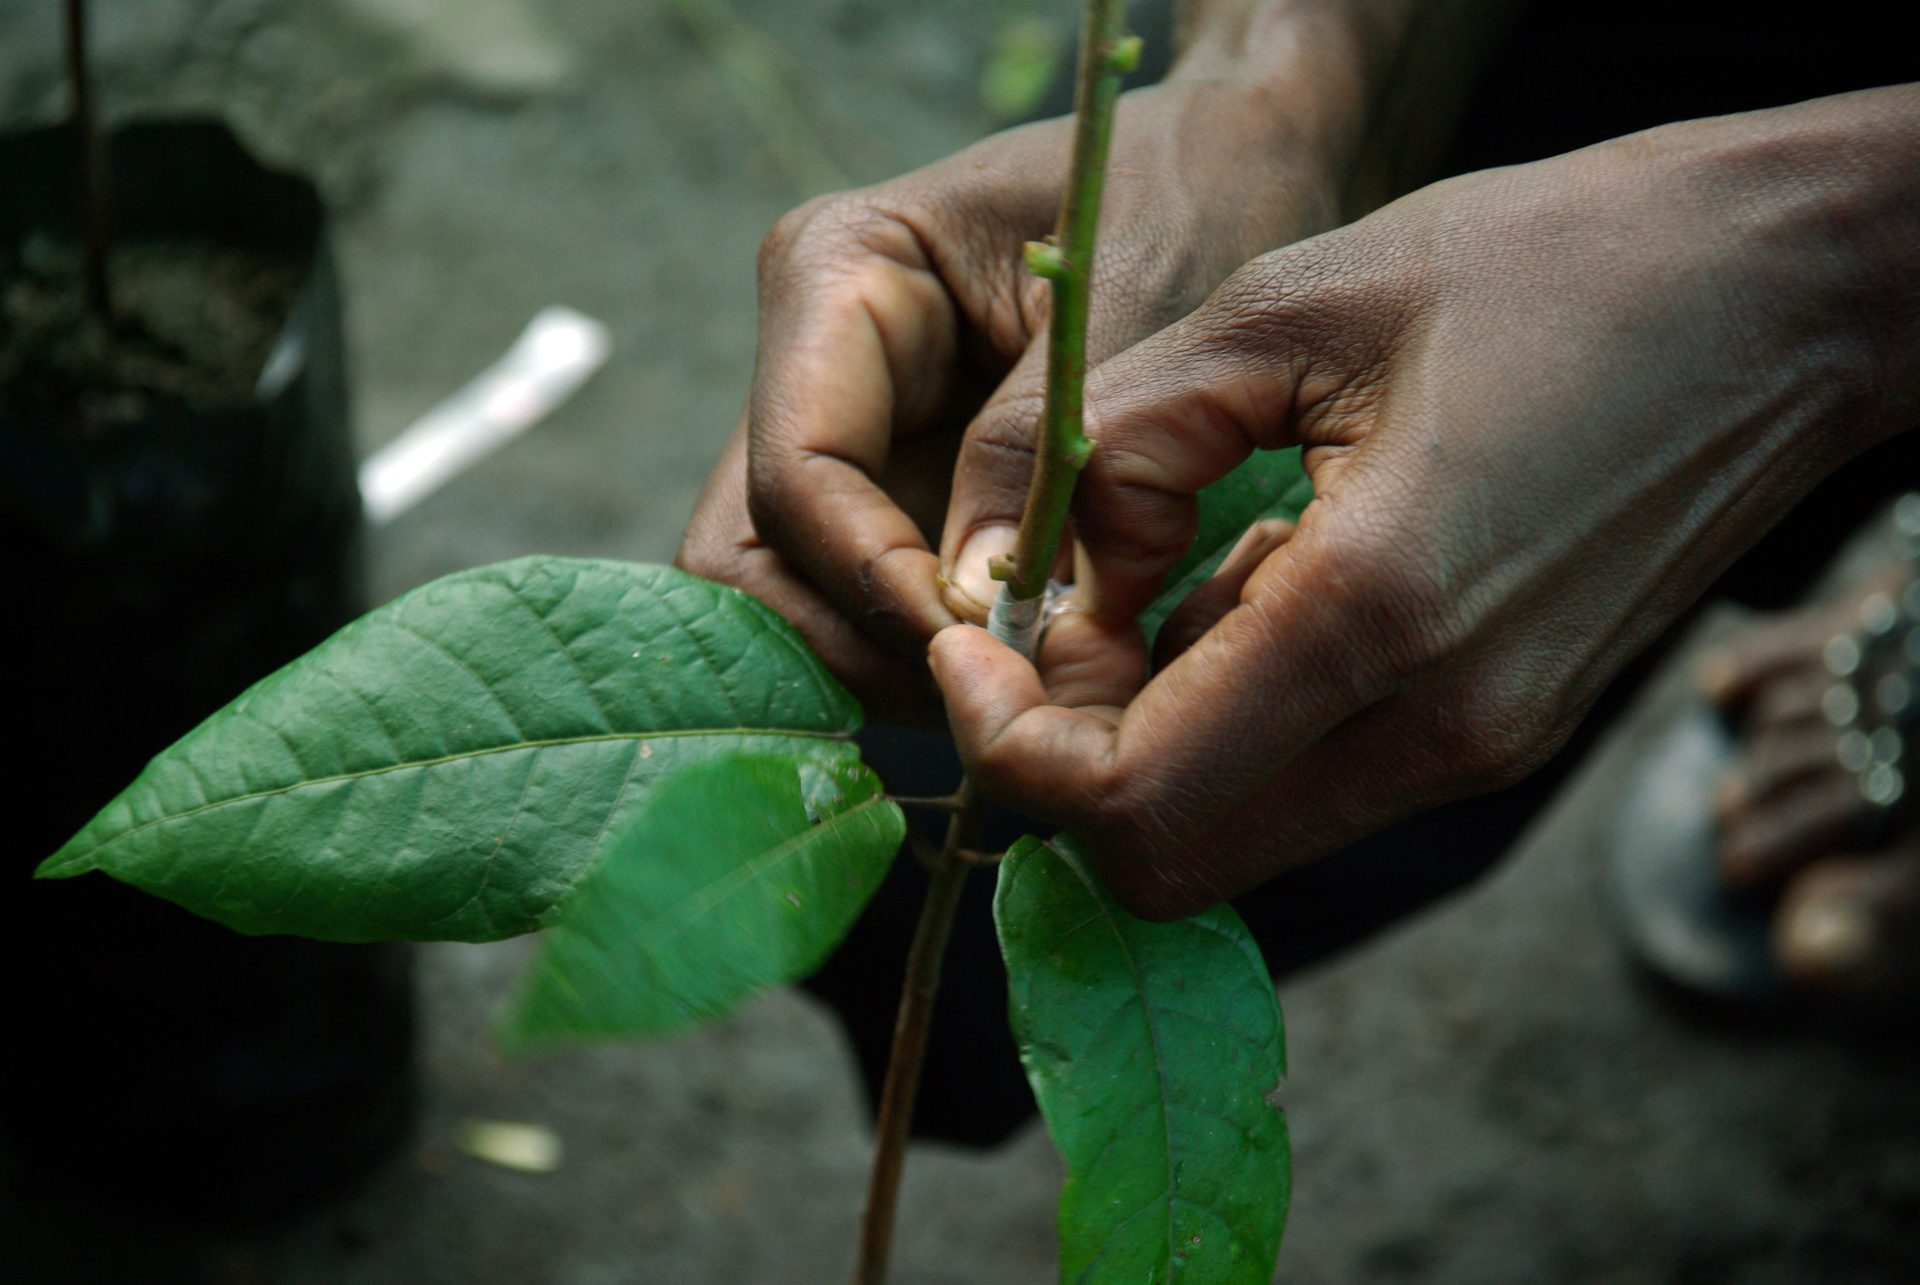
Plant grafting is a technique that vegetatively joins two plants into one. Instead of cross-pollinating two plants and producing hybrid seed, grafted plants use the roots and the bottom portion of one plant (rootstock) and attach it to a tender shoot (scion) from the top portion of another plant. The rootstock is what provides the lower trunk and root system. The scion is what provides the upper portion (stems, leaves, flowers, and fruit). Grafting is an ancient practice, but newer research within the last century is why most grafted plants are available today. The purpose of plant grafting is to reproduce desirable plants. If there is a type of plant you really like, you can make duplicates of it by grafting plants.

Image Source: Lola Flora
Types of Plant Grafting
There are a few different types of grafting. The way the plant is grafted is what gives the plant its characteristics. While the types of grafting are similar to each other, they do have some differences. Here is a quick guide to the different types of grafting.
Whip and Tounge Graft
The whip and tongue graft is usually performed on deciduous trees. However, it works on any woody plant. This type of graft produces a new plant by joining a single, straight scion on top of a cut-off rootstock. The rootstock and scion need to be the same size, which should be about less than 1 inch in diameter. Each piece is cut at a matching 45-degree angle. A second, vertical cut in each piece creates notches. The scion fits against the rootstock with their corresponding notches interlocking together. Wrapping the graft with grafting tape holds the pieces in place while they grow together. Once they grow together, you can remove the grafting tape.
Bark Graft
Bark grafting is usually performed on flowering and fruiting trees. This type of grafting joins multiple scions to a single rootstock. The rootstock should be 4 to 12 inches in diameter. It is recommended to do bark grafts in the spring when the plant is no longer dormant. The bark should be green and slippery when you perform a bark graft. A knife pushed between the rootstock’s bark and wood creates 2-inch-long and one-quarter-inch-wide strips of loose bark. A scion with a one-quarter-inch diameter and a 2-inch long point on its bottom end fits nicely between the bark strip and rootstock’s wood. Finish the process by covering the rootstock’s top surface and grafting points with wax.
Side Veneer Graft
Side veneer grafts work well on conifers, rhododendrons, and camellias. This type of graft joins a scion to a dormant, potted rootstock to create a new plant or replace an existing branch. Create the graft’s location by removing a 1-inch section of bark on the side of the rootstock or branch. The bottom of the scion must undergo a 45-degree angle cut to create a surface that matches the cut on the rootstock. Press the scion to the exposed wood of the rootstock and wrap grafting tape around the two pieces.
Cleft Graft
Cleft grafting attaches a less hardy scion variety to a hardy rootstock. This type of grafting is meant to change the variety of the plant. Cleft grafts are common on fruit trees. It should be performed during the winter while the trees are dormant. Proper scions must contain 2 to 3 buds and have a diameter of a one-quarter inch. The rootstocks need to be straight with a 1- to 4-inch diameter. Begin by cutting the top horizontally with a 2-3 inch verticle cut down the center. Cut two angled cuts on either side of the bottom end for the scion. This ensures that the scion fits the rootstock. Use grafting wax to seal the cuts and stabilize the graft.

Image Source: Instructables
Types of Plants to Graft
Not all plants can be grafted. Most people graft trees, but it is also possible to graft shrubs and even vegetables. Below is a list of the best trees and shrubs for grafting.
- Apple trees
- Ash
- Beech
- Birches
- Camellia
- Cedar varieties
- Cherries, the oriental ornamental flowering types
- Citrus
- Dogwood, weeping and red forms
- Fir
- Hawthorn
- Hazelnut or Filbert
- Honey locust, the thornless and fruitless types
- Horsechestnut, Buckeye
- Maples
- Redbud
- Spruces
- Witch hazel
Best Vegetables for Grafting
While grafting trees is the most popular kind of grafting, you can also graft vegetables. The best vegetables to graft include the following:
- Chilies
- Cucumbers
- Tomatoes
- Melons
- Squashes
- Sweet peppers
How to Graft Trees
Preparation:
Before you try grafting trees you will need all of your supplies ready. The supplies you will need include actively growing plant material, two plants which can be brought close to each other, a grafting knife, twine, plastic tape, and sealing wax.
Step 1:
Find an area of smooth wood in each plant. Hold your grafting knife tucked in the four fingers of your dominant hand. As you cut, draw your whole hand in this position, the knife and hand moving as one unit. Cut into the bark and a small amount of the wood underneath. Draw your knife along the grain for an inch or two, then back out again. You want the cut to be perfectly straight, so avoid twisting the knife. Repeat to make a matching cut in the other plant on a stem of the same thickness.
Step 2:
Next, you’ll need to join together the plants to form your first graft. This can be done by moving the cut-sides against each other. Match them up to check the quality of your cuts. There should be no air space between the cuts. If you notice that the cut surfaces are wavy, then it is not a perfect match. This could be caused by a knife that isn’t sharp. If there is no air space between the cuts, then continue on with step 3.
Step 3:
The final step is to seal both plants to each other tightly. Holding the stems in place, bind them together with tape. You may also want to wax the surfaces. Waxing prevents water loss from the wounds, which will kill the scion faster than it can heal.

Can Railroad Ties Be Used for Plant Grafting in Landscaping?
Railroad ties landscaping: a comprehensive guide. While railroad ties may seem like a convenient option for various landscaping projects, they are not recommended for plant grafting. These treated wooden ties may contain harmful chemicals that can be detrimental to plants. It is essential to prioritize the health and growth of your plants by using appropriate materials specifically designed for grafting purposes.
How to Graft Vegetables
Preparation:
Wash hands thoroughly before working on the plants. Choose rootstock and scion plants with similar size and thickness of stem for grafting. Before you begin grafting plants, be sure you have all your supplies ready. The supplies you’ll need include a very sharp sterilized blade, grafting clips, and clear plastic bags.
Step 1:
Begin by cutting off the upper stem of the rootstock and discard it. Make a vertical slit up to 1/2 inch long into the top of the cut-off stem.
Step 2:
Cut off the upper stem of the scion but retain the upper part and discard the base. Cut the base of the scion into a V-shape.
Step 3:
Insert the scion base into the slit of the rootstock to complete the graft. Secure the two halves of the graft with a grafting clip.
Step 4:
Immediately cover the plants with a clear plastic bag. Place them out of direct sunlight and keep the temperature at 59°F-63°F (15-19°C). Uncover the plants daily to let air in, as well as to check how much water the plants have. Keep the soil moist but not wet.
Step 5:
Once the graft union has calloused and plants are growing strongly, remove all the covers and clips. This should happen around two to three weeks after you have grafted the plants. After that, care for them just like you would with other plants.
How to Care for Grafted Plants
Once you have successfully grafted your plants, you must now begin caring for them. The most important thing is that you are careful when planting the plants. If the graft joint is buried underground, the rootstock can sprout its own top growth or the scion can send down its own roots. When that happens, you lose the characteristics selected for when the plant was grafted. During the winter, you may need to provide some protection for the rootstock. If you live in a colder climate, you may need to cover the graft in the winter. Don’t forget to uncover it in the spring because the plant will not sprout if it remains covered.

Image Source: Hayes Garden World
Final Thoughts
I hope this article has answered all your questions about plant grafting. Plant grafting, also known as budding, is when you grow a rootstock and scion together to create another plant. This process allows you to create duplicates of desirable plants. Plant grafting is often done with trees, but it can also be done with vegetables. Caring for grafted plants is very similar to caring for regular plants. Just make sure that the rootstock is protected from the weather. During the winter, it is recommended to cover the grafted plants. Overall, plant grafting is a great thing to consider doing if you are interested in growing more plants in your garden. I hope this article has answered all your questions about plant grafting. Happy gardening!