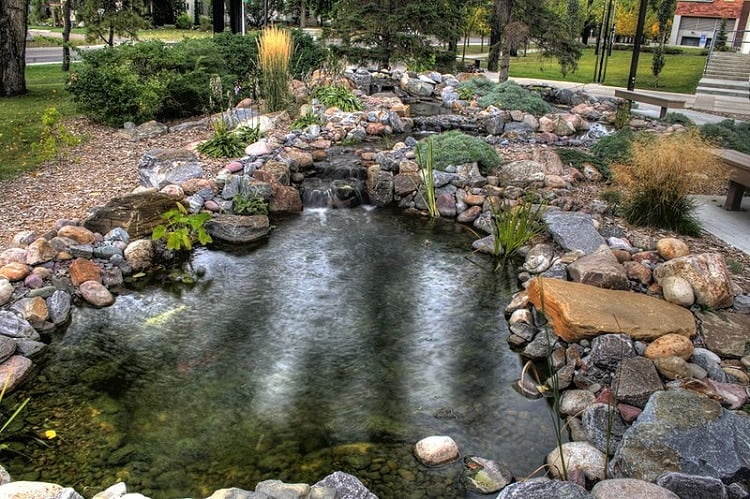
Relaxing in a garden by the sound of water is one of the easiest ways to recharge your batteries. However, you don’t always have time to take a walk in a park or to visit a fancy garden with a pond. This shouldn’t be a problem, as you can learn how to build your own water feature right in your garden. Here a few steps for the building of DIY backyard ponds and waterfalls.
Why Build a Pond in Your Backyard?
You might have always been dreaming about a pretty garden with its own water feature. This makes a great place for relaxation, as the sound of a stream flowing through the stones is incredibly soothing. Also, looking at the small colorful fish swimming in the pond turns the place into a corner of heaven.
However, you might think a water feature in your garden is a luxury. On the contrary, building DIY backyard ponds and waterfalls isn’t that complicated. It requires quite a lot of time, but you don’t need that many resources, and can even build them on your own.
Tools and Materials You Need for Building
The bad part about this project is the fact that it might be a little too costly. You can find the necessary tools right in your backyard, but you might have to buy the materials. Therefore, make a thorough assessment of your costs, and see if you find it affordable.
For planning and digging, you’ll only need a water hose and a shovel. However, the necessary materials for the pond are some rubber liner, a pump, and a skimmer. They might be a little expensive, but it will assure your DIY waterfall won’t malfunction. Once you have acquired all of them, you are ready to start building.
Step 1 – Planning for DIY Backyard Ponds and Waterfalls
First of all, do some research before starting the building. Make sure your garden is suitable for DIY backyard ponds and waterfalls. The soil needs to be relatively dry, and you should avoid muddy areas that retain water. You’ll already have a lot of water pumped into the hole, and you wouldn’t want your formation to fall over.
The Perfect Place
If your garden soil allows it, you can start looking for the place where you want to build the pond. A sunny area would be great, but you shouldn’t run away from the shade either. However, be careful with the source of the shade. If you place it under some trees, make sure that’s not the place where all their leaves fall off. This way, you’ll avoid having to gather them all from the water.
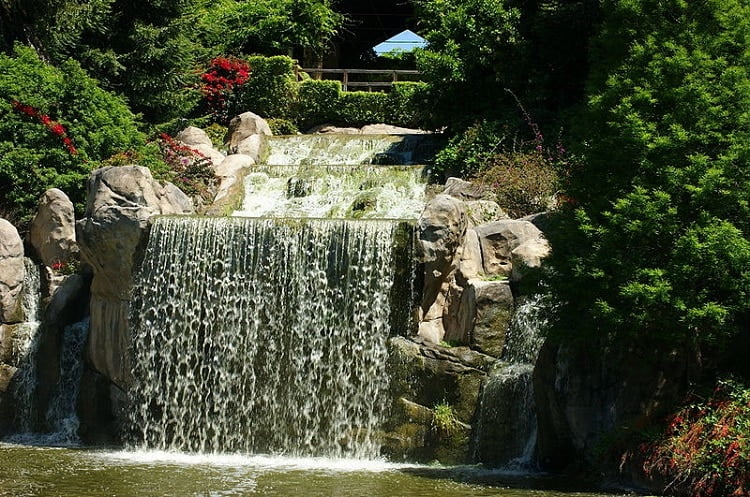
If you want a waterfall, a hill or a taller area in your garden is the place you’re looking for. This will make it easier for you to build the layers and will allow the water stream to flow.
Choosing the Outline
Before you start working on the pond, you should choose its outline. If you want everything to be perfect, you can draw it on a paper and print it at the scale. Then, use a water hose to transfer this outline on the ground. A hose is perfect as it’s flexible and allows you to shape it however you like.
Step 2 – Digging the Pond
After you have chosen the outline, it’s time to start digging. At first, dig out only a small amount of soil. This way, you’ll see how the outline looks like, and if it’s big enough. If you want a waterfall and don’t have a taller hill nearby, you can place all the soil you have dug out at one end of the pond. This is where all your water will fall from.
Choosing the Right Depth
Once you’ve figured how big the surface of the pond should be, it’s time to think about the depth. This is dependent on the fish you want to breed in the pond. Some of them require a lot of space and a bigger depth, while others don’t have many requirements. Koi fish, for instance, need a depth of at least 3 feet, while goldfish can do with a lot less space.
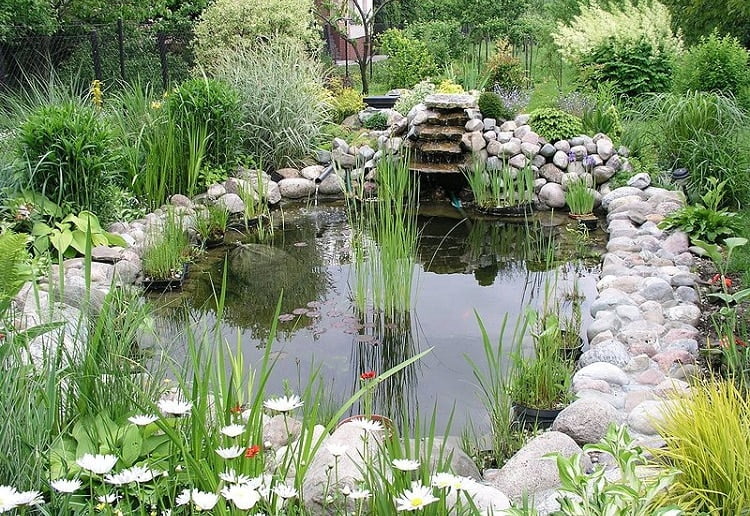
When you dig out the pond, make some steps at the side. This way, it will get gradually deeper, and will also be more stable. You might want to leave some space at the top as well, to arrange the stones and create your design. If you want to, you can add some plants, but don’t forget about the extra space they need.
Sculpting
For a waterfall, the water should be flowing in all kinds of ways. Therefore, you need to direct the flow and create whatever patterns you like. You can create a unique stream, and maybe insert another small waterfall within the pond.
Step 3 – Adding the Rubber Liner
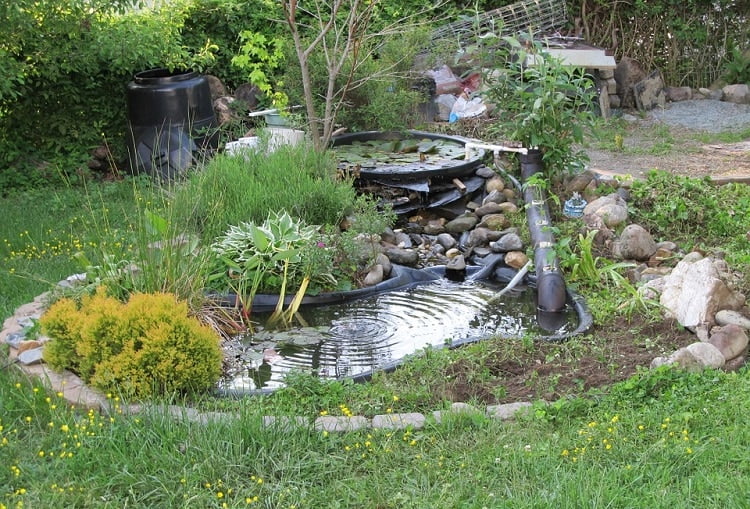
Any DIY backyard ponds and waterfalls need to be covered in rubber liner. This will allow the water to flow without eroding the soil and the stones. Before buying it, measure the surface of the pond carefully, and buy more liner. This material should cover the surface of the pond completely, as well as its outer edges.
Then, it’s time to arrange the stones. Here, you can get creative. Choose whatever design you like, and place the stones both in the pond, at its edges, but also on the height of the waterfall. If you have other ideas, feel free to try them. These stones should also keep the rubber liner in place.
Step 4 – Install the Skimmer
Although a bit expensive, a skimmer is necessary for a bigger pond because it has plenty of filters, and helps you clean the water easier. Also, it helps with the water circulation. The skimmer should go in a hole dug right next to the pond. Line up the intake of the skimmer to the water level, and place it at the edge of the pond. This area should stay in place, so fix it with some sand or gravel.
Then, attach the liner between the skimmer’s faceplate and the rest of the tool. Make sure the faceplate stays in place as well, as this will prevent the water from leaking. When you have finished, cover the skimmer with a plate, or whatever you find suitable.
Step 5 – Continue Adding Stones
Now it’s time to add more stones to your design. You might want to cover the entire surface of the waterfall with stones, but this can be a little risky. If you just leave them sitting around without support, water might displace them. Therefore, you’ll need some glue to fix them to the walls of the waterfall.

Step 6 – Add the Pump
This is the essential step, as it allows water to flow in DIY backyard ponds and waterfalls. The assembly depends on the type of pump you have, but the process is not that complicated. First of all, attach the pump to your skimmer. This way, you’ll allow it to do the cleaning and filtering.
Then, you need to fix a pipe on the pump. This pipe will allow the water to go at the top of the waterfall, and then flow down across the steep hill. If you like, you can add a valve to this pipe. This way, you’ll be able to reduce the flow a bit if you find it too powerful.
Step 7 – Test the Waterfall
Before turning on the pump and filling up the pond, you’d better see if the waterfall holds. Take a hose and sprinkle some water on top of it. If everything goes well, then it’s time to start the pump and turn your garden into a reverie.
Step 8 – Add Fish and Plants
No backyard pond is complete without some fish. Choose your preferred species, and then release them in their new DIY home. The pond will look more beautiful if you add some plants either around the edges or even directly into the water. Make sure these plants you choose can cope with a lot of humidity, as they’ll spend a lot of time with their roots being soaked.
Some Important Things to Know
Pay attention to how stable your soil is. If you have a hard time digging the hole, it means it’s tough enough to resist the pressure of water and rocks. Otherwise, it might be a little too soft, and you might risk shattering it.
In this case, take some sand and add it at the bottom of the pond before filling it with water. If you like, you can also add some extra stones that are flatter and tougher. These should keep everything in place, and give your pond the stability it needed from the soil.
Summing Up
Building DIY backyard ponds and waterfalls is a fun activity that allows you to create a relaxation corner right in your garden. It might require a lot of time and money, but the final result is always worth it. The process isn’t that complicated either, so you only need time and will. A beautiful DIY pond or waterfall will turn your garden into a fairyland and a refuge from the chaos of the city.