A DIY ice rink may sound like an ambitious project, but it’s surely worth it if you have children around. They’ll be more than happy to have their own skating ring at home, plus this will help them exercise more. Luckily, the steps you need to take aren’t complicated. Today we will show you how to make a DIY ice rink right in your backyard.
Enjoy Winter In Your Backyard With The Kids With A DIY Ice Rink
1. Make Sure You Have Enough Space
If you want to take advantage of an ice rink completely, you need to ensure it’s big enough. Nobody would love an ice rink where you must spin in a small circle for hours in a row. There are no recommended sizes for this, it only depends on how big your family is or how much time you intend to spend on the ice rink. However, make sure you measure everything beforehand. After all, you don’t want to start working just to find out that there isn’t enough space for you to finish your project.
2. Get What You Need
Here is a brief list of the tools and materials you need to get for one of the best DIY projects you can choose for your home:
- Staple gun;
- Rebar stakes;
- Garden hose;
- Spray nozzle;
- Plastic tarp;
- Lumber (2 inches thick).
You can find lots of them in the stores near you, but in case you don’t, here are our online favorites;
No products found.
3. Plan It All
Now, you need to write down a detailed plan for your DIY ice rink. Pay attention even to the smallest details, such as the exact size of the materials, the placement, etc. Ideally, the frame for the DIY ice rink should be placed on the flattest piece of land you have. This happens because each of the four corners should be on the same level. Irregularities in its design may lead to an accelerated damaging process, and we’re sure you don’t want that to happen. However, in case you don’t have such a flat surface, you will need to adjust the frame to correct any dips or slopes in your terrain. That’s why you need to plan it all carefully.
4. Get Someone to Help You
It may not seem like a big deal, but it’s important to have a person to help you. You will need to set together all the wooden boards, which might be hard to achieve on your own. Whether you ask a friend or hire a professional in this field, make sure there is someone to help you out.
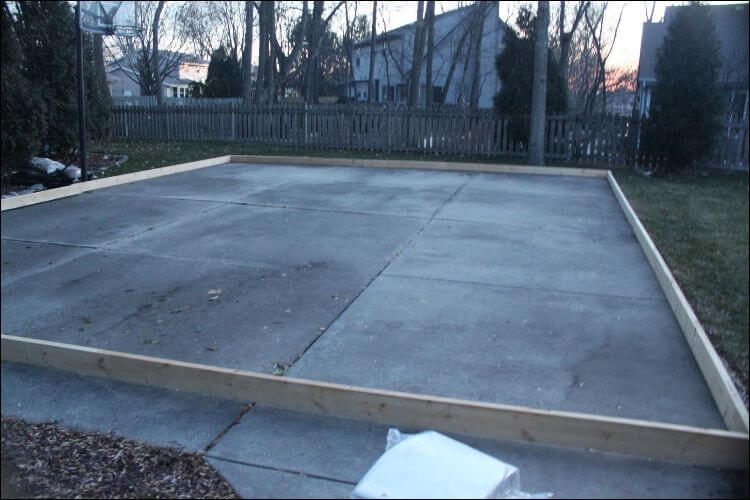
5. Build the Rink Frame
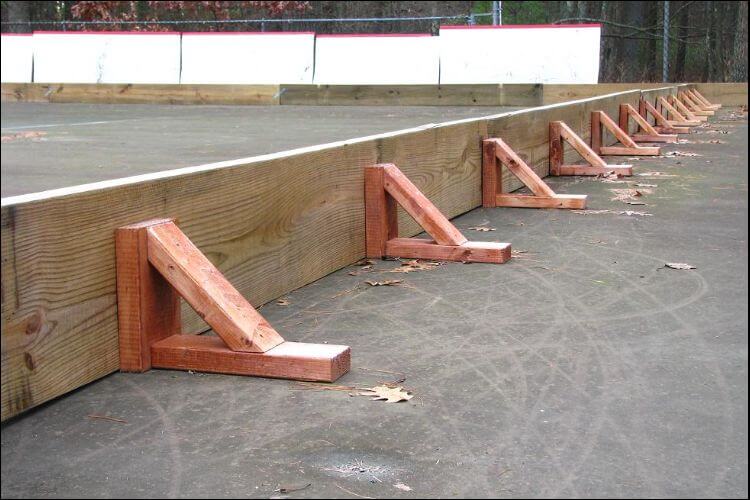
Now is the time to think about what we said earlier. Remember that you need to find the flattest surface around. Stick to the measurements you included in the plan. If you have significant changes in ground elevation, now you can correct them. Ideally, you would use only 2×4 inches wooden boards for the frame, but you can adjust this if you want to correct a slope, for example. Use 2×6 inches boards in case the ones you have aren’t enough.
Another thing to keep in mind when you set to build the ice rink frame is that every piece of wood you use needs to be reinforced with a rebar stake. Rebar stakes are generally used to support tents on camping trips, but in this case, you will need to brace the frame. The ice will expand, naturally, thus pushing on the frame. And since you don’t want the frame to break exactly when your children are skating there, it’s a good idea to use them.
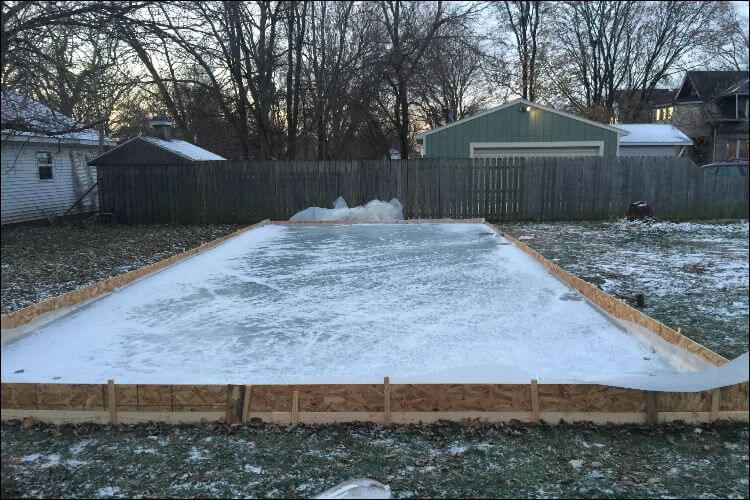
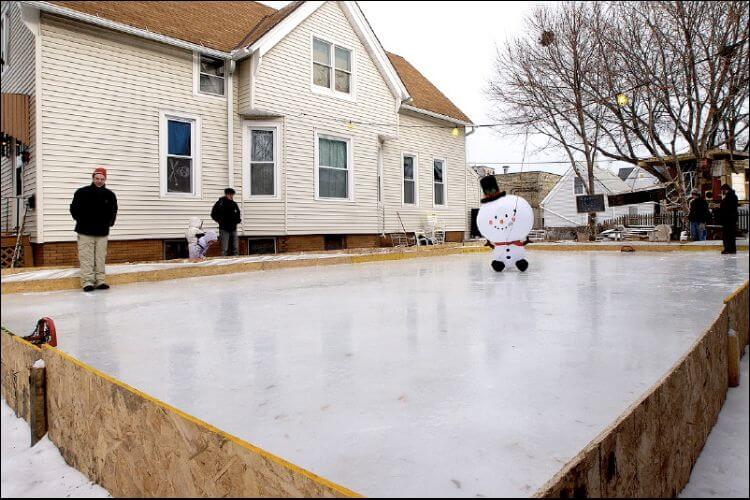
6. Line It with the Tarp
Once you have the frame ready, it’s time to line it with a clear or white tarp. What’s important to keep in mind for your DIY ice rink is that the tarp needs to be in a light color. Dark colors absorb heat naturally, which means that your ice will turn into slush. To avoid this, simply go for a white tarp. Next, you need to push and smooth it until it covers both the bottom of the frame and the sides.
It’s essential to make sure that there are minimum bunch-ups and wrinkles. Stretch the tarp over the edges of the frame, to the exterior. The point here is to leave enough material to staple the tarp into the right position. Then, secure it at all the corners. On the sides, secure the tarp every three feet. If there is any excess, make sure you trim it away. If you don’t want to trim it, you can simply roll the tarp next to the frame. In this way, you ensure nobody will accidentally trip on it.
7. Check the Weather Forecast
It might seem a weird step to do when building a DIY ice rink, but remember that for this project you need plenty of ice. For this, you will need to make sure that the following couple of days will come with temperatures below freezing. If this isn’t the case, perhaps you should wait a little more until the temperatures drop even more.
8. Fill the Tarp with Water
The next step you need to do is to fill the tarp with water. However, there is an interesting process here as well. Once you make sure that the temperatures will stay below freezing, it’s time to pour the water. Fill the tarp with 1 inch of cold water first. In 6 – 8 hours, check on it since it should be frozen by then. Next, set the spray nozzle at the end of your regular garden hose and pour one inch of hot water. Again, wait until it freezes. You need to repeat all this process until you have a layer of 3 – 5 inches of solid ice. It might seem too complicated at first, but if you don’t respect these steps, you will end up with a thin layer of ice that can even become dangerous for you or your family.
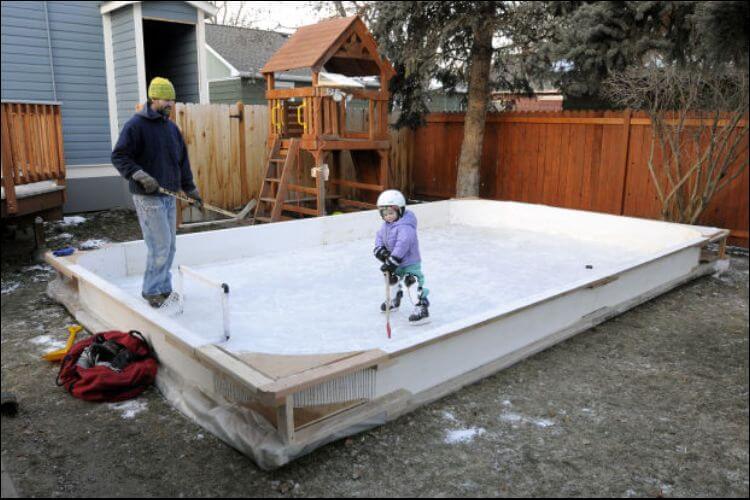
9. Test the Ice
Naturally, one of the final steps for your DIY ice rink is to test the ice. You can find out if it’s stable enough by tapping the surface. Do this with a broomstick or even a hockey stick if you already have one. If you followed the steps carefully, the ice should be just right to support both you and other members of the family.
10. Maintaining the Ice
After you had some fun on the ice rink, don’t rush to get into the house, no matter how cold it is. If you want to enjoy skating for as much as possible, you need to maintain the ice rink. Before you leave the area, make sure that the ice surface is smooth. Shovel up the shavings that remain after you skated there. At the end, spray some extra hot water on the ice. In this way, you make sure that the ice will be perfect next time you want to skate again. Here you have some tips on keeping the ice smooth all winter long:
11. Using Snow
In case it has already snowed when you started setting up your own DIY ice rink, you can take advantage of that and use packed snow for various purposes. For example, you can use it as a barrier between the ice and the grass underneath. Moreover, you can craft a border out of it instead of using wood boards. However, keep in mind that this option may be less sturdy, and it may get damaged faster.
If you decide to use it, spray it with water first and let it freeze a couple of times before you fill the rink with water. The initial water pressure could be strong enough to melt the snow, so make sure this won’t happen by adding the ice layer.
12. Melting the Rink
One danger with the melting of the rink is winterkill. This can take place in the spring, damaging your turf because of the freezing and thawing. It’s recommended to accelerate the melting process when you notice the rink starts melting. Remove any snow banks or the boards around the edges. This will allow the water to run off freely. You can also start breaking up the ice and spreading some dark materials around, such as charcoal or Milorganite.
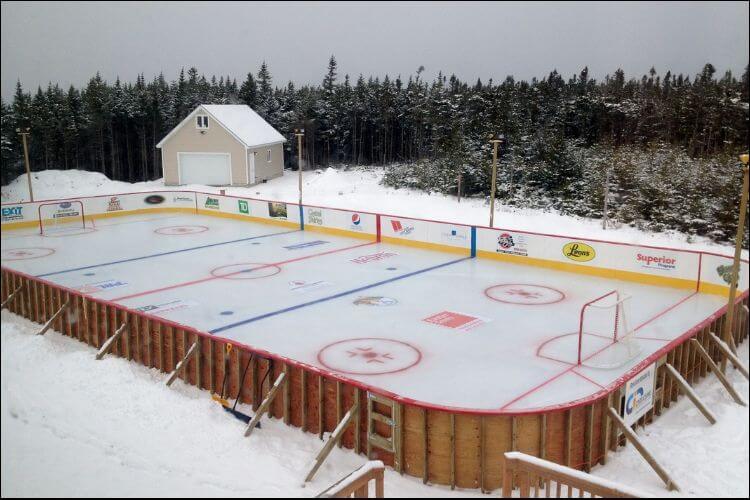
13. Customizing the Rink
Besides the general steps we presented above, you can also customize the rink any way you want. You can add painted lines on the ice, include scoreboards, as well as Zambonis. There are plenty of online shops that can help you with buying accessories or can even bring you an ice rink ready for skating. But that would take away the pleasure of doing it yourself, right?
Conclusion
To sum it up, you need to have some patience when starting your own DIY ice rink. Get someone to help you, because if you’re planning to build something big, you will need some help. Otherwise, you can ask for ideas from all the members of the family, including children. They’ll be the happiest to take advantage of their own ice rink, so why exclude them from the creation process?
Main image source: 1
Last update on 2024-04-20 at 06:59 / Affiliate links / Images from Amazon Product Advertising API