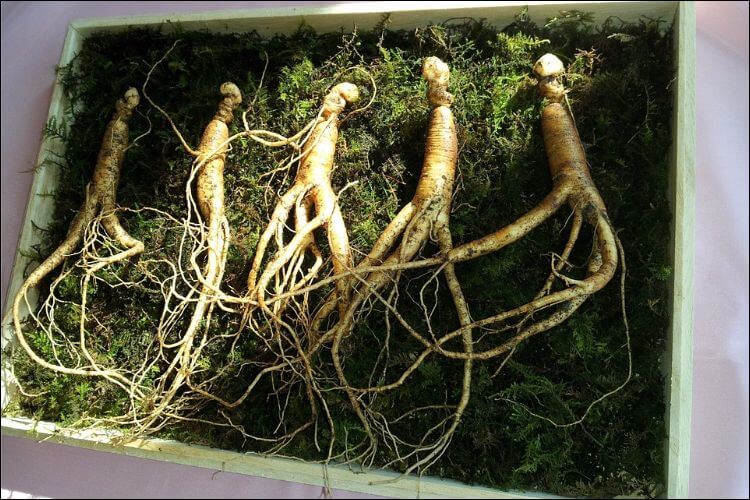
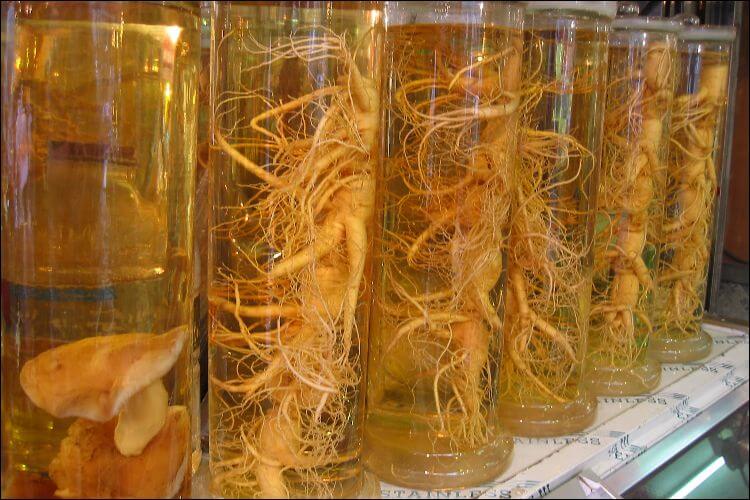
Ginseng has been a star in herbal medicine for thousands of years now. The name of this plant comes from a Chinese word, renshen, which means “man root”. Are you wondering why is it called like that? Just look at the shape of the root, which resembles a man’s legs. But there’s more to it than its weird shape. Even today, people make hundreds of dollars for one pound of ginseng roots. For this reason and not only, today we are going to have a look at how to grow ginseng by yourself.
Before Planting
1. Are You Going to Sell It?
Before reading about how to grow ginseng, you should think ahead. Make sure there is a market for you to sell it on when it reaches maturity. One such option, for instance, would be to contact a licensed ginseng dealer. They often buy ginseng from other people who grow it. There is even a state registry with all the dealers available in each area, so you can try and see which one offers the best price.
On the other hand, you can become a dealer yourself and get the license. For this, you need to check the requirements each state has when it comes to getting the necessary papers. Most likely, you will need to pay a fee and complete an application.
2. Understand the Method
It’s not as easy as you might think to learn how to grow ginseng. First, you need to understand that this method tries to mimic the natural environment where the plant grows. The ginseng cultivated in this way will need seven or eight years to reach maturity. And yes, you read that well. There is yet another method, which implies field cultivation, but it yields a plant of lesser quality.
The field cultivation method will offer you a mature plant after 4 years. However, you need to put in more labor and there is a higher risk of spreading the disease. Moreover, you will need to spend around $20,000 to $40,000 for each acre.
3. Check the Environment
The wild-simulated method of growing ginseng requires some special conditions. For example, the plant ideally needs a cool and temperate climate. Usually, it grows naturally in hardwood forests, where it gets 20-40 inches of rainfall each year. Simply put, you can find it in the Midwest and NE of the U.S., South of Canada or the mountains in the South of the U.S.
4. Get the Necessary Permits
There are various regulations the state imposes on how to grow ginseng. Often, you need some special permits or licenses, especially if you plan on commercializing it. Do some research and find out what you need.
5. Choose the Right Location
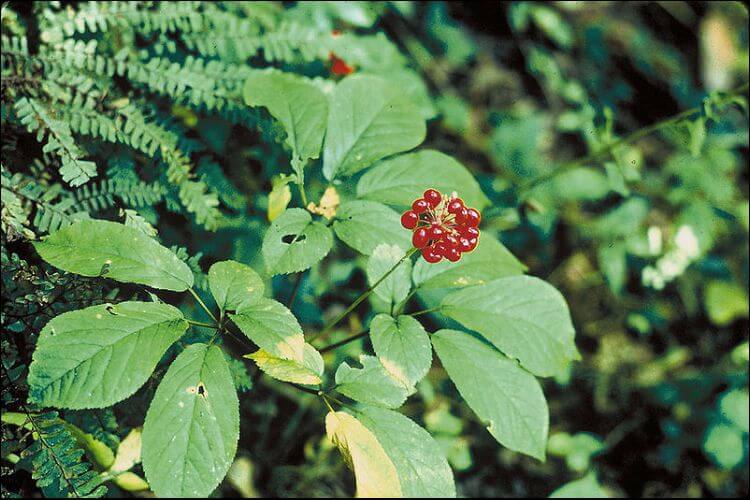
The best location for ginseng is represented by the well-shaded sites, such as east- or north-facing slopes. This plant loves having next to it some deciduous trees with deep roots, such as sugar maple, tulip poplar, oak, or yellow poplar. Another option would be a mature forest that has big hardwood trees, as well as a canopy blocking a minimum of 75% of the sunlight.
On the other hand, you should avoid briars, shrubs, and, in general, thick and tall undergrowth. These can compete with your plant and use up the available nutrients. In this way, ginseng will have little nutrients left. Another thing to pay attention to is ginseng poachers. Make sure the location is hidden and is not found next to a roadway or hiking trail.
6. Prepare the Soil
It is recommended you use a soil tester before planting anything. In this case, make sure the soil is moist and loamy. However, it should have a quick drainage. Don’t go for hard clay or swampy soil. Ideally, the pH levels should be between 4.5 – 5.5 (which is acidic soil). It needs to contain 3,000 – 5,000 pounds of calcium per acre and a minimum of 95 pounds of phosphorus per acre.
7. Fertilizing
The wild-simulated method of growing ginseng does not require any fertilizer. However, if you still want to use some, you need to apply it to the surface and not mix it in. You can raise the soil pH by adding some lime (calcium carbonate) and increase the calcium level by adding gypsum (calcium sulfate). You should test the soil and amend it once a year.
8. Purchase or Harvest the Seeds
The next step in our guide on how to grow ginseng is to get the seeds. In some areas, it is prohibited to harvest wild ginseng, so pay attention to that. Alternatively, you can buy organic seeds from someone who grows them locally. If you choose “green” seeds, they will be cheaper, but you will need to offer them more preparation than the cold stratified ones. You should order seeds in July or August and then receive them in the fall. If you wait until fall, you might end up with low-quality ones.
9. Keep the Seeds Moist
The purchased, stratified seeds should be stored in a refrigerator, in a plastic bag. Mist them once a week until you plant them. If they dry, they will die.
10. Prepare the Non-Stratified Seeds
Stratification refers to the process where seeds lose the flesh and are ready to sprout. The seeds you buy from the store are stratified already, but if you have “green” seeds you need to do it yourself. Make a pouch of lightweight mesh, put some seeds in it, and tie it with wire. In the fall, bury it 4-5 inches (10-13 cm) deep in shaded, loose soil. Cover it with mulch and keep it moist (though not soaked).
11. Plant the Sprouting Seeds in Spring
If you stratified the seeds, take out the container and see if they are ready. Throw away any moldy, discolored, or soft seeds. If you notice some of them are sprouting, plant them immediately. Stir the rest around and put them back in the container, making sure the soil/sand is moist. Plant the rest in late fall or winter.
12. Prepare Seeds for Planting
Before planting, you need to soak the seeds in bleach and water. Make a mix of 9 parts water and 1 part household bleach, and then leave them there for 10 minutes. This helps to kill the fungus spores often found in the seeds.
Planting the Seeds
13. Remove Ferns and Weeds
An important part of knowing how to grow ginseng is to remove the plants from the area. Though you shouldn’t take them all out, make sure there is no small underbrush to compete with your plant. Ferns can kill other plants, so be careful.
14. Plant the Seeds
Simply scatter the seeds on the planting site you choose. First, take off the leaf litter and scatter 6-12 seeds/ sq ft. Alternatively, you can create furrows and plant the seeds 6-9 inches apart if you want to get large ginseng. Wide spacing cuts down on the risk of spreading any disease.
15. Cover the Area
Use leaves or mulch to cover the area and replace the leaf litter you removed. Place a layer of 1-2 inches, but not more than that. If you’re in an area with frequent frosts and cold winters, place 4 inches. Finally, mark the spot in a discreet manner or use a GPS device to locate it. In the 7 years the plant needs to mature, the area can change a lot, so you need to remember where you planted it.
Caring for and Harvesting Ginseng
16. Thin It Yearly
As we previously mentioned in our guide on how to grow ginseng, if you grow it too closely the plants may spread a disease from one to another. After the first growing season, try removing or transplanting them. Ideally, you should have 6 plants for each square foot. After the second year of growth, cut it down to 1-2 plants per square foot. A good idea is to plant ginseng in other areas as well during the fall, to have a bigger harvest.
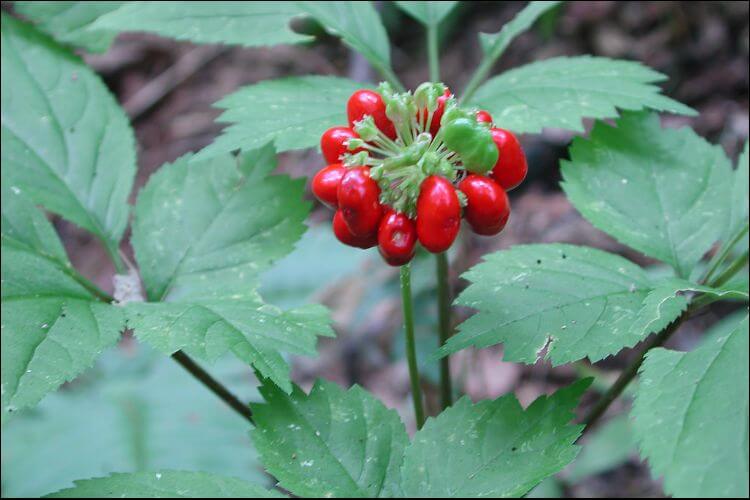
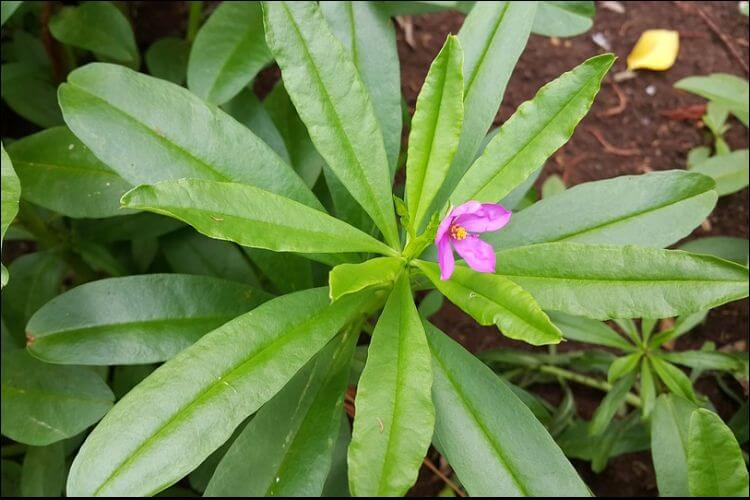
17. Harvest Red Berries
The last part of learning how to grow ginseng is to harvest it. You can harvest red berries each year after the third one. Once ginseng matures, it will present clusters of red berries, where the seed is in the center. Pick them during fall if you want to harvest the seeds. Remember that they need to be stratified, just like we explained above.
18. Harvest Mature Plants
Usually, after 7 years you will be able to harvest ginseng and obtain a high-quality root. However, you can still leave them there for a couple of years more and they will still grow. It’s advised to check the local regulations to see what’s the earliest when you can harvest ginseng.
19. Dig It Carefully
This is another important thing to keep in mind when learning how to grow ginseng. With a pitchfork or a needle-nose spade, dig under the plant. Leave some 6 inches (15 cm) between the roots of the plant and the place where you push the tool. Pay extra attention if the plant you want to harvest is close to other immature ginseng plants. Use a smaller tool or don’t harvest at all if you risk damaging the other plants. Make sure you don’t break any roots.
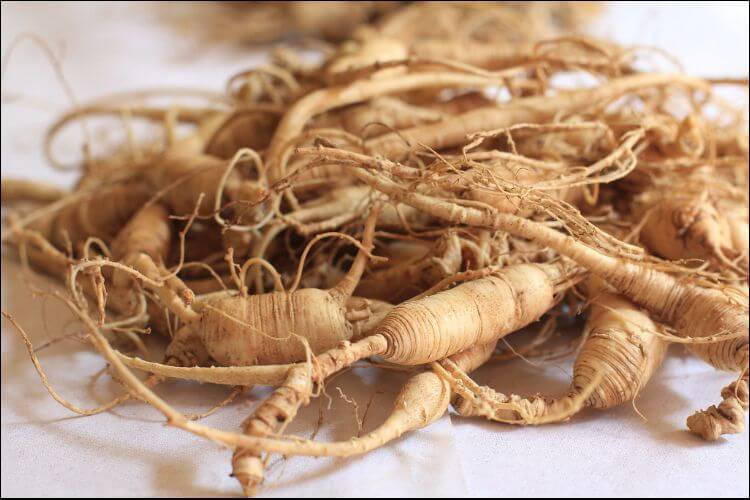
20. Wash and Dry
After harvesting, soak the roots in cool water to take off any excess soil. Place them in one layer on a wooden tray. Next, wash them under a sink faucet or use a hose. Make sure you wash them gently. Don’t let the roots touch. Then, let them dry on a wooden rack. Place them in a room that is well ventilated, at a temperature between 70 – 90 °F (21 – 32 °C) and a humidity of 35 – 45%. Turn them once a day. They are ready when you can snap them.
Conclusion
Our guide on how to grow ginseng focuses on the wild-simulated method. It requires mimicking the natural conditions where this plant grows. The hardest part is that you must wait at least 7 years until you can harvest and sell it. However, if you still decide to grow your own, make sure you are familiar with the legislation on this topic.
Image source: 1