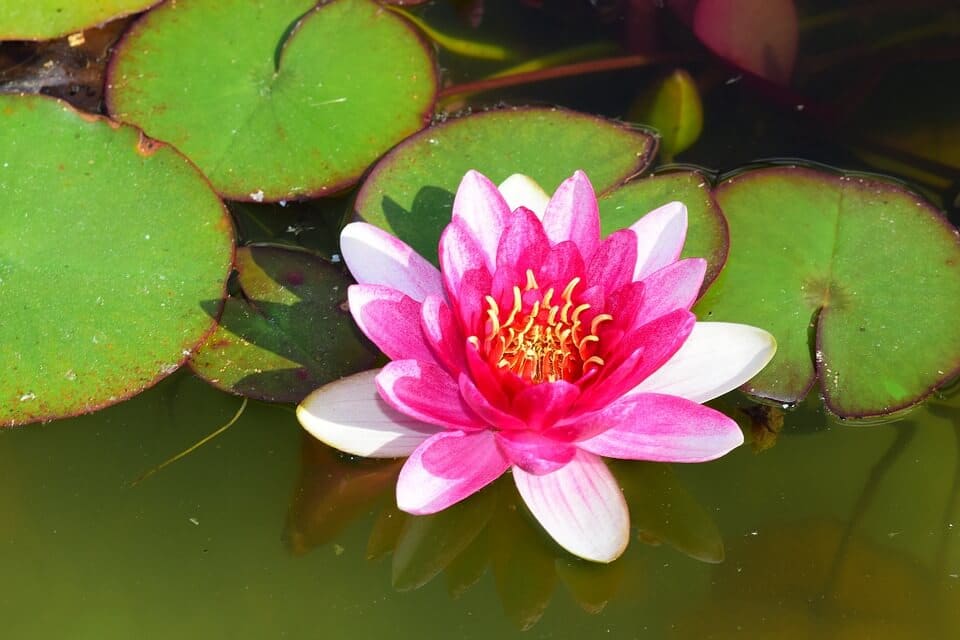
Where Will You Plant Them?
The first thing you should think about before buying the water lilies is the place where you will plant them. All these varieties enjoy having a sunny location and can thrive in shallow waters. In fact, shallow waters are the place where they can grow faster and stronger, as well as produce more flowers. Moreover, it is better if the water is warmer. So how do you plant water lilies in a pond? Foremost, you should keep in mind some important details. For example, you should know that hardy water lilies are very frost hardy, so they can survive cold winters, even if the temperatures will drop as much as -20 degrees. Meanwhile, they are easy to grow, as you will see in the following easy steps on how to plant water lilies.When and How Do You Plan Water Lilies in a Pond?
You can start planting bare rooted water lilies starting with March, all the way to the end of July. The lilies that are planted in spring should begin to bloom by June or July, if you offer them the right conditions. If you want to know how do you plant water lilies in a pond the right way, then you should pay attention to these periods.Basic Requirements
Before deciding if you want to plant them or not, you should know that these plants have some basic requirements. As such, they only need a good share of aquatic plant food 1-2 times a year. Every few years, you will have to repot them. The process might need to be repeated more often in case the pot you have been using right from the start is too small. If you notice that the water lily is growing too fast, then you should think about replacing the pot sooner than you expected. Being aware of the basic requirements is essential to any guide on planting water lilies in a pond.How Do You Plant Water Lilies in a Pond?
There are 6 easy steps which you need to follow to plant your own water lilies. You don’t need to be an expert to grow some beautiful pond plants which you’ll be proud of in a couple of months. Moreover, you can use the lilies to create some unusual landscape ideas if you’re willing to test your creativity!Step 1: Choose a Container
Choosing a container is indeed an easy job, but you should still pay attention to a couple of details. The adequate size is 12 x 18 inches in width and 6 x 10 inches in depth for growing water lilies in pots. Remember that the tuber, which resembles the rhizome of an iris, develops in a horizontal manner. It is not compulsory for the container to have holes. If you do choose it to have some drainage holes, it’s a good idea to use burlap for lining the pot. In this way, you will be able to keep the soil in the container. This is an important step, since the soil that gets out of your container will cloud the water that grows in your pond, which will ruin the beautiful aspect of a water lily pond. There is no rule saying how many rhizomes you should plant at one time, despite having other indications on planting water lilies in a pond correctly. However, the best idea is to plant just one lily in a 4-litre container, if you have a small pond. Alternatively, if you prefer going for a faster display of color, you can plant 10 lilies in a large container.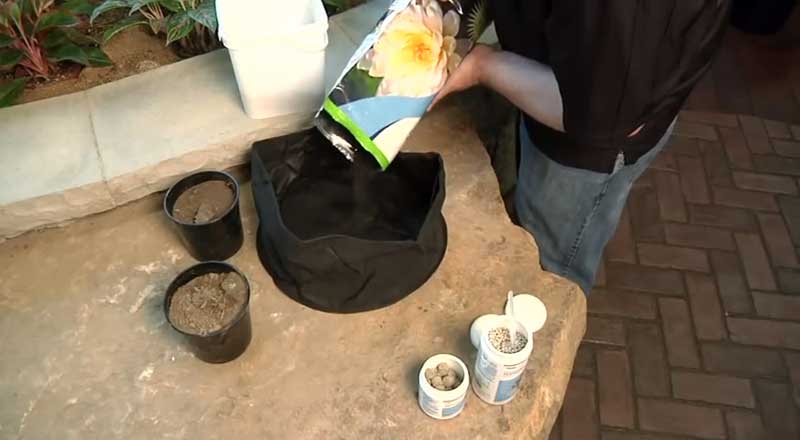
Step 2: Choose the Soil
The best soil which you should keep in mind when getting information on how do you plant water lilies is the heavy one. Go for the one that is used in the garden, not a fluffy type, since the latter has the tendency of floating outside the container, thus clouding the water in the pond again. The general recommendation is to avoid soil mixes with peat, vermiculite or perlite, exactly for the same reason. You can also enrich the soil with special aquatic fertilizer pellets. They are made exactly for this purpose and it’s easy to use them: simply place them into the soil before planting the water lily. Keep in mind that you may need hessian or cloth liners to prevent the soil from eroding. Aquatic soil and top gravel are also useful, because they will help you protect your lily from foraging fish, for instance, plus they will add some weight, as well as stability, to the container. Moreover, the top gravel has a nice aesthetic effect. Important! If you have fish in the water garden, keep in mind that water lilies shouldn’t be potted in regular potting soil. The regular kind contains lots of organic material, which eventually rots and fouls the water. Besides, if you want to know how do you plant water lilies in a pond correctly, you should remove any other organic material that eventually rots. Organic material represents a breeding ground for anaerobic bacteria, as well as pathogens. It might even add some excess nutrients that nourish the algae blooms. Remember that prevention is much easier than going around treating sick or even dying fish later.Step 3: Remove Old Leaves and Old Roots
Ideally, you should leave only the emerging leaves and buds, together with the newer roots that look somewhat like hair. In this way, you will make sure that the plant is clean and that there are no unnecessary things in your pot.
Step 4: Plant the Lily
Now is the time to plant it! Place the tuber against the side of the pot. The growing tip should be pointing upwards at an angle of about 45 degrees, heading towards the center of the pot. Remember that most rhizomes come without any roots and these will start sprouting just below the shoots and stalks. However, they still need to be below the soil level. The upright types of water lilies need to be planted with the rhizomes under the soil level, while the shoots remain above. If you are not sure about it, you should push the lily down 1-2 inches below the soil. Thus you will make sure that they manage to grow secure and strong.Step 5: Cover the Soil
The next step to do is to cover up the soil with a layer of gravel. Whether you choose to use rock or pea gravel, they are both equally good. You can also use regular sand. They will help the soil from floating away when you are ready to move to the next step, which is submerging the container. One inch of gravel should be more than enough.Step 6. Lower the Pot
The pot with the plant should be lowered into the pond at a certain angle. It is necessary for you to angle it, as well as do it slowly so that any air bubbles that are trapped inside could escape. The base of the pot should be planted 12 x 18 inches deep so that the leaves can float to the surface. If you have a pond that is deeper than 18 inches, without any built-in planting ledges, then you should consider supporting the pot. But how do you plant water lilies in a pond that is deeper? There is a simple trick you should use for this: add a pile of rocks underneath it so that it could stay higher than the bottom. You can also use this short clip that illustrates the above steps:Are Water Lilies and Lily of the Valley Similar Plants?
Water lilies and lily of the valley are not similar plants. While both have lily in their name, water lilies are aquatic plants known for their beautiful flowers that float on water. On the other hand, lily of the valley is a terrestrial plant that grows in shady areas and produces delicate bell-shaped flowers. If you’re planning to plant lily of the valley, here are some useful lily of the valley planting tips to ensure success.